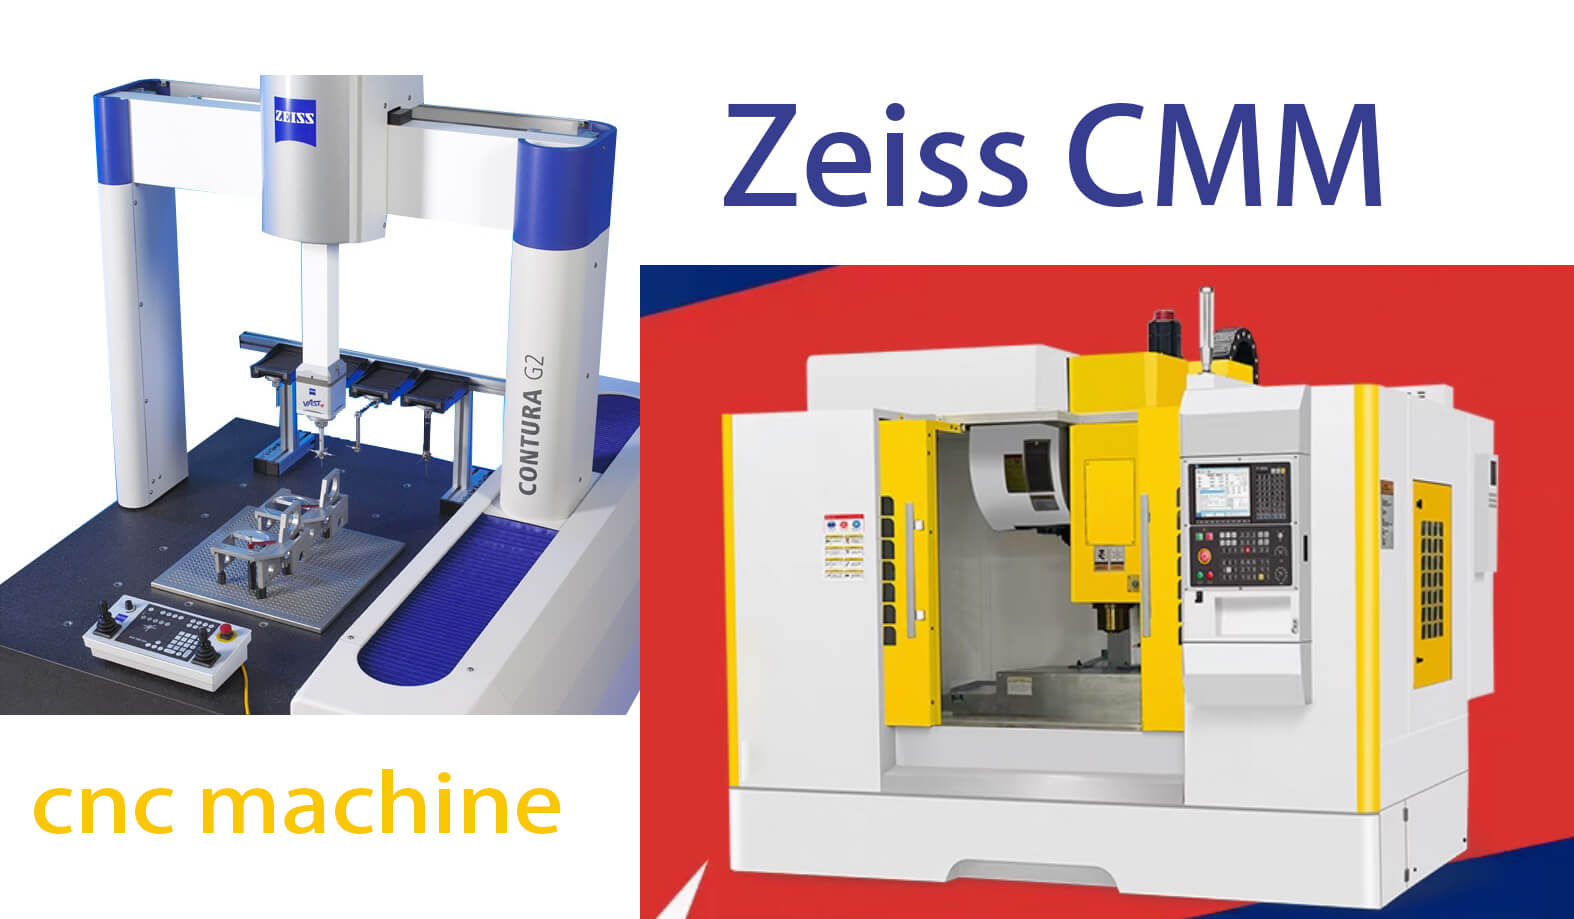
Precision is the cornerstone of custom part manufacturing, especially when it comes to complex designs and tight tolerances. For those of us working closely with CNC (Computer Numerical Control) technology, ensuring that each part meets strict specifications is no easy feat. This is where Zeiss CMM (Coordinate Measuring Machine) technology shines. It brings a level of precision to quality control, directly enhancing CNC custom parts and making it invaluable for achieving consistent, high-quality production.
In this article, I will walk you through how using a Zeiss CMM machine can significantly improve the accuracy and quality of CNC custom parts, while simultaneously reducing costs and enhancing efficiency. From my experience working in this field, Zeiss CMM machines have proven to be a game-changer in helping CNC suppliers meet demanding client requirements. I’ll also provide practical insights into how Zeiss CMM integrates with CNC workflows and why it’s an essential tool for custom part manufacturers.
Why Precision Measurement Is Critical for CNC Custom Parts
When dealing with CNC custom parts, precision is everything. Clients who require custom parts expect them to fit perfectly within their intended applications, and even the slightest deviation can result in costly errors, delays, or product failures. I’ve seen firsthand how even small inaccuracies can lead to massive rework, impacting both time and budget.
The Role of Zeiss CMM in CNC Precision
Zeiss CMM machines are designed to handle the precision demands of CNC machining. They are equipped with advanced probing systems that can measure parts down to microscopic tolerances. For example, in one of my projects involving aerospace components, the parts had to adhere to tolerance levels within microns. Using Zeiss CMM, we were able to validate the exact geometry of each part, ensuring that no errors slipped through during the CNC process.
Precision measurement doesn’t just ensure that the part is correct—it also verifies that the entire CNC process is functioning properly. By integrating Zeiss CMM machines into the quality control process, we can catch any deviations early and correct them before they escalate into larger problems.
| Parameter | CNC Machining Requirement | Zeiss CMM Capability |
|---|---|---|
| Tolerance (Microns) | ±10 µm | ±2.5 µm |
| Surface Roughness (Ra) | 0.4 µm | 0.1 µm |
| Measurement Speed | Medium | High |
| Probe Flexibility | Limited | Multi-sensor Options |
| Data Collection Accuracy | Manual/Automated | Fully Automated |
The table above illustrates how Zeiss CMM machines bring superior accuracy and flexibility compared to standard measurement tools, making them ideal for CNC custom parts where precision is paramount.
How Zeiss CMM Ensures Maximum Precision for CNC Parts
Ensuring the precision of custom parts goes beyond just the CNC machine’s performance. It’s about how well the final product matches the exact specifications outlined in the design. This is where Zeiss CMM excels, offering unparalleled accuracy and comprehensive measurement capabilities.
Advanced Probing Systems for Complex Geometries
One of the standout features of Zeiss CMM machines is their advanced probing technology. They can measure intricate geometries that would be difficult, if not impossible, to inspect using traditional measurement tools. I recall a particular project where we were manufacturing automotive components with highly complex contours and tight tolerances. The Zeiss CMM’s multi-sensor probe was able to navigate the complex surface and capture accurate data points, ensuring that each component was manufactured to perfection.
Zeiss CMM machines come with a range of probing options, including tactile and optical probes, which can be used interchangeably depending on the type of measurement required. This flexibility allows manufacturers to measure a wide variety of custom parts, from small precision components to large, intricate assemblies.
How Precision Reduces Rework and Waste
One of the greatest benefits I’ve noticed when using Zeiss CMM machines is their ability to catch errors before they turn into expensive rework. By providing real-time measurement feedback, Zeiss CMM allows us to identify any discrepancies early in the production process. This not only saves time but also reduces material waste, which can add up significantly in high-volume production runs.
For instance, in a medical device manufacturing project, we had a strict requirement to ensure that all parts passed inspection with zero tolerance for defects. By integrating Zeiss CMM into the quality control workflow, we were able to maintain the high precision required and avoid costly rework or material loss, ensuring that all parts met the client’s stringent requirements on the first pass.
Data-Driven Insights for Process Optimization
Zeiss CMM machines are not just measurement tools; they are powerful data collection systems. They provide detailed measurement reports that can be used to fine-tune CNC machining processes. In one of my previous projects, we used data from Zeiss CMM to optimize tool paths and machine settings, which improved the overall efficiency of the CNC process and reduced production time by 15%. This ability to generate actionable data is one of the reasons why I consider Zeiss CMM to be an essential part of any custom part manufacturing setup.
| Zeiss CMM Feature | Benefit | CNC Process Impact |
|---|---|---|
| Multi-Sensor Probes | Measures complex surfaces | Enhances versatility |
| High Precision | Ensures tight tolerances | Reduces rework |
| Automated Data Reporting | Real-time feedback | Optimizes workflows |
Reducing Production Costs and Rework Rates for CNC Custom Parts with Zeiss CMM
In custom part manufacturing, every dollar saved on production costs or rework can make a significant difference to profitability. Zeiss CMM plays a key role in reducing costs by minimizing errors, cutting down on rework rates, and improving overall production efficiency.
The Hidden Costs of Rework and Scrap
Rework and scrap are two of the biggest hidden costs in CNC manufacturing. When a part is out of tolerance, it often has to be re-machined or scrapped entirely. This can lead to significant material waste and labor costs. I remember a case where one of our aerospace clients had a batch of parts that didn’t meet specifications. Without the use of precise measurement systems like Zeiss CMM, we would have faced substantial rework costs.
By incorporating Zeiss CMM measurements early in the production process, we were able to identify out-of-tolerance parts before they made it through to the final stages of production. This not only saved material costs but also reduced downtime, as we could address issues immediately without halting the entire production line.
| Cost Factor | Without Zeiss CMM | With Zeiss CMM |
|---|---|---|
| Rework Rate | 8-12% | <2% |
| Material Waste | 5-8% | 1-3% |
| Inspection Time | 15-20 mins/part | 5-10 mins/part |
| Labor Costs (Rework) | High | Low |
Optimizing Production with Zeiss CMM
The ability to optimize CNC machining processes through precise measurement is one of the most valuable aspects of Zeiss CMM. In a recent project involving the production of complex mechanical parts, we were able to reduce cycle time by optimizing the CNC program based on the data collected from Zeiss CMM measurements. This led to a 10% increase in overall throughput while maintaining high-quality standards.
One of the reasons why Zeiss CMM machines are so effective in reducing costs is their ability to provide quick, accurate feedback that can be used to adjust CNC machine settings in real-time. This closed-loop system minimizes the chances of producing defective parts, leading to lower rework rates and reduced waste, which directly impacts the bottom line.
Integrating Zeiss CMM with CNC: How Clients Benefit
For many of my clients, integrating Zeiss CMM with CNC machines has led to improved precision and overall efficiency. The seamless integration between these systems allows for real-time adjustments during production, ensuring that every part is manufactured within the required specifications.
Achieving Closed-Loop Quality Control
The integration of Zeiss CMM with CNC machines enables closed-loop quality control, a system where measurement data is fed directly back into the CNC process to adjust machine settings. This approach ensures that each part produced meets the required tolerance levels without the need for manual adjustments.
In my experience, this closed-loop system has been especially beneficial in industries where high precision is critical, such as aerospace and medical devices. By using Zeiss CMM to continuously monitor part quality, manufacturers can detect and correct deviations in real time, ensuring that every custom part meets the client’s specifications without needing additional inspections.
| Integration Benefit | Impact on CNC Process | Client Benefit |
|---|---|---|
| Real-Time Feedback | Adjusts machining in real time | Consistent precision |
| Reduced Manual Inspections | Automation of quality control | Faster delivery times |
| Improved Process Efficiency | Streamlined workflows | Lower production costs |
Enhancing Client Confidence with Zeiss CMM
For clients, knowing that their custom parts are being measured with industry-leading Zeiss CMM technology adds an extra layer of confidence. I’ve had clients express how reassured they are when they know that Zeiss CMM machines are involved in the quality control process. This trust has helped me secure repeat business, as clients feel confident in the quality and reliability of the parts produced using Zeiss CMM measurement systems.
By integrating Zeiss CMM into the CNC workflow, we can offer clients a high level of transparency. Detailed measurement reports generated by Zeiss CMM provide clients with full visibility into the precision of each part, allowing them to verify that their specifications have been met without any guesswork.
How Zeiss CMM Ensures the Success of Customizing Large, Complex Parts
Manufacturing large or complex parts presents unique challenges, especially when it comes to ensuring precision and meeting tight tolerances. From my experience working on complex custom projects, such as automotive components and aerospace assemblies, it is clear that a high level of accuracy is required to ensure the functionality and reliability of these parts. That’s where Zeiss CMM machines come into play, providing the advanced measurement capabilities needed to tackle even the most challenging geometries.
Zeiss CMM for Large Parts
One of the main benefits of Zeiss CMM technology is its ability to handle large and intricate components with ease. In one of my projects involving the production of aircraft landing gear, the parts were not only large but also required extremely tight tolerances. Traditional measuring tools simply couldn’t provide the accuracy or scope needed to inspect these massive components.
Zeiss CMM machines are designed to accommodate large parts without sacrificing precision. Using gantry-style CMMs, for example, allows manufacturers to measure even the largest parts while maintaining micron-level accuracy. This kind of precision is critical in industries where safety and performance are paramount, such as aerospace and automotive.
| Part Type | Traditional Measurement Challenges | Zeiss CMM Solution |
|---|---|---|
| Aerospace landing gear | Size, weight, and complex geometry | Gantry-style CMM for large components |
| Automotive engine blocks | Tight tolerances on multiple surfaces | Multi-sensor probes for complex surfaces |
| Medical devices (prosthetics) | Irregular shapes and biocompatibility | Optical probes for intricate detailing |
Handling Complex Geometries
In custom part manufacturing, especially for medical devices or precision instruments, complex geometries are common. Many parts have curved surfaces, internal cavities, or fine details that are difficult to measure accurately with conventional tools. I’ve found that Zeiss CMM’s combination of tactile and optical probes is incredibly effective for these types of parts. The optical probes can scan surfaces that are too sensitive or complex for traditional touch probes, allowing us to get a complete, accurate measurement of the entire part.
For example, in a medical device project, we were tasked with producing custom prosthetics with highly irregular shapes. The Zeiss CMM machine’s optical probe scanned the curved surfaces with extreme precision, ensuring that the prosthetics were perfectly fitted to the patient’s needs. Without this technology, achieving such a high degree of customization and accuracy would have been extremely challenging.
Reducing Time and Effort in Complex Part Measurement
Another key advantage I’ve observed with Zeiss CMM machines is the reduction in time and effort when measuring complex parts. In one automotive project, we used the CMM to measure multiple surfaces on an engine block with very tight tolerances. What would have taken hours with manual measuring tools was completed in a fraction of the time using the Zeiss CMM, and with far greater accuracy. This not only saved time but also allowed us to meet our delivery deadlines without sacrificing quality.
Zeiss CMM’s ability to automate and streamline the measurement of complex geometries means manufacturers can focus on production, knowing that quality control is handled efficiently. This benefit becomes particularly important when dealing with high-volume production runs, where consistent quality is essential for client satisfaction.
Conclusion
Precision and quality control are critical in custom part manufacturing, especially when working with CNC technology. From my experience, integrating Zeiss CMM into the production process significantly enhances the accuracy, quality, and consistency of CNC custom parts. Whether dealing with large aerospace components or complex medical devices, Zeiss CMM provides the advanced measurement capabilities needed to meet the most demanding specifications.
By leveraging Zeiss CMM’s precision, manufacturers can reduce rework, minimize scrap, and optimize their CNC workflows. For clients, this means faster turnaround times, lower production costs, and—most importantly—parts that meet or exceed their expectations. Zeiss CMM is more than just a measuring tool; it’s a key component in ensuring the success of custom part production.
FAQ: Using Zeiss CMM for Custom Parts
As I’ve worked with clients who need custom CNC parts, many common questions arise about how Zeiss CMM integrates into the production process and ensures the precision of their parts. Below is a list of frequently asked questions that I’ve encountered, along with the answers based on my experiences and understanding of Zeiss CMM’s capabilities.
- How does Zeiss CMM improve the accuracy of CNC custom parts?
Zeiss CMM machines use advanced probing systems that can measure parts down to the micron level. By integrating CMM technology with CNC production, any deviations in part geometry are quickly identified, allowing for immediate adjustments. - What types of custom parts benefit most from Zeiss CMM measurements?
Parts with tight tolerances, complex geometries, or those made from sensitive materials benefit most from Zeiss CMM measurements. Industries like aerospace, medical devices, and automotive commonly use this technology for precision components. - Can Zeiss CMM measure large parts like automotive or aerospace components?
Yes, Zeiss CMM machines, particularly gantry-style models, are specifically designed to handle large parts without losing measurement accuracy. This makes them ideal for inspecting large components such as engine blocks, landing gear, or large-scale assemblies. - How does Zeiss CMM reduce production costs for custom parts?
By identifying measurement errors early in the production process, Zeiss CMM reduces the need for rework and minimizes scrap rates. This saves both time and material costs, leading to more efficient production cycles. - What is the role of Zeiss CMM in automated CNC production lines?
Zeiss CMM machines can be integrated with CNC production lines to provide real-time measurement feedback. This allows manufacturers to adjust machine settings on the fly, ensuring that each part produced meets exact specifications, thereby reducing manual inspection time. - How does Zeiss CMM handle complex geometries that traditional tools struggle with?
Zeiss CMM machines are equipped with both tactile and optical probes, allowing them to measure complex shapes, such as curved surfaces or internal cavities, that would be difficult or impossible to measure using traditional tools. - What types of probes does Zeiss CMM offer, and how do they benefit CNC custom part inspection?
Zeiss CMM machines offer a wide range of probes, including tactile probes for standard measurements and optical probes for non-contact measurements. This flexibility allows manufacturers to measure different types of parts with greater accuracy and efficiency.
Other Articles You Might Enjoy
- What is a CMM Machine?
Accuracy in geometric and physical dimensions is essential for every manufacturing process. In the world of CNC machining, there are two methods are available to achieve these goals. The conventional…
- Choosing the Right CMM Machine for Your Production Needs
When it comes to precision measurement in manufacturing, CMM machines (Coordinate Measuring Machines) have become indispensable. Selecting the right CMM machine for your specific production needs can be quite challenging,…
- Custom Precision CNC Machining Services for Bronze Parts
Introduction to CNC machining and Bronze Parts Manufacturing Custom precision Computer Numerical Control (CNC) machining is a unique technology that employs computerized controls and machine tools to eradicate layers of…
- Improve the Precision of Your CNC parts
In some industries, precision machining is more essential than in others. For example, medical devices, certain parts, and products must be reliable and always work. The doctor must direct the…
- 3 Axis Vs 5 Axis CNC Machining: Custom Precision Parts Cost
In modern custom CNC machining services, the need for high precision customized machining parts is rising. No doubt, COVID-19 has also put an impact on the cost of parts ranging from…
- Why Is CNC Milling Preferred for Manufacturing Precision Titanium Parts?
Titanium is renowned for its exceptional properties, making it a preferred material for manufacturing precision parts in various industries such as aerospace, medical, and automotive.
- Nylon CNC Machining Service for Custom Parts
Nylon is an engineering plastic known for its high strength, wear resistance, and chemical inertness. It possesses excellent mechanical properties and durability, making it widely used in various fields including…
- Unraveling the World of CNC Machined Plastic Parts(CNC machined plastic parts Mabel)
Modern innovations have taken traditional manufacturing methods to new heights. One such innovation that stands out is Computer Numerical Control (CNC) machining, a process used extensively in various industries from…


