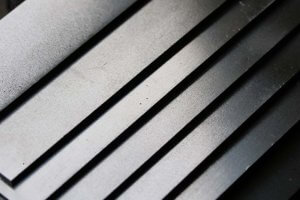
Introduction: Why 5160 Steel Machining Matters?
I’ve worked around metal fabrication shops for a good chunk of my professional career. One thing I’ve noticed is how often people ask about 5160 steel and its machinability. At first, I didn’t pay much attention to the details. But once I got my hands on 5160 steel, I realized it’s a material that truly stands out for certain applications. It’s flexible, tough, and can take a beating, which is one reason I’ve seen blacksmiths use it for forging knives and automotive enthusiasts rely on it for suspension parts.
I believe 5160 steel plays an important role in industries like automotive, knife-making, and even some forms of heavy machinery. The reason is straightforward: 5160 steel is a high-carbon steel with enough chromium to give it extra hardness and wear resistance. Yet, it remains ductile enough to avoid snapping under stress. If you’ve ever tested the springiness of a blade made from 5160 steel, you might be amazed by how well it flexes and returns to shape.
So, why does 5160 steel machining matter? Because many people now use CNC equipment to produce parts, reduce production time, and maintain consistent quality. Machining 5160 steel on a CNC mill or lathe can be the difference between a consistent final product and one that fails prematurely. For unique projects, Custom Machining allows you to tailor 5160 steel components to precise specifications with ease. When I first started milling 5160 steel, I discovered that the right combination of speeds, feed rates, and tooling significantly affects tool life and the final surface finish. That’s why I’m excited to say this approach leads to CNC machined parts that are both reliable and high-quality. That’s the main reason I decided to put together this guide. I want to share what I know so it’s easier for anyone who wants to work with 5160 steel and get good results without burning through expensive tooling or facing endless rework.
In the chapters ahead, I’m going to explore every step of the machining process. I’ll talk about the properties of 5160 steel, what tools to choose, how to figure out the best cutting speeds, and even how to troubleshoot issues in real-world projects. I’ll also include some personal observations and a few data tables to help illustrate how different parameters affect outcomes. My hope is that this guide will become your go-to resource whenever you have questions about 5160 steel or just want to refine your own machining workflow.
Let’s dive in. In Chapter 2, I’ll start by exploring 5160 steel itself—what it’s made of, what makes it special, and why it can sometimes be challenging to machine.
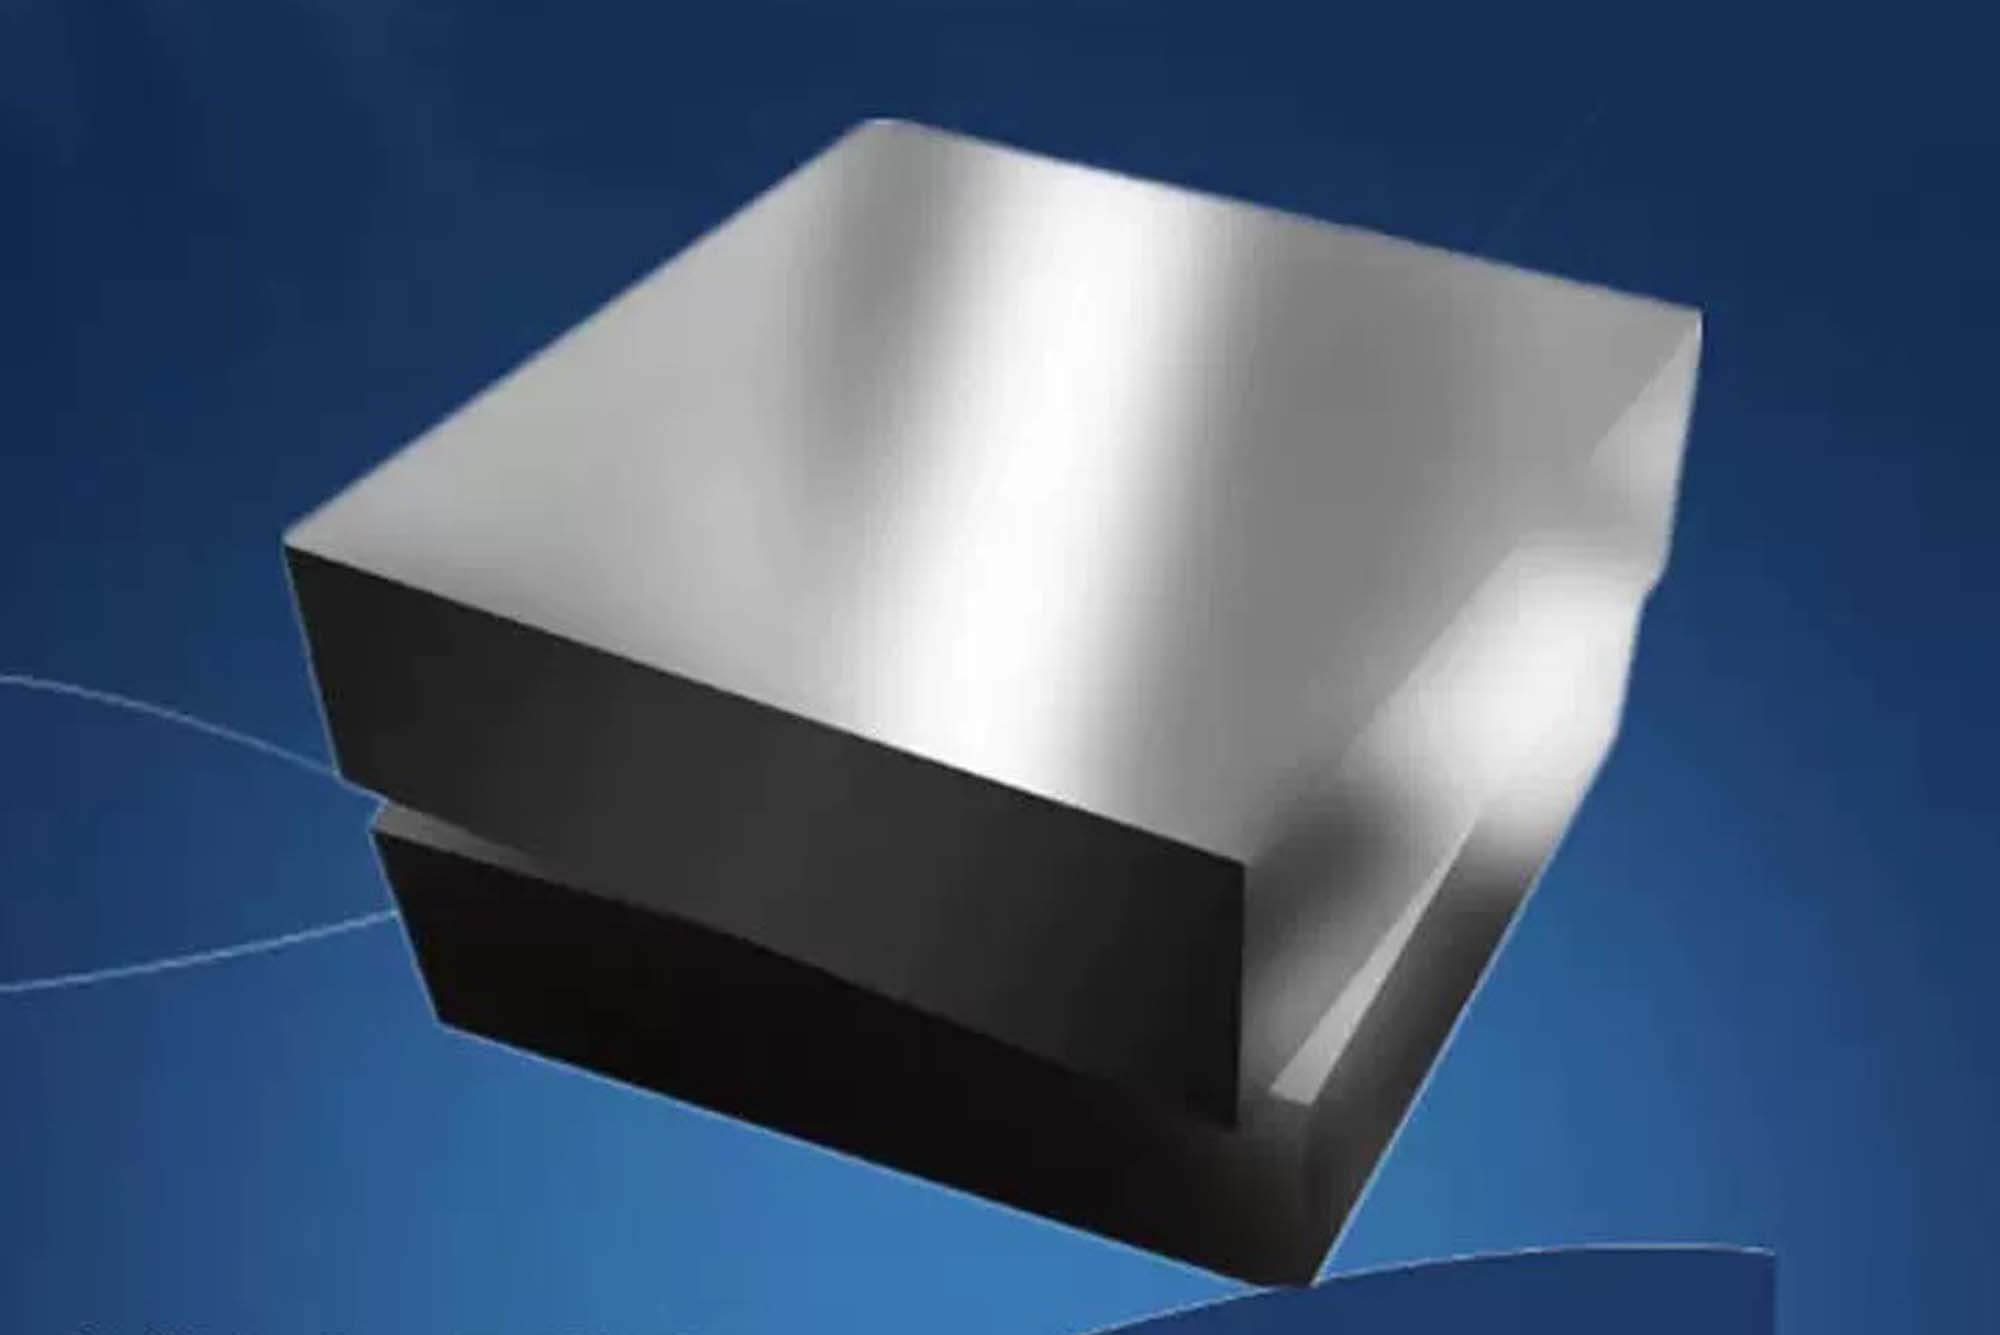
5160 Steel Properties & Machinability
When I first encountered 5160 steel, I had a very basic idea of what set it apart from other steels. I knew it was a spring steel with high carbon content, which meant it should be tough and flexible. But once I started experimenting with it in real projects, I realized there’s far more to understand than just its label as a “spring steel.” Machinability, heat treatment, and wear resistance are all factors that can change how we should approach milling or turning this material. Before we tackle the actual machining process, let’s break down what I learned about the core properties of 5160 steel and why those properties matter.
2.1 Chemical Composition & Mechanical Properties
5160 steel is categorized as a high-carbon, chromium-containing spring steel. Its chemical composition typically includes:
- Carbon (C): ~0.56% to 0.64%
- Chromium (Cr): ~0.7% to 0.9%
- Manganese (Mn): ~0.75% to 1.0%
- Silicon (Si): ~0.15% to 0.35%
- Sulfur (S) and Phosphorus (P): Usually < 0.04% each
- Iron (Fe): Balance
I remember the first time I studied the composition in detail. I realized the chromium content was one key reason 5160 steel can achieve decent wear resistance and hardness after heat treatment. The carbon content, hovering over 0.60%, places it in the high-carbon steel category. That’s crucial because high-carbon content steels are known for their strength but can be more challenging to cut or shape. They also tend to develop more brittleness if not heat-treated properly.
Mechanically, 5160 steel has a tensile strength that can easily surpass 200,000 psi once fully hardened and tempered. I’ve seen data sheets that show yield strength anywhere from 100,000 to 150,000 psi, depending on how you treat it. Because of these mechanical properties, 5160 steel is popular in automotive leaf springs, which is why it’s often called a “spring steel.” Another important aspect is its ductility. Spring steels are engineered to flex under load and return to their original shape without permanent deformation. That’s why you see 5160 steel used in applications like swords, large knives, and automobile suspension parts.
One thing I appreciate about 5160 steel is that it has enough chromium to improve hardenability but not so much that it becomes as wear-resistant (or difficult to machine) as some tool steels. From my vantage point, that makes 5160 steel a “middle ground” steel: it’s tough and wear-resistant but still workable with standard carbide tooling. If the steel had more chromium, we’d be in the territory of certain stainless or tool steels that can be quite stubborn to machine.
2.2 How Heat Treatment Affects Machinability
Whenever I talk about 5160 steel, I can’t leave out heat treatment. Heat treatment is one of the reasons 5160 steel can be customized for different tasks. You can adjust its hardness and ductility to fit your project. But heat treatment also significantly affects machinability. The difference between annealed and hardened 5160 steel is night and day.
- Annealed State: When 5160 steel is annealed, it’s softer and easier to cut. In my experience, it machines a lot like other medium or high-carbon steels. Cutting forces are moderate, and tool wear is manageable.
- Hardened & Tempered State: Once you harden and temper 5160 steel, it becomes more difficult to machine. The hardness can easily reach the mid-50s on the Rockwell C scale. I’ve had times where the steel was at about 56–58 HRC, and at that point, my cutting tools wore out much faster. If you plan to do extensive machining, it’s easier to do most of the milling or turning before the final heat treatment. Then you can perform finish grinding or minimal cleanup cuts after it’s hardened.
- Stress Relief or Normalizing: Occasionally, I’ve needed to normalize or stress-relieve 5160 steel if it had an unknown heat treatment history. Doing so helps stabilize the steel, reducing the risk of warping when you do more intensive machining or subsequent heat treatments.
In practice, I prefer machining 5160 steel in its annealed or normalized state. I only do final shaping or finishing work after it’s hardened. That approach saves time and money because tooling costs are lower when you’re working with material that isn’t rock-hard.
2.3 Wear Resistance & Ductility
A hallmark of 5160 steel is its balance of wear resistance and ductility. I’ve been a part of projects where we tested different steels for making large fixed-blade knives. We subjected the knives to ridiculous abuse: chopping hardwood, hitting them against concrete blocks, and even prying heavy objects. Blades made from 5160 steel tended to roll or slightly deform on the edge, rather than chipping or snapping, especially if the heat treatment was done well. That’s the ductility aspect at work. For me, that property alone explains why 5160 steel is so popular for survival or outdoor knives that need to withstand extreme conditions.
In an industrial setting, the same property helps 5160 steel used for springs. You don’t want your suspension spring to snap. You want it to flex, absorb energy, and return to its form. The chromium content adds a measure of wear resistance, which means parts last longer under abrasive conditions. However, in a pure machining sense, wear resistance can lead to more tool wear. This is one reason I emphasize the use of high-quality carbide tools when working with 5160 steel, especially if it’s in a hardened or partially hardened state.
2.4 Differences from Machining Other Steels
Machining 5160 steel isn’t the same as machining mild steel (like 1018) or stainless steel (like 304). If you jump in with the same cutting speeds and feed rates you’d use for mild steel, you might end up with poor surface finish or quickly worn tools. The hardness and toughness of 5160 steel demand that we slow down a bit and plan carefully. Here are a few differences I’ve observed compared to other common steels:
- Greater Tool Wear: Because 5160 steel can have higher hardness, you’ll likely see more rapid tool wear than with low-carbon steels.
- Potential for Work Hardening: If you let your tool rub instead of cut, or if you overheat the workpiece, you can cause localized work hardening. This phenomenon is more common in high-carbon steels and can be a real headache.
- Heat Dissipation: High-carbon steels can build up heat quickly in the cutting zone. If you don’t use proper coolant or keep your feeds/speeds dialed in, heat can damage your tooling and degrade the steel’s properties.
- Surface Finish Sensitivity: 5160 steel can produce good finishes when cut correctly, but it also punishes any mistakes in tool geometry or feed rate. I’ve seen nasty chatter marks appear if the machine isn’t rigid or if the cut parameters are off.
I like to remind myself that 5160 steel is basically a “semi-tool steel.” It’s not as hard to machine as D2 or certain stainless steels. But it’s no pushover. I usually approach it with a bit more caution than mild steel or 4140.
2.5 Practical Tips on 5160 Steel Stock Selection
When you’re about to start a machining project with 5160 steel, you need to ensure you’re getting the right stock condition. Choosing annealed bars, plates, or forgings can save you headaches during production. If the supplier sells “as rolled” or “as forged” 5160 steel, you might consider normalizing it before you do critical machining steps. That’s because internal stresses could lead to distortion, especially if you’re milling long, thin sections.
I recall a project where I had to machine a series of brackets for an off-road truck suspension. The customer provided 5160 steel bar stock that was in a semi-hardened state. Machining it was slow, and my end mills took a beating. The moment I realized it was partially hardened, I recommended a stress-relief cycle followed by annealing. Once we reworked the material, the difference in tool life was remarkable. That was a moment where I learned to always confirm the heat treatment condition of 5160 steel before diving in.
2.6 Machinability Rating: Where Does 5160 Steel Stand?
Machinability ratings are often subjective because they rely on comparisons to a standard steel, like 1212 or 1112, which are considered easier to machine. Some references give 5160 steel a machinability rating around 65% compared to that baseline. That’s not terrible, but it’s also not fantastic. Personally, I’d say it feels more challenging than something like 4140 in the annealed condition, but not as difficult as some high-speed tool steels.
If you are used to machining mild steels, you’ll want to adopt more conservative parameters for 5160 steel. The slower feed rates and cutting speeds can increase cycle times, but that’s part of the trade-off. You either slow down and protect your tools, or you push the envelope and risk excessive tool wear or breakage.
2.7 Key Takeaways on 5160 Steel Before Machining
- High-Carbon Content: Offers strength and toughness but increases challenges in machining.
- Chromium Addition: Enhances wear resistance, making tooling quality paramount.
- Heat Treatment Flexibility: Machine in the annealed state when possible, then harden if needed.
- Ductility & Wear Resistance: Great for springs and blades, but tool wear is something you must manage.
- Optimal Machinability: Typically found in annealed or normalized stock.
All these points factor into how you choose to set up your machining operations for 5160 steel. Now that we’ve covered the fundamental properties, it’s time to delve into the tools you’ll need. Chapter 3 will focus on the cutters, drills, and CNC hardware best suited for 5160 steel. I’ve learned a lot the hard way on that front. I’ll share some personal favorites, along with a data table or two so you can see which tools have worked for me over time.
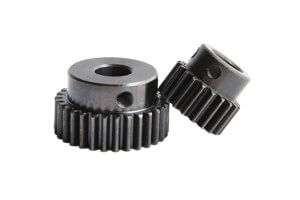
Best Tools for Machining 5160 Steel
When I first started machining 5160 steel, I used the same tools I’d been using for mild steel. That turned out to be a mistake. The increased hardness and wear resistance of 5160 steel took a toll on my cutters, and I found myself replacing tools more frequently than I wanted.
In this chapter, I’ll share what I’ve learned about selecting the right cutting tools, tool coatings, and CNC machine accessories to handle 5160 steel more efficiently. I’ve broken it down into two major sections: choosing cutting tools and optimizing your CNC machines.
I’ll also provide a data table with recommended tooling options for different machining operations. This is the kind of table I wish I had when I first started working with 5160 steel.
3.1 Choosing the Right Cutting Tools
I’ve experimented with various cutting tool materials over the years. Let me outline the two most common categories I’ve worked with for 5160 steel: High-Speed Steel (HSS) and Carbide. Occasionally, you’ll see folks using ceramic or cubic boron nitride (CBN) tools for extremely hard steels, but that’s often overkill for 5160 steel, especially in its annealed or normalized state.
3.1.1 High-Speed Steel (HSS)
HSS tools are often considered a baseline. They’re cheaper than carbide tools, and they can still cut 5160 steel decently if the steel is in a softer condition (annealed). However, once 5160 steel is hardened above mid-40s HRC, HSS becomes less practical. I have two reasons for this:
- Tool Wear: HSS dulls quickly when cutting through harder steels.
- Slower Speeds: If you want decent tool life, you must reduce your spindle speed and feed rate, which impacts productivity.
I still keep a few HSS end mills and drills around for prototyping or for roughing when the steel hasn’t been heat-treated. They remain a good option for those on a tight budget, especially if you’re only doing occasional machining on 5160 steel. But in a production environment, carbide’s longer tool life and higher cutting speeds usually make it a better value.
3.1.2 Carbide Tools
When I first switched from HSS to carbide tools for 5160 steel, I saw an immediate improvement in speed and surface finish. Carbide is harder and more wear-resistant, which means you can run your spindle at higher speeds, use higher feed rates, and still maintain a reasonable tool life.
A few considerations:
- Carbide Grades: There are many grades of carbide, each designed for different materials. I typically choose a grade formulated for steel with a balance of toughness and wear resistance.
- Coatings: I strongly recommend coated carbide tools for 5160 steel. Coatings like TiAlN (titanium aluminum nitride) or AlTiN (aluminum titanium nitride) help dissipate heat and reduce tool wear. When I started using TiAlN-coated carbide end mills, I noticed fewer problems with built-up edge, even at higher speeds.
Although carbide tools cost more upfront, the improved cutting parameters and extended tool life often justify the price. If I’m doing a large production run with 5160 steel, carbide is my go-to choice almost every time.
3.1.3 Tool Geometry
Geometry matters a lot when you’re cutting 5160 steel. You want a geometry that can handle moderate hardness without chipping. A few personal tips:
- Positive Rake Angles: For milling, I prefer tools with a positive rake angle because they shear the material more efficiently. This can help reduce cutting forces.
- Corner Radii: On end mills, I often use a small corner radius instead of a sharp corner. This distributes cutting forces and helps extend tool life.
- Chip Gullet Size: A larger chip gullet can prevent chips from packing in the flute, which can quickly lead to friction and heat buildup.
If you’re drilling 5160 steel, consider using split-point or parabolic drills to improve chip evacuation. It might seem like a small detail, but better chip evacuation reduces heat and increases tool life.
3.2 CNC Machines & Accessories for 5160 Steel
Selecting good cutting tools is half the battle. Your CNC machine setup also makes a significant difference. When I started cutting 5160 steel on older machines with less rigid spindles, I noticed more chatter. Over time, I upgraded some components to improve results.
3.2.1 Machine Rigidity
Rigid machines can handle higher cutting forces without excessive vibration. If you have a small, entry-level CNC mill that lacks rigidity, you may see chatter when you try to cut 5160 steel at higher feed rates. Chatter leads to poor surface finish and accelerated tool wear.
Even if your machine isn’t top-of-the-line, there are steps you can take:
- Secure your workpiece properly. Good fixturing goes a long way to reduce vibration.
- Tighten gibs and check backlash on older machines. This ensures your spindle and axes are stable under load.
3.2.2 Spindle Horsepower & Speed Range
I typically run higher spindle speeds when cutting 5160 steel with carbide tools because higher speeds can help maintain an efficient cutting temperature. But to do that, you need enough horsepower. If your spindle stalls or bogs down, you’re going to generate excessive heat and possibly cause chatter.
Look for CNC machines with enough horsepower to handle the depth of cut and feed rates you want to use. If you’re milling large 5160 steel parts, you may need a spindle with at least 5 to 10 horsepower to keep up.
3.2.3 Coolant & Mist Systems
Cooling is critical for 5160 steel. If you let the cutting zone overheat, you risk work hardening the steel and damaging the cutting edge. A flood coolant system is often best, but I’ve had decent success with mist or high-pressure coolant as well. The key is to ensure you’re clearing chips and keeping temperatures stable.
In my experience, an emulsion-type coolant with good lubricity works better than straight water-based coolants. Look for a coolant specifically designed for high-carbon steels if possible. Some brands even list “optimized for steels above 45 HRC” on the packaging.
3.2.4 Workholding & Fixturing
Workholding can make or break your machining process, especially if you’re dealing with large or oddly shaped 5160 steel blanks. I’ve had the best results when I use:
- Vise with hardened jaws: For smaller parts, a standard milling vise with hardened jaws provides a secure grip.
- Custom fixtures: If you’re making repeated parts, custom fixtures can speed up your workflow and reduce part slippage.
- Strap clamps or toe clamps: These are ideal for larger plates or bars of 5160 steel.
Remember that 5160 steel can have internal stresses. If you clamp a piece too aggressively, or remove a lot of material from one side, it might warp. To mitigate that, I sometimes do balanced machining (removing material in stages from both sides) or incorporate stress relief steps.
3.3 Recommended Tooling Table for 5160 Steel
Below is a table I put together based on my personal experiences machining 5160 steel. It includes different tool types, suggested coatings, typical diameters, recommended feed rates, cutting speeds, and notes on usage.
| Tool Type | Coating | Typical Diameter Range | Feed Rate (IPM) | Cutting Speed (SFM) | Notes |
|---|---|---|---|---|---|
| HSS End Mill | Uncoated / TiN | 0.25” – 1.0” | 4 – 12 | 60 – 90 | Good for annealed 5160 steel, slow speeds to extend life |
| Carbide End Mill | TiAlN / AlTiN | 0.25” – 1.0” | 8 – 18 | 150 – 300 | Best overall choice for 5160 steel, higher SFM possible |
| HSS Drill | Black Oxide / TiN | #10 – 1/2″ | 2 – 8 | 30 – 60 | Use in softer 5160 stock, reduce feed if chatter occurs |
| Carbide Drill | AlTiN | #10 – 1/2″ | 3 – 12 | 80 – 150 | Excellent for faster drilling, requires rigid setup |
| Indexable Insert Mill | TiAlN | 2” – 4” | 10 – 30 | 200 – 350 | Good for face milling larger surfaces, check insert seat |
| Carbide Insert Lathe Tool | TiAlN / CVD | Varies | 0.004” – 0.010”/rev | 180 – 320 | Turn 5160 steel with moderate depth of cut, stable speeds |
| Reamer (Carbide) | TiAlN | 0.25″ – 1.0” | 2 – 8 | 50 – 80 | Use finishing passes, keep coolant flow consistent |
(IPM = inches per minute, SFM = surface feet per minute, rev = revolution)
I’ve often tweaked these feeds and speeds depending on the specific hardness of the steel and the rigidity of the machine. Consider this table a starting point. If you see chatter, reduce the feed rate or depth of cut. If tool life seems too short, drop the spindle speed or switch to a more robust coating.
3.4 Coatings & Why They Matter
You’ll notice I mentioned TiAlN and AlTiN coatings a lot in the table. Here’s why:
- TiAlN (Titanium Aluminum Nitride): This is my go-to for high-temperature cutting operations. It forms a layer of aluminum oxide at elevated temperatures, which helps protect the tool from heat.
- AlTiN (Aluminum Titanium Nitride): Very similar to TiAlN, but with a different aluminum-to-titanium ratio. Some brands claim it offers slightly better performance in steel, but I haven’t seen a drastic difference.
- TiN (Titanium Nitride): A classic coating that’s cheaper, but doesn’t provide as much heat resistance as TiAlN. It’s better than uncoated tools for sure, but if you’re doing a lot of 5160 steel machining, you might want the higher-tier coatings.
In my experience, uncoated tools wear out much faster in 5160 steel. The small additional cost for a quality coating is almost always worth it, especially in production scenarios.
3.5 Tool Life Management
Even with top-tier tools, 5160 steel will wear your cutters faster than mild steel. I keep a spreadsheet (or you can use specialized shop software) to track how many parts each tool can make before it needs sharpening or replacing. This data helps me predict when a tool might fail, so I can replace it preemptively. Nothing hurts productivity more than a broken end mill in the middle of a large production run.
It’s also good practice to measure tool diameter wear after each job. For instance, if I see the diameter on a 0.5” carbide end mill drop by 0.001” after cutting a certain number of parts, I’ll note that. Then I can plan to retire it or regrind it at a consistent interval.
I remember one time I pushed a worn end mill a bit too far because I was in a rush. The tool snapped mid-cut, and the part got ruined. That ended up costing more time and money than if I’d just swapped in a fresh tool. Lesson learned.
3.6 Practical Tips for Tool Setup & Maintenance
- Check Tool Runout: Excessive runout leads to uneven cutting, increasing wear on one flute. Use a dial indicator to ensure your tool runs true.
- Invest in a Good Tool Holder: ER collets or hydraulic chucks can improve rigidity and reduce runout. This alone can extend tool life, especially for 5160 steel.
- Sharpen or Replace Tools Regularly: Don’t wait until the tool is completely trashed. A consistent maintenance schedule ensures consistent part quality.
- Store Tools Properly: Keep carbide and HSS tools in a dry, organized place. Moisture can cause corrosion on HSS, and even carbide can degrade if stored carelessly.
3.7 My Personal Experiences & Lessons Learned
I’ll never forget a job where we had to machine a batch of 50 large brackets from 5160 steel for an automotive suspension project. Initially, we used uncoated HSS end mills. We tried to push them at speeds we normally used for 4140 steel. That led to rapid tool wear, frequent tool changes, and an overall messy process.
About halfway through the batch, I ordered a set of TiAlN-coated carbide end mills from a reputable brand. Although they cost significantly more, we finished the job with fewer tool replacements and better surface finishes. The real payoff came in the form of time saved. We spent less time swapping out dull tools and reworking bad parts.
Since then, I almost always recommend coated carbide for significant runs of 5160 steel. Yes, the initial investment might sting, but the overall efficiency wins every time. For smaller runs or personal projects—like making one-off knife blanks—I might still use HSS to keep costs down, but that’s only if I know the steel is in a fairly soft condition.
I also discovered that indexing the inserts on my face mill more frequently helped maintain a uniform cut and surface finish. Once the leading edge of the insert starts to wear, the finish degrades rapidly, and the possibility of chatter increases. If you keep track of the insert edges you’re using, you can swap them out at the right time.
Another tip: if you see any signs of chatter or abnormal cutting forces, stop and investigate. Sometimes it’s an alignment issue with the machine, a loose fixture, or a damaged cutting edge. Letting it continue only compounds the damage. In my case, ignoring chatter once led to a jammed spindle because the tool ended up pulling out of the holder, creating a massive gouge in the part. That was a tough day, but it taught me the value of vigilance.
3.8 Chapter Summary & Transition
Choosing the right cutting tools and optimizing your CNC machine setup can transform the way you approach 5160 steel. The steel’s higher hardness and tendency to generate heat demand more than a “one-size-fits-all” strategy. Whether you opt for HSS or carbide, be sure to consider coatings, geometry, and proper machine accessories.
In Chapter 4, I’ll dive deeper into cutting speeds and feed rates, which will help you maximize the potential of these tools. We’ll also take a closer look at how small tweaks in speed or feed can drastically affect tool life and surface finish. I’ll include another data table showcasing specific speed/feed combinations I’ve used successfully for different types of operations, such as roughing, finishing, drilling, and reaming in 5160 steel.
Cutting Speeds & Feed Rates for 5160 Steel
When I first started working with 5160 steel, I often found myself guessing at cutting speeds and feed rates. I’d take numbers from generic steel machining charts and hope they worked. Sometimes I got lucky, other times my tools overheated or chipped, and the finish was terrible.
Over the years, I’ve refined my approach to determining the right speed (spindle RPM) and feed rate (IPM or IPR). In this chapter, I’ll share everything I’ve learned. I’ll talk about roughing vs. finishing, drilling vs. milling, how to adapt speeds for different hardness levels of 5160 steel, and even how your coolant choice affects feed rates.
4.1 The Importance of Proper Cutting Parameters
Anytime I cut 5160 steel, I remind myself that it behaves like a high-carbon, chromium-rich alloy that can be unforgiving if you push it too hard. Going too fast generates heat, which can cause work hardening, degrade the tooling, or produce poor surface finishes.
But going too slow isn’t great either. If the feed is too low, the tool may rub instead of cutting, leading to premature tool wear and potential surface hardening. There’s a sweet spot where you remove material efficiently without killing your end mills, drills, or inserts.
By focusing on these sweet spots, I’ve significantly reduced my scrap rate. I’ve also improved overall productivity. 5160 steel doesn’t have to be a nightmare. Once you dial in your speeds and feeds, it becomes fairly predictable.
4.2 Roughing vs. Finishing in 5160 Steel
Many machinists differentiate between roughing cuts and finishing cuts. In roughing, we remove the bulk of the material as fast as possible. In finishing, we slow down, reduce the depth of cut, and aim for a smooth surface with tight tolerances.
- Roughing: When I rough out 5160 steel, I like to use heavier depths of cut with lower spindle speeds and higher feed rates. This combination promotes chip-thinning, keeps the tool engaged, and helps me move a large volume of metal quickly.
- Finishing: During finishing passes, I lighten the depth of cut and increase spindle speed to achieve a better surface finish. My feed rate may drop slightly to ensure each tooth of the cutter can “kiss” the material without generating deflection or chatter.
This approach has saved me from headaches, especially on parts that have tight dimensional tolerances or require a near-polished finish on a final pass.
4.3 Determining Spindle Speed (RPM) for 5160 Steel
Spindle speed depends on the tool’s diameter, the type of tool material (HSS or carbide), and the hardness of the 5160 steel. A standard formula for spindle speed in RPM is:RPM=SFM×3.82Tool Diameter (in)RPM=Tool Diameter (in)SFM×3.82
- SFM: Surface Feet per Minute
- Tool Diameter (in): The diameter of your end mill, drill, or lathe tool in inches
- 3.82: Approximate constant from the conversion (12 inches per foot, π, etc.)
When I started milling 5160 steel, I often used an SFM in the range of 150 to 250 for carbide tools. For HSS, it was more like 50 to 90. But these numbers aren’t set in stone. You can adjust based on your machine’s rigidity, coolant system, and the actual hardness of the steel.
If 5160 steel is in a hardened state (let’s say 55 HRC or higher), you might want to reduce the SFM by 10% to 20%. If it’s annealed (typically around 25–35 HRC), you can push the SFM closer to the higher end of the range.
4.3.1 Example Calculation
Let’s assume I’m using a 0.5” carbide end mill, and I decide on a cutting speed of 200 SFM for 5160 steel in an annealed state. The RPM calculation would be:RPM=200×3.820.5=7640.5=1528 RPMRPM=0.5200×3.82=0.5764=1528RPM
I might round that up to 1,550 RPM on the machine. Then, I’d do a test pass to see how the chips look, how the machine sounds, and whether the surface finish is acceptable. If I see any signs of chatter or the tool gets too hot, I’ll back off slightly.
4.4 Feed Rate (IPM or IPR) Basics
Feed rate is how fast the tool or workpiece moves relative to each other during a cut. In milling, we often talk about IPM (inches per minute). In turning, we frequently use IPR (inches per revolution).
A basic formula to convert chip load per tooth (CLPT) into feed rate for milling is:Feed Rate (IPM)=CLPT×Number of Flutes×RPMFeed Rate (IPM)=CLPT×Number of Flutes×RPM
- Chip Load per Tooth (CLPT): How much material each tooth of the cutter removes per revolution.
- Number of Flutes: How many cutting edges the end mill has.
- RPM: Spindle speed.
For 5160 steel, I commonly use a chip load of about 0.002″ to 0.006″ per tooth for a typical 4-flute carbide end mill, depending on whether I’m roughing or finishing. A heavier chip load near 0.006″ might be good for roughing, while 0.002″ is safer for finishing.
4.4.1 Example Calculation
Let’s say I have a 4-flute carbide end mill running at 1,550 RPM (from our earlier example). For a moderate chip load of 0.004″ per tooth, the feed rate would be:Feed Rate (IPM)=0.004×4×1550=24.8 IPMFeed Rate (IPM)=0.004×4×1550=24.8IPM
I’d likely set the feed rate around 25 IPM on the machine. Again, I’d watch and listen to see if that feed is too aggressive. If I hear chatter or see the tool deflect, I’ll reduce feed. If the machine and tool handle it well, I might push a bit further.
4.5 Roughing vs. Finishing Feed Rates
I touched on roughing and finishing at the start of this chapter, but let’s dive deeper:
- Roughing Feed Rate: Typically, you can push a higher chip load per tooth because you’re not as concerned about surface finish. I might do 0.005” or 0.006” per tooth for a 4-flute end mill if the machine is rigid and the steel is in an annealed condition.
- Finishing Feed Rate: For a final pass, I drop down to 0.002″ to 0.003″ per tooth. This lighter load helps keep surface finish smooth and prevents deflection that could ruin part accuracy.
I often do multiple finishing passes at these lighter feeds if the part has critical tolerances. Each pass might only remove 0.010″ to 0.020″ radially or axially, which helps keep final measurements precise.
4.6 Feed & Speed Adjustments Based on Hardness
5160 steel can vary in hardness from the mid-20s HRC (fully annealed) to the mid-50s HRC (hardened). Here’s how I adjust:
- Annealed (25–35 HRC): I run closer to the higher side of recommended SFM (like 200–300 SFM for carbide) and moderate chip loads (0.003″–0.006″ per tooth).
- Partially Hardened (35–45 HRC): I might reduce SFM by about 10% and keep chip loads moderate.
- Fully Hardened (45–55+ HRC): I dial back the SFM to around 150–180, sometimes even lower. I also use smaller chip loads (0.002″–0.004″ per tooth).
This approach ensures I don’t burn through tools unnecessarily. Sometimes you have no choice but to machine hardened 5160 steel, especially if you’re doing final finishing operations post-heat treatment. But if you can, always machine it in the annealed state to maximize tool life and productivity.
4.7 Drilling & Tapping in 5160 Steel
Milling gets a lot of attention, but drilling is also a big part of working with 5160 steel. I’ve broken enough drill bits in 5160 steel to know that a careful approach is essential.
- Carbide Drills: Best choice if you have a rigid setup. You can push higher speeds (80–150 SFM) with moderate feed.
- HSS Drills: Use lower speeds (30–60 SFM) and keep an eye on heat buildup.
- Peck Drilling: Sometimes necessary in deeper holes to clear chips and reduce heat.
Tapping can be tricky in 5160 steel, especially if it’s hardened. I prefer to tap in the annealed state. If I must tap hardened steel, I’ll use high-quality taps designed for tough materials (spiral flute or spiral point, coated with TiCN or similar) and plenty of cutting fluid. Even then, I go slow.
4.8 Coolant & Lubrication Impact on Feeds & Speeds
Coolant isn’t just about keeping the cutting zone cool. It also lubricates the interface between the tool and 5160 steel, reducing friction. Lower friction can let me push the feed rate slightly higher without risking excessive heat.
- Flood Coolant: Best for clearing chips. Helps maintain stable temperature.
- Mist Coolant: Good for smaller setups or when flood coolant is impractical.
- High-Pressure Coolant: Great if you have through-spindle options. It blasts chips away and keeps temperatures more consistent.
I try not to rely solely on coolant to compensate for overly aggressive feeds and speeds. It’s better to find the right balance first and then use coolant to fine-tune the process.
4.9 Practical Data Table for Speeds & Feeds in 5160 Steel
Below is a table summarizing some typical speeds and feeds I’ve used for 5160 steel. These numbers are starting points. Always verify on your own equipment, because machine rigidity and coolant delivery can vary widely.
| Operation | Tool Type | Hardness State | SFM Range | Chip Load (per tooth) | Depth of Cut (Rough) | Depth of Cut (Finish) | Notes |
|---|---|---|---|---|---|---|---|
| Face Milling | Carbide Insert | Annealed | 200–300 | 0.004–0.006 | 0.100–0.200″ | 0.010–0.030″ | Lower SFM if partial hardness is suspected |
| Side Milling | Carbide End Mill | Annealed | 180–250 | 0.003–0.005 | 0.075–0.150″ | 0.010–0.020″ | Maintain consistent coolant flow |
| Slot Milling | Carbide End Mill | Annealed | 150–220 | 0.004–0.006 | 0.050–0.100″ | 0.010–0.015″ | Consider trochoidal milling for deep slots |
| Drilling | Carbide Drill | Annealed | 80–120 | 0.002–0.004 (IPR) | – | – | Use peck drilling for holes > 3x diameter |
| Drilling | HSS Drill | Annealed | 30–60 | 0.001–0.003 (IPR) | – | – | Reduce speed & feed if partial hard spots |
| Tapping | HSS/Carbide Tap | Annealed | 10–20 | – | – | – | Use plenty of lubrication, go slow |
| Turning (Rough) | Carbide Insert | Annealed | 180–280 | 0.008–0.012 (IPR) | 0.100–0.200″ | – | Depth of cut depends on rigidity |
| Turning (Finish) | Carbide Insert | Annealed | 200–300 | 0.003–0.006 (IPR) | 0.010–0.050″ | – | Consider multiple light passes for accuracy |
These ranges may seem wide because 5160 steel can vary a lot based on heat treatment. If you sense chatter, try reducing depth of cut first. If your finish is rough, adjust feed and consider a finishing pass at higher RPM with a lighter feed.
4.10 Trochoidal Milling Strategies
Trochoidal milling (or dynamic milling) is a technique I like to use on tougher steels like 5160 steel. Instead of slotting at full cutter width, trochoidal paths use a smaller radial engagement with higher feed rates and speeds. It minimizes tool load and helps chips evacuate more effectively.
I’ve seen tool life jump by 30% or more when using trochoidal milling on deep slots or pockets in 5160 steel. The constant chip load keeps temperatures stable. If your CNC machine and CAM software support trochoidal strategies, it’s worth exploring.
4.11 Balancing Tool Life & Throughput
In production scenarios, we often face a trade-off: do we push the tools hard to reduce cycle time, or do we run conservative speeds/feeds to extend tool life?
With 5160 steel, I generally aim for a middle ground. I’ve found that pushing too hard can lead to catastrophic tool failure, which ends up costing more in downtime and scrap. On the other hand, being overly cautious can hurt productivity.
A good strategy is to do controlled tests with incremental increases in feed rate or spindle speed. Monitor tool wear, part finish, and cycle time. If I see that tool life is acceptable while cycle time is reduced, that’s an optimal setting.
4.12 My Personal Experiences with Overly Aggressive Feeds
I once took on a job making spring brackets from 5160 steel for a custom suspension system. In an attempt to impress the client, I cranked up the feed and speed beyond my usual comfort zone. I managed to shave off 20% of the cycle time for the first few parts, and I was feeling proud.
Then a carbide insert exploded mid-cut. The bracket was wrecked, and a few hundred dollars worth of tooling went out the window. Even worse, it took me nearly two hours to recalibrate everything and ensure the machine was still aligned. My “savings” vanished, and I ended up behind schedule.
That fiasco taught me to find a stable operating window rather than chasing the absolute maximum feed rate. Sometimes a small compromise in cycle time is safer and more cost-effective.
4.13 Monitoring Chip Color & Shape
When cutting 5160 steel, chip color can give you clues about temperature. Blue or purple chips often mean you’re running hot. A light straw color might be okay, but if the chips are glowing bright red when they exit, you’re probably generating too much heat.
Chip shape also matters. If they come out as consistent curls or small broken segments (in turning), that usually means you’ve got a healthy feed rate. If chips are stringy or welded together, you might need to increase feed or adjust tool geometry to promote breakage.
4.14 Using CNC Monitoring Features
Modern CNC machines often have load meters or sensors that track spindle torque. If your machine shows a spike in spindle load, it might be time to reduce feed or speed. Some advanced setups even let you program the machine to automatically adjust if torque exceeds a certain threshold.
I use these features as an early warning. With 5160 steel, it’s easy for the cutting forces to ramp up if your tool gets dull or if you’re pushing too hard. Monitoring machine load can save you from tool breakage or part damage.
4.15 Dealing with Part Distortion
Because 5160 steel is a spring steel, it can warp when internal stresses are released during machining. Distortion can ruin your carefully planned feed and speed strategy, especially if the part moves mid-cut.
I’ve found that doing a rough cut on both sides of a part before moving to finishing passes helps. By removing material more symmetrically, you minimize stress imbalances. This approach ensures your final finishing pass encounters less distortion.
4.16 Verifying Work Hardening
Work hardening occurs when you generate excessive heat or let the tool rub instead of cut. High-carbon steels like 5160 steel can develop a hardened skin if the cut isn’t aggressive enough. Then the next pass has to chew through a hardened layer, which compounds your tool wear problem.
One test is to file the freshly cut surface. If it feels noticeably harder than the surrounding steel, you might be dealing with work hardening. To fix it, increase feed slightly and ensure your tool engagement is consistent. You can also try adjusting coolant flow to keep temperatures down.
4.17 Example Workflow
Let me share a typical workflow I follow for a new 5160 steel project:
- Material Check: Confirm if it’s annealed or partially hardened.
- Test Cut: Use moderate speeds/feeds to gauge how the steel responds.
- Tune Speeds: Adjust spindle RPM based on chip color and tool wear.
- Optimize Feed: Increase feed until I see the first sign of chatter or temperature spike.
- Document Parameters: Keep a log with final SFM, IPM, depth of cut, and tool life data.
- Refine: If tool life is too short, reduce speed or feed by 10%. If productivity is too low, try increasing them by 5%.
- Final Validation: Make sure part dimensions are in spec, and the surface finish is acceptable.
This iterative approach has helped me find that sweet spot more quickly.
4.18 My Mistakes & Lessons Learned
I recall a job where I had to produce 40 automotive leaf spring components from 5160 steel. Initially, I used the same parameters I used for 4140 steel. That was a bad move. My feed was too low, so the tool started to rub, heating the material and causing partial work hardening. The surface finish was inconsistent, and the tool dulled quickly.
Once I realized the mistake, I increased the chip load slightly and bumped the spindle speed down a bit to control heat. The chips started coming off nicely in short curls, and tool life stabilized. By the end of that run, I had a solid data set that helped me with future 5160 steel projects.
CNC Machining Techniques for 5160 Steel
When I first heard about “advanced CNC machining techniques,” I assumed it involved expensive equipment and complicated software that only large manufacturers could afford. Over time, I realized that even small-scale shops (like the one I started in) can adapt certain strategies to get better results, especially with steels like 5160 steel.
In this chapter, I’ll discuss a range of machining methods that can help you work more efficiently, minimize tool wear, and achieve excellent surface finishes on 5160 steel. I’ll begin by outlining the differences between climb milling and conventional milling, then move into multi-axis machining, dynamic tool paths, and finishing touches that save time (and headaches).
5.1 Climb vs. Conventional Milling
Many shops still rely on conventional milling by default. That’s where the cutting tool rotates in a way that forces chips “up” the face of the material. Climb milling, on the other hand, has the cutter move in the same direction the material is being fed, essentially “slicing” the material off in a cleaner way.
5.1.1 Climb Milling Advantages
- Less Work Hardening: I’ve noticed that climb milling tends to produce a cleaner shear plane on 5160 steel, reducing rubbing and heat buildup. That matters for high-carbon alloys prone to work hardening.
- Better Surface Finish: Because the cutter enters the material with a full-thickness chip and exits with a thinner chip, the surface finish often looks better.
- Lower Cutting Forces: In climb milling, the tool “pulls” the material, which can result in slightly lower cutting forces under the right conditions.
5.1.2 Conventional Milling Advantages
- Machine Backlash Compensation: On older or less rigid machines, climb milling can cause the cutter to dig in or chatter if backlash is present. Conventional milling may be safer to avoid machine issues.
- Forgiving When Fixturing is Weak: If you’re uncertain about the rigidity of your setup, conventional milling can sometimes reduce the chance of part movement.
Personally, I prefer climb milling whenever possible, especially with 5160 steel in the annealed state. The only time I switch to conventional is if my machine’s rigidity is questionable or if I see immediate signs of chatter.
5.2 Multi-Axis Machining Approaches
I used to assume multi-axis machining was only for complex aerospace parts. However, even simpler 5160 steelcomponents, like brackets with angled features, can benefit from 3+2 or full 5-axis machining.
- Reduced Setups: If you have a 4-axis or 5-axis machine, you can machine multiple features in one setup, improving accuracy.
- Optimized Tool Angles: Being able to tilt the part or the tool can improve cutting angles, reduce chatter, and extend tool life.
- Complex Geometry: For sculpted surfaces (like certain knife blades or automotive components with curved profiles), multi-axis movement can deliver a consistent finish.
When I had a chance to run a 5-axis machine on a 5160 steel knife blank project, I found it easier to maintain consistent geometry around the blade’s curvature. With fewer repositionings, tolerances stayed tight, and the surface finish was uniform.
5.3 High-Efficiency or “Dynamic” Milling
High-efficiency milling (often called dynamic milling) is a strategy that uses a smaller radial stepover with higher axial depths of cut and higher feed rates. The goal is to keep a constant chip load on the cutter.
5.3.1 Benefits for 5160 Steel
- Less Heat Build-Up: Because the tool never engages the full slot width, heat dissipates more effectively.
- Extended Tool Life: Consistent chip thickness means fewer sudden load spikes that can chip the cutting edge.
- Faster Material Removal: You can often run at higher feed rates, removing material more quickly.
When I first tried dynamic milling on 5160 steel, I saw a 20–30% reduction in cycle times compared to traditional slotting. The difference was especially noticeable on pockets and slots where I had to remove a lot of material.
5.4 Peel Milling & Trochoidal Techniques
Peel milling and trochoidal milling are very similar to high-efficiency milling. Peel milling uses a narrow radial width of cut with deeper axial cuts, while trochoidal milling uses an arc motion to maintain constant engagement.
- Trochoidal Milling: Great for deep slots in 5160 steel. The tool moves in a circular path, nibbling away material without burying itself fully.
- Peel Milling: Often used for 2D or 2.5D operations, slicing off narrow strips of material with consistent engagement.
Both strategies rely on software that can dynamically calculate tool paths. They’re not new, but CAM software improvements have made them more accessible. If you have a modern CAM package (Fusion 360, Mastercam, etc.), you can often find these strategies built-in.
5.5 Avoiding Chatter & Vibration
High-carbon steels like 5160 steel can produce chatter if the setup isn’t rigid or if the cut parameters are off. The good news is that advanced tool paths can help:
- Constant Tool Engagement: Minimizes sudden load changes.
- Adaptive Clearing: Some CAM systems call it “adaptive” or “intelligent” clearing, where the tool adjusts its path to maintain consistent radial engagement.
- Variable Helix End Mills: These specialized end mills have slightly different helix angles on each flute to break up harmonic frequencies, reducing chatter.
Whenever I sense chatter, I consider halving the radial depth of cut or switching to an adaptive strategy. Sometimes just dropping the feed or the speed slightly can stabilize things.
5.6 Proper Chip Evacuation Techniques
One of the biggest issues in cutting 5160 steel is chip evacuation. If chips accumulate in the cutting zone, they can be re-cut, generating extra heat and damaging the surface finish.
- High-Pressure Coolant: If your machine supports it, blasts chips away effectively.
- Through-Spindle Coolant: Drills and end mills with internal coolant channels direct fluid right where it’s needed.
- Air Blast: In some cases, a strong air blast can keep chips clear, especially if coolant is not desirable (e.g., finishing passes).
I recall a project that involved drilling many deep holes in thick 5160 steel bars. Once I switched from a standard coolant flood to through-spindle coolant on a carbide drill, my drill life nearly doubled, and hole accuracy was significantly improved.
5.7 Finishing Techniques for Aesthetic & Performance
Sometimes the end user wants a specific surface finish on 5160 steel. Knife blades, for example, often need a polished or satin finish. Automotive parts might just need a consistent, medium finish so they can be coated or painted.
- Lighter Depth of Cut: I rarely exceed 0.010” in a finishing pass on 5160 steel.
- Higher RPM: Increasing the spindle speed can refine the finish, assuming the setup is rigid.
- Wiper Inserts: Some lathe inserts come with a wiper geometry that produces a smoother finish at higher feed rates.
- Buffing & Polishing: If you need a near-mirror finish, mechanical or manual polishing may follow CNC operations.
For certain cosmetic parts, I’ve also used ball end mills at small stepovers. This “scallop” method can give a beautiful 3D surface finish, albeit at the cost of longer cycle times.
5.8 Real-Time Monitoring & Adjustments
Modern CNC controllers often let you tweak feed rates on the fly. If I notice the machine load is higher than expected, I’ll dial back the feed override. Conversely, if I see that the spindle load is low, I may push the feed override up a bit to optimize cycle time.
I once ran a job on 5160 steel where each part took 20 minutes with my initial feeds and speeds. By gradually increasing feed override in small increments, I got it down to 16 minutes per part without sacrificing tool life. Over dozens of parts, those four minutes per part added up to a huge saving.
5.9 CNC Programming Pitfalls
A few things can go wrong when programming 5160 steel operations:
- Forgetting to Add Lead-Ins and Lead-Outs: Abrupt tool engagement can cause instant chatter or tool deflection. A gradual ramp or helix entry is much gentler.
- Misusing Cutter Compensation: If you apply cutter comp incorrectly, you could be burying the tool in the material more than intended.
- Ignoring Machine Acceleration Limits: If your CAM program sets feed rates too high on tight corners, your machine might bog down or jerk, causing poor finishes.
I keep an eye on the simulation in the CAM software, but also do a “dry run” in the CNC with the spindle off, just to confirm everything looks right on the control. Mistakes in code can be expensive with a steel as tough as 5160 steel.
5.10 My Personal 5160 CNC Techniques Checklist
I like having a mental (or written) checklist for each new job:
- 1) Material Condition: Annealed or hardened?
- 2) Tool Selection: Carbide with TiAlN or AlTiN if possible.
- 3) Tool Path Strategy: Adaptive/dynamic milling for heavy roughing, climb milling for finishing.
- 4) Speeds & Feeds: Start with known baselines; adjust for machine load.
- 5) Coolant: Ensure enough flow and proper angle.
- 6) Entry & Exit: Use ramps or helixes to engage the steel smoothly.
- 7) Monitor: Watch chip color, tool wear, and machine load.
Checking these items systematically helps me avoid silly mistakes that lead to wasted tools or scrapped parts.
5.11 Combining Techniques for Maximum Efficiency
Let’s say you have a part with several pockets, slots, and angled surfaces in 5160 steel. You can:
- Use Dynamic Milling for pocket roughing, removing bulk material fast.
- Switch to a Multi-Axis Strategy if the walls are angled or curved, so you can maintain a constant tool angle.
- Finish with Climb Milling at a higher RPM to get a good surface finish on the final pass.
Putting it all together can reduce cycle time while still preserving tool life. I’ve found that each technique is powerful in its own right, but the real magic happens when you combine them strategically.
5.12 Chapter Summary & Transition
In this chapter, we explored advanced CNC machining methods—like climb milling, multi-axis strategies, dynamic milling, and finishing passes—that help maximize your results in 5160 steel. The bottom line is that you can’t treat 5160 steel like a low-carbon material. You need to plan your strategies carefully, or risk chatter, short tool life, and poor surface finishes.
Now, let’s move on to Chapter 6, where I’ll share several case studies of successful (and sometimes challenging) 5160 steel machining projects. These real-world examples will tie together the lessons from Chapters 2 through 5, showing how the right combination of tools, speeds, feeds, and techniques can produce top-notch parts.
Case Studies: Successful 5160 Steel Machining Projects
I’ve been lucky enough to work on a variety of 5160 steel projects in different industries. Some jobs were small—like crafting a custom knife—while others were large production runs for the automotive sector. Each one taught me something new.
In this chapter, I’ll present a few detailed case studies. My hope is that these stories will help you see how the concepts from earlier chapters play out in real scenarios. I’ll include the initial challenges, the solutions I tried, and the final outcomes—both good and bad.
6.1 Case Study #1: Heavy-Duty Knife Blanks
6.1.1 Background
A custom knife maker approached me to machine blade blanks from 5160 steel. He specifically wanted 10” long blanks that he could later grind and finish by hand. The steel arrived in an annealed state with about 0.25” thickness.
6.1.2 Challenges
- Profile Contours: The blanks had sweeping curves and a partial tang shape.
- Tight Tolerances: He needed +0.005” / -0.000” on critical dimensions to ensure each blank fit his jigs.
- Surface Finish: The edges had to be clean, requiring minimal sanding or hand-filing before heat treatment.
6.1.3 Approach
- Dynamic Milling for Profiling: Rather than slotting around the blank, I used a trochoidal strategy to machine the outer contours. This kept radial engagement low.
- Carbide End Mills with TiAlN: I selected a 3/8” end mill for the profiling, running around 220 SFM and 0.004” chip load per tooth.
- Workholding: I used a vacuum fixture with a secondary clamp on one corner. Because the shape was irregular, I pinned one reference hole near the tang.
6.1.4 Results
- Cycle Time: About 6 minutes per blank, which was quicker than I expected.
- Tool Life: I managed to cut 50 blanks before I had to swap out the end mill. That was acceptable given the length of the cuts.
- Finish Quality: The edges were smooth enough that the customer only did minimal sanding.
I learned that dynamic milling on annealed 5160 steel can be quite efficient, especially for complex profiles. The vacuum fixture was the trickiest part. If I had used a standard vise, it would’ve been tough to securely hold the contoured geometry.
6.2 Case Study #2: Leaf Spring Brackets for Off-Road Vehicles
6.2.1 Background
An off-road vehicle manufacturer hired us to produce leaf spring brackets from 0.375” thick 5160 steel plate. These brackets had several holes, slots, and bent sections (post-machining) that would form part of a custom suspension.
6.2.2 Challenges
- Material Hard Spots: The 5160 steel arrived in “as rolled” condition, with some zones slightly harder than others.
- Multiple Operations: We had to drill holes, slot a few sections, and do final milling on edges before the parts went to a press brake for bending.
- Dimensional Accuracy: The slots had to line up perfectly once bent.
6.2.3 Approach
- Normalize First: We convinced the client to let us normalize the steel plates before machining. This step helped eliminate unpredictable hard spots.
- Indexable Face Mill: To remove scale and flatten each plate, I used a 3” indexable face mill at around 250 SFM and a feed of 15 IPM.
- High-Pressure Coolant: For drilling and slotting, we used carbide drills and end mills with a through-spindle coolant system.
6.2.4 Results
- Reduced Tool Wear: Normalizing the steel significantly cut down on broken drills, which had been a major issue early on.
- Consistent Accuracy: After face milling, the plate thickness was uniform, so our bending operation was more predictable.
- Client Satisfaction: The client found fewer misaligned holes once the brackets were bent.
This case showed me how important it is to manage material condition before you even start cutting. Sometimes spending extra effort (and cost) up front saves you exponentially more down the line.
6.3 Case Study #3: CNC-Turned Shafts for Agricultural Equipment
6.3.1 Background
A local agricultural supplier needed rugged shafts for a soil tilling machine. They insisted on 5160 steel because they wanted better impact resistance compared to 4140. Each shaft was about 1.5” in diameter and 10” in length.
6.3.2 Challenges
- Turning Long Parts: Parts this long can deflect in the lathe, leading to chatter.
- Hardness Variation: The client specified a heat-treated hardness of around 40 HRC for extra toughness, which made turning more demanding.
6.3.3 Approach
- Steady Rest Support: I used a steady rest to reduce flex in the shaft during turning.
- Carbide Inserts with TiAlN: Chosen for wear resistance at around 220 SFM.
- Moderate Depth of Cut: Roughing at 0.100” depth, finishing at 0.020”.
- Coolant Through Tool: This lathe had through-tool coolant for drilling center holes.
6.3.4 Results
- Minimal Chatter: The steady rest was crucial. Without it, I saw immediate vibration.
- Consistent Diameter: Tolerances stayed within ±0.001” over the 10” length, which was excellent for a tough steel like 5160 steel at 40 HRC.
- Smooth Finish: A wiper insert helped produce a final finish around 63 Ra, acceptable for an agricultural shaft.
One thing I learned was that 5160 steel at 40 HRC is still quite machinable with good carbide inserts. I just needed to be cautious with feed rates and depth of cut to avoid overwhelming the tool.
6.4 Case Study #4: Large Batch Production for Truck Suspension
6.4.1 Background
A big job came in for 200+ suspension components made from 0.5” thick 5160 steel plate. These were support arms with multiple milled features and a final shape that included a few chamfers and filleted corners.
6.4.2 Challenges
- Production Efficiency: With over 200 parts, cycle time and tool life were big concerns.
- Multiple Tool Changes: The design called for drilling, milling, chamfering, and a final finishing pass.
- Holding Tolerance in a Large Batch: Even slight wear on the tool could accumulate over so many parts.
6.4.3 Approach
- Dynamic Roughing: Used peel milling to remove the bulk material quickly, keeping radial engagement low.
- In-Process Probing: The CNC machine had a probe to measure features and adjust offsets if tool wear was detected.
- Carbide Chamfer Tool: A dedicated 90° carbide tool for chamfers, ensuring consistent edges.
6.4.4 Results
- Cycle Time Savings: Dynamic roughing cut each part’s roughing time by about 30%. Over 200 parts, that was a huge benefit.
- Tool Wear Tracking: The in-process probe caught offset drifts early, which prevented scrap.
- Quality: Dimensions stayed within ±0.003” across the batch, which the client was thrilled about.
This job reinforced the value of modern CNC features like in-process probing. For large batches, a little technology can save a lot of money.
6.5 Lessons Across All Case Studies
Across these four stories, I see a few recurring themes:
- Material Prep: Normalizing or annealing 5160 steel before machining can save you from unpredictable hardness zones.
- Advanced Strategies: Dynamic or trochoidal milling often outperforms traditional slotting on tough steels.
- Rigidity & Coolant: A rigid setup and adequate coolant flow are crucial when pushing feeds and speeds.
- Tool Selection: Quality carbide with TiAlN or AlTiN coatings usually pays off in the long run.
- Monitoring: Whether it’s tool wear or part distortion, consistent checks ensure your final product meets expectations.
Now that we’ve seen real-world applications, we’ll move into Chapter 7, the final segment: Frequently Asked Questions (FAQ). That section addresses common queries I’ve encountered from both experienced machinists and newcomers eager to work with 5160 steel.
FAQ
Some questions might repeat ideas from earlier chapters, but that’s intentional. I want this FAQ to be a handy reference for quick answers.
- What makes 5160 steel different from other carbon steels?
5160 steel is a high-carbon, chromium-containing alloy known for its toughness and spring-like properties. It can absorb shocks without fracturing, which sets it apart from simpler carbon steels like 1045 or 1095. - Is 5160 steel suitable for CNC machining?
Absolutely. I’ve machined 5160 steel on both milling machines and lathes. It’s somewhat tougher than mild steel, but with the right tooling and speeds/feeds, it’s very manageable. - What type of CNC tools should I use for cutting 5160 steel?
I recommend carbide tools with TiAlN or AlTiN coatings. HSS tools can work in annealed material, but they wear out quickly if the steel is partially or fully hardened. - What are the best cutting speeds and feed rates for CNC machining 5160 steel?
For carbide, I typically run 150–300 SFM depending on hardness, with a chip load of 0.003″–0.006″ per tooth for roughing. Always start conservative and adjust based on machine load and tool wear. - Should 5160 steel be heat-treated before or after CNC machining?
I prefer doing most of the machining in the annealed state, then heat-treating afterwards. If you need tight tolerances on a hardened part, plan for minimal finishing passes post-heat treatment. - What are the most common CNC machining problems with 5160 steel?
Tool wear, chatter, and heat buildup are the big three. Work hardening can also occur if feeds and speeds are off, or if the tool rubs instead of cutting. - How can I reduce tool wear when machining 5160 steel?
Use high-quality carbide tools, keep your speeds/feeds balanced to avoid excessive heat, and ensure good coolant flow. Also, consider coated tools (TiAlN, AlTiN) to enhance heat dissipation. - Which coolants are best for CNC machining 5160 steel?
A flood coolant with decent lubricity works well. If you can use high-pressure or through-spindle coolant, even better for chip evacuation. - Can I machine 5160 steel with a standard CNC mill or lathe?
Yes, as long as the machine is rigid and has enough horsepower to maintain stable cutting conditions. Even older machines can do it if you’re mindful of limitations. - What surface finishes can be achieved when machining 5160 steel?
You can get a near-mirror finish with the right tooling and finishing passes. For practical uses (like automotive parts), a 32–63 Ra finish is common without needing extensive polishing. - How does heat affect 5160 steel during CNC machining?
Excessive heat can lead to work hardening, tool wear, and dimensional inaccuracies. Proper coolant application and correct speeds/feeds help control heat. - What industries commonly use CNC machining for 5160 steel?
Automotive (springs, brackets), knife-making (blades, blanks), farming equipment (shafts, tines), and even some heavy machinery parts. Anywhere toughness and spring-like properties are essential. - How does CNC machining 5160 steel compare to forging it?
Forging shapes the steel under high heat and can refine the grain structure for added toughness. CNC machining is more about precise dimensional control and repeatability. Sometimes manufacturers do both: forging for initial shape, then machining for final features. - Is water jet or laser cutting better than CNC for 5160 steel?
Water jet or laser can be faster for simple profiles, especially on flat plate. But they don’t replace the accuracy and 3D contouring capabilities you get from CNC milling and CNC turning. - Where can I buy CNC-grade 5160 steel?
Many specialty steel suppliers carry 5160 bars, flats, and plates. Look for material advertised as “annealed” or “normalized” if you plan on extensive machining. - (Bonus) How do I handle warping during machining?
Warping can occur if internal stresses are released unevenly. Sometimes normalizing the stock first helps, or you can do balanced machining (removing material from both sides in stages). - (Bonus) Should I worry about scale or decarb layers on hot-rolled 5160 steel?
Yes, it’s often wise to skim off the outer layer (face milling or light grinding) to remove scale or decarburized material. That layer can be harder or softer than the core, causing inconsistent tool wear.
Other Articles You Might Enjoy
- Mastering D2 Steel CNC Machining: Your Complete Guide
Introduction Overview of D2 Steel and Its Relevance in CNC Machining D2 Steel is a high-carbon, high-chromium tool steel that’s tough as nails and widely loved in the manufacturing world. I’ve seen it pop up everywhere—from knife blades to industrial molds—because of its incredible hardness and wear resistance. When paired with CNC machining, D2 Steel becomes a game-changer for creating precision parts that last. CNC, or Computer Numerical Control, lets us shape this rugged material with accuracy that hand tools can’t touch. For those needing tailored solutions, Custom Machining with D2 Steel offers endless possibilities to meet specific project demands. The result? Flawless CNC machined parts that stand up to the toughest conditions.If you’re searching for "D2 Steel" and how it works with CNC,,you’re in the right place.…
- Steel Type Secrets: Boost Your CNC Machining Today
Introduction: Why Care About Steel Types? I’ve always been curious about how the stuff we use—like car engines or tools—gets made so tough and precise. That’s where CNC machining and…
- A36 Steel: Best Practices for CNC Machining and Cost Control
Introduction Overview of A36 Steel: Material Properties, Composition, and Applications A36 steel has become one of the most widely used materials in the world, and it’s the go-to choice for…
- Comprehensive Guide to High Carbon Steel Properties and CNC Machining Solutions
Introduction When it comes to advanced manufacturing and precision machining, high carbon steel stands out as a critical material in industries such as automotive, aerospace, toolmaking, and industrial machinery. Its remarkable hardness,…
- Decoding Steel Plate Choices: Your Path to Machining Success
Introduction: Steel Plates and Their Role in Machining Success Steel plates are the foundation of modern manufacturing and construction. From towering skyscrapers to precision medical equipment, they play a critical…
- Mastering 440 Stainless Steel Machining: Techniques, Tools, and Applications
Introduction When it comes to machining, 440 stainless steel stands out for its exceptional hardness, wear resistance, and corrosion resistance. These qualities make it indispensable in industries such as aerospace,…
- Iron vs Steel: Decoding Their Strengths for Real-World Needs
What Is Iron and Steel? Their Definitions and Basic Properties Iron and steel are two materials that have shaped human civilization for centuries. Iron, a chemical element (Fe), is one…
- Low carbon steel in CNC machining offers affordable and reliable solutions
Why Low Carbon Steel Is Ideal for CNC Machining Low carbon steel, often referred to as mild steel, is a versatile material favored across industries for its balance between affordability…
- SFM Meaning and Its Importance in CNC Machining for Different Materials
Introduction: What Is SFM and Why Does It Matter in CNC? When I first heard the phrase “sfm meaning” in the context of CNC machining, I remember feeling a bit…