Introduction
A “Brilliant Cut Grinder” has become symbolic of high-end design and precision manufacturing. At a glance, it’s a grinder for herbs, spices, or other plant material that stands out for its engineering sophistication and mirror-like finish. But behind that refined exterior lies a story of advanced CNC Machining processes, carefully chosen materials, tight tolerances, and a strong emphasis on user experience.
I’ve often encountered discussions about the brilliant cut grinder’s sleek rotation and noticeable heft, features that underscore the attention to detail poured into its design. For machinists, engineers, or entrepreneurs interested in replicating or drawing inspiration from this product, understanding the CNC steps is essential. In this guide, I’ll delve into the design elements, machining challenges, finishing treatments, and commercial viability that define a product like the brilliant cut grinder. By the end, you’ll have a clear sense of how CNC Machining drives the performance and allure of these premium grinders, and whether it might be an interesting venture for your own manufacturing or brand-building ambitions.
Chapter 1: The Anatomy of the Brilliant Cut Grinder
The first time I held a brilliant cut grinder in my hand, I immediately noticed two standout qualities: weight and smoothness. Despite being relatively compact, it felt dense and balanced, suggesting high-quality metal and minimal wasted space. When I twisted the top piece, there was zero wobble—just a precise engagement between the lid’s teeth and the lower section. It reminded me of how well-fitted watch components click into place.
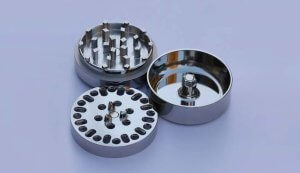
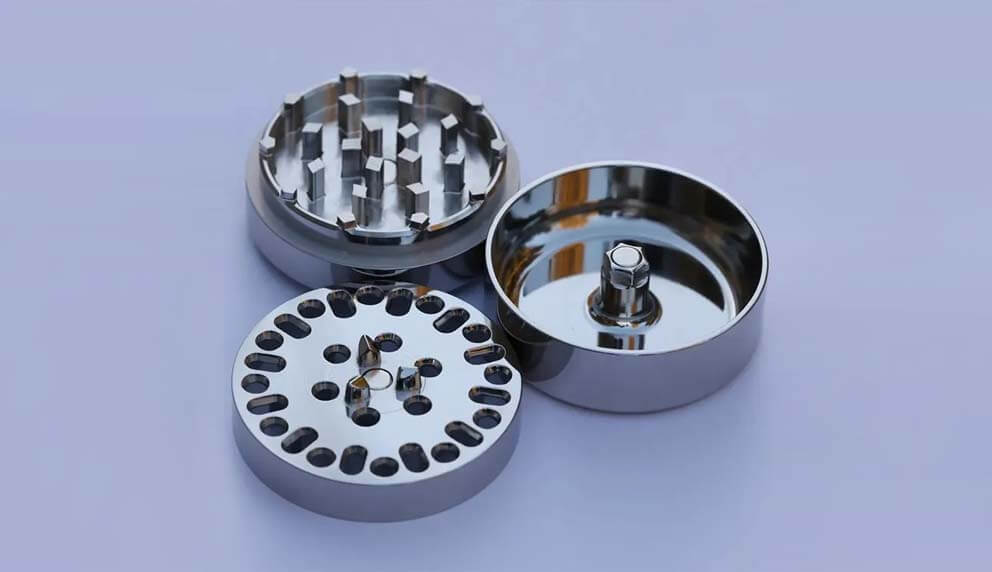
In essence, a brilliant cut grinder usually has:
- Top Section (Lid):
This portion often has precision-milled grooves or teeth, as well as an ergonomic exterior design. I’ve seen versions with gently curved edges or shallow knurling for a better grip. - Middle Ring or Plate (if applicable):
Some designs have a middle section featuring magnets and a ring of well-placed holes. That’s where ground material sifts through. In certain models, it’s combined with the bottom piece. - Bottom Chamber:
Another ring of teeth (aligned with the top) and the receiving area for ground material. In many brilliant cut–style grinders, the bottom section detaches to easily collect the finished product. - Teeth or Cutting Mechanism:
This is what does the actual “grinding.” The geometry can vary widely—some are triangular, others trapezoidal or helically arranged. I’ve personally found that the tooth design significantly affects how smoothly it grinds. - Magnets & Fitting:
Often, a small but strong neodymium magnet is embedded in the center of the lid and bottom piece, ensuring a snap-fit closure. Achieving consistent magnet pockets in CNC Machining demands tight tolerances.
Because each piece must fit seamlessly while withstanding friction, it’s easy to see why CNC Machining stands out as the ideal production method. Milling or turning each section precisely is what generates that signature “brilliant cut”—referring not just to the finish, but the precise way in which the cutting edges align and rotate.
Of course, the product’s design might vary among different brands, but the fundamentals are similar: multi-part assemblies with tight symmetrical geometry, often made from aluminum or stainless steel. In the next chapter, we’ll explore exactly why CNC Machining is central to delivering this level of refinement.
Chapter 2: Why CNC Is the Ideal Manufacturing Process
When I first discovered the brilliant cut grinder, I remember being struck by its symmetrical elegance and ultra-smooth rotation. Thinking about the geometry of those interlocking teeth and the near-flawless finish, I realized that casting or stamping alone wouldn’t achieve that standard of precision. The more I compared it to other grinders, the more apparent it became: CNC Machining is the process that truly unlocks that premium look and feel.
In my experience, creating intricate metal parts that fit together seamlessly calls for high-precision methods. CNC stands for Computer Numerical Control, meaning specialized software drives cutting tools along carefully plotted toolpaths. It’s the combination of digital precision and advanced tooling that allows complex shapes—like tooth patterns, shallow pockets, or magnet bores—to be reproduced exactly. Below, I’ll expand on the key reasons CNC Machining stands out for the brilliant cut grinder design.
2.1. Achieving Tight Tolerances and Perfect Fits
A brilliant cut grinder’s performance depends on how precisely the lid, middle section, and bottom chamber mate together. If there’s too much slack, it feels wobbly. Too little clearance makes it hard to twist open. CNC Machining offers the micro-tolerance control needed for these rotating parts.
I recall a time working on a different product—aluminum rings that had to rotate freely without side play. Our tolerances were around ±0.02 mm. With CNC Machining, we routinely hit those specs. Casting would have required extensive secondary machining to rectify warpage or shrinkage, wasting both time and raw material. By programming the CNC lathe or mill to hold those tight tolerances from the start, we minimized manual fitting or finishing.
For a brilliant cut grinder, the magnet pockets likewise need consistent depth so that magnets align flush. A fraction of a millimeter variance can affect closure strength or produce a rattling effect. With a well-tuned CNC machine, you can replicate the same pocket depth across thousands of units without drift.
2.2. Complex Internal Geometries
Another advantage is the capability to cut complicated internal shapes. A standard herb grinder might have simple angled teeth or pins, but a brilliant cut grinder often features carefully curved, interlocking teeth that maximize contact area while maintaining smooth turning. These intricacies come from multi-axis CNC Machining. I’ve personally seen how creative you can get with endmills and ball-nose cutters, carving out undulating edges that a single-axis or cast mold can’t easily replicate.
Some models also incorporate carefully placed sifting holes or distinct patterns to control how finely the material is ground. Achieving these fluid, multi-level shapes would be tedious with purely manual machining or die casting. CNC toolpaths can integrate these features seamlessly, ensuring uniform geometry from piece to piece. That repeatability is crucial when your brand identity hinges on consistent performance and a uniform user experience.
2.3. Surface Finish and High-End Look
A key selling point of the brilliant cut grinder is its polished or anodized finish, which often feels luxurious compared to budget grinders. CNC Machining helps here in two ways:
- Precision of cut:
Because CNC movements are digitally controlled, there’s less chance of tool chatter or inconsistent feed. This typically yields a smoother surface that requires less post-processing. When finishing steps like bead blasting or buffing are applied, the result is more uniform because you’re starting from a consistent baseline. - Contour milling:
I’ve machined parts where the difference between a “meh” finish and a sleek, reflective surface was the final toolpath strategy. Using the right tooling and speeds can minimize tool marks on curved surfaces. For a grinder, these subtle curves add to the ergonomic feel and the brand’s premium image.
Casting, by contrast, can yield surfaces that demand heavy polishing or secondary machining to achieve a comparable level of refinement. But if you’re going to machine the surfaces anyway, you lose the cost advantage of a casting approach. Hence, going straight to CNC Machining often ends up more direct and predictable for a product like the brilliant cut grinder.
2.4. Material Versatility
CNC Machining supports a wide range of metals. Most brilliant cut grinders are aluminum-based, partly for weight reduction and cost, but some use stainless steel or titanium for an ultra-durable, heavier feel. I’ve observed how different metals can shape user perception—heavier stainless gives a robust sensation, while aluminum feels agile in hand.
By sticking with CNC, you retain the freedom to pivot between these metals without drastically altering your production workflows. The same fixture setups, albeit with adjusted tool speeds and feed rates, handle aluminum or steel fairly interchangeably. This is helpful if you want multiple product lines or offer custom runs to clients seeking different metals. Casting might require entirely different molds or gating systems for each metal, which is cost-prohibitive for niche or short-run variants.
Additionally, if you decide to incorporate partial plastic or polymer elements (maybe a window or special ring), CNC machines can tackle many engineering plastics as well. That kind of flexibility suits iterative design processes or small-batch experiments. If you’re a brand attempting to test new materials, CNC Machining helps reduce upfront tooling investments.
2.5. Batch Sizes and Scalability
A question I’ve heard often is whether a CNC approach suits only small runs or also scales up. Typically, CNC Machining excels in small to medium batches of complex parts. The brilliant cut grinder, being a premium item, tends to sell in moderate volumes compared to mass-market plastic grinders. That fits CNC perfectly: you produce enough to recoup setup costs but avoid overinvesting in specialized casting molds.
However, some brands achieve fairly large volumes in the thousands. In that scenario, CNC is still relevant if each part demands the same tight tolerances and finishing. You can use multi-spindle setups or multiple CNC machines operating in parallel. The cost per part does come down with scale, as programming time and fixture design get amortized across more units. I’ve seen shops dedicate entire machining cells to a single product once demand justifies it.
If you needed tens of thousands or millions of units, then you might reconsider forging or injection molding. But given the design complexity and brand ethos behind brilliant cut grinders, I suspect the sweet spot is moderate to high-value production runs—squarely in CNC territory.
2.6. Repeatability and Brand Consistency
In my view, one of the biggest strengths of CNC is consistent reproducibility. Every lid or bottom ring can be identical to the next. When customers compare two grinders from the same brand, they want them to feel the same. If one had a tighter fit or rattled differently, trust in the brand diminishes.
With CNC’s digital control, once you’ve dialed in the programming, verified tool offsets, and established correct feeds and speeds, you can repeat that success indefinitely, minus normal tool wear. This uniformity is a marketing edge. If your brand claims a “brilliant cut” is part of the identity, you rely on the fact that each piece of metal exiting the machine embodies the same geometry, down to minute details.
Sure, you have to maintain routine calibration. I recall how occasionally, a shift in temperature or a dull endmill could alter part dimensions. But if you keep a robust QA system, you spot these drifts quickly and correct them. In a mold-based process, an unseen flaw in the mold might produce thousands of flawed parts before detection. CNC can be paused, retooled, or adjusted more easily mid-run.
2.7. Lower Tooling Barrier for Niche Products
Another reason CNC Machining is ideal for the brilliant cut grinder is the lower initial tooling barrier. Creating a custom mold or forging die can cost thousands to tens of thousands, justified only by massive production volumes. Meanwhile, CNC requires only the raw material, the fixturing, and the programming. Setting up a new geometry might take days rather than months.
For a specialized product like a brilliant cut grinder, you might not be certain of the market size early on. You can test a small run (hundreds or low thousands) with CNC. If it sells well, ramp up production. If you need to tweak tooth geometry or magnet placement after user feedback, CNC’s re-programmable nature accommodates changes with minimal overhead. This agility fosters innovation and brand differentiation.
In contrast, once a casting mold is made, design changes become expensive. I’ve been part of a project where we scrapped an entire mold because marketing wanted a revised shape. That fiasco reminded me how flexible CNC can be for iterative design: you just adjust the CAD model, regenerate toolpaths, and you’re set.
2.8. Combining CNC Machining with Finishing and Assembly
Creating a market-ready brilliant cut grinder involves more than just metal cutting. You still have to:
- Deburr or round off edges for safe handling
- Apply finishing, such as bead blasting or anodizing for color
- Insert magnets or bearings
- Possibly laser-engrave a logo or scale
A CNC-centered workflow meshes well with these subsequent operations. The same fixture that holds a part for milling can hold it for laser marking, ensuring perfect alignment. Surfaces that require careful finishing can be prepped with minimal manual sanding. This synergy means fewer logistical steps between vendors. If you keep things in-house, it streamlines the process from start to end.
2.9. Personal Reflections on CNC for High-End Grinders
I’ve machined my fair share of consumer product prototypes, noticing how the tangible feel of a precisely milled piece can make or break the brand’s perception. The brilliant cut grinder exemplifies this: it’s not just functional, it’s also a tactile and visual statement. CNC Machining is what births that statement in metal. The reliability, geometry precision, consistent finishing—these are hallmarks of a CNC approach.
Some might ask if simpler methods could suffice. Possibly, but it wouldn’t truly capture the same “brilliant cut” brand identity. Machining lines, material consistency, and the perfect fit are all part of the grinder’s charm. Moreover, CNC’s flexibility to scale from small runs to moderate production volumes means you can keep a personal, boutique vibe while fulfilling enough orders to be profitable.
2.10. Conclusion on Why CNC Is Ideal
CNC Machining matches the needs of a brilliant cut grinder perfectly:
- Tight tolerances for smooth rotation.
- Complex internal geometry for distinctive teeth shapes.
- Superb surface finish for that luxury aesthetic.
- Repeatability for brand consistency.
- Lower tooling overhead for niche or evolving product lines.
These benefits far outweigh potential downsides like higher per-unit cost compared to mass-production methods. Given the product’s high-end positioning, buyers expect premium craftsmanship—something CNC excels at providing. For me, that synergy between design ambition and manufacturing capability is precisely why the brilliant cut grinder thrives as a CNC-manufactured item.
In the next chapter, we’ll break down the CNC process step by step, from raw material selection through to final finishing. If you’re planning to replicate or adapt a grinder design, Chapter 3 will clarify exactly how we transform a block of metal into that polished, tight-fitting final product.
Chapter 3: CNC Machining Process Step-by-Step
To appreciate how a brilliant cut grinder emerges from a simple metal stock, we need to explore the CNC machining workflow in detail. I’ve found that understanding each step helps machinists and designers refine their approach to produce consistent, high-quality parts. Below, I’ll walk through my typical process, from selecting the right blank to finishing and inspection.
3.1. Raw Material Selection and Preparation
The most common material for a brilliant cut grinder is aluminum alloy (often 6061 or 7075). Some premium versions use stainless steel or even titanium. Each choice influences durability, cost, and finishing results. My go-to for a balance of machineability and strength is 6061, especially for prototypes.
- Blank Sizing:
We typically start with round bar stock or extruded rods. When we used 2-inch diameter rods for a certain grinder project, the extruded round shape minimized material waste. - Saw Cutting:
If we’re using bar stock, we cut blanks slightly longer than needed. In my experience, oversizing by a few millimeters ensures we have enough margin for facing and any fixturing. - Deburring and Cleaning:
Pre-deburring edges helps avoid scratches on the machine bed. It may seem small, but it reduces the risk of alignment issues down the line.
3.2. CAM Setup and Toolpath Generation
Once we have our blank, the next big step is programming. We create or import a 3D model into a CAM (Computer-Aided Manufacturing) software like Mastercam, Fusion 360, or NX. The software slices that geometry into toolpaths, telling the CNC machine how to move the cutting tool.
- Part Orientation:
For a typical grinder, we might define separate toolpaths for the top piece, bottom piece, and ring piece. Each might require multiple setups. - Tooth Profiles:
The distinctive grinding teeth present a challenge: they can be curved, angled, or in radial arrays. The CAM software must generate 3D contour toolpaths that track the slope of each tooth face. I recall spending extra time perfecting these angles, as suboptimal toolpaths cause chatter or poor surface finish. - Feeds and Speeds:
Aluminum allows more aggressive cutting. However, to preserve fine detail, we might lower feed rate around the tooth edges or final finishing passes. I prefer multi-axis finishing passes at slower feeds to maintain a refined, consistent surface.
For complex shapes, a 5-axis machine can handle everything in fewer re-clamps. But many shops manage with 3-axis or 4-axis setups, rotating the part strategically. The key is planning each step so there are minimal part flips or re-fixturing.
3.3. Initial Facing and Roughing Operations
Typically, we start with facing operations:
- Face the top of the blank, ensuring a flat reference.
- Rough out bulk material to approach the general shape—removing 70–80% of the surplus. This might involve hogging out the inside cavity if the grinder design has a hollow middle or ring structure.
In my experience, this roughing pass sets the stage. If your roughing is inaccurate, subsequent finishing might remove too little or too much. I also track tool wear here, especially if the design demands a lot of metal removal.
When making multiple parts, we might use specialized fixtures or chuck jaws shaped to the part’s outer diameter. Good fixturing is paramount: any part slippage will ruin the tolerances critical to the brilliant cut grinder’s function. I’ve seen setups with custom aluminum soft jaws, each contoured to hold the part snugly while exposing the top for milling.
3.4. Detail Machining of the Grinder Teeth
The tooth geometry is arguably the core characteristic of the brilliant cut grinder. Achieving those crisp edges and symmetrical layout requires careful tool choice and pathing:
- Ball-Nose End Mills or Tapered End Mills:
Typically used for 3D contouring the sloped or curved surfaces. The radius of the ball-nose helps produce a smooth finish if the step-down is small. - Adaptive Clearing:
Some CAM software strategies like “adaptive clearing” can speed up roughing in the tooth area without excessive plunging. - Final Profiling Passes:
I prefer a slow, precise finishing pass around each tooth’s perimeter to ensure crisp edges and avoid visible step lines. This pass might be at 50–70% of normal feed rates, preventing vibrations.
Inside the grinder ring, clearance must be exact: not so tight that the top piece grinds metal on metal, but tight enough that bits of herb or spices don’t slip into the rotating gap. Maintaining consistent radial spacing between these teeth is crucial for a uniform grinding texture.
3.5. Internal Features: Magnet Pockets, Threads, or Screens
Depending on the design, you might incorporate:
- Magnet pockets:
Typically bored holes with a slight press-fit or glue fit for neodymium magnets. I recall devoting a separate finishing pass just for these pockets, ensuring uniform depth. - Threading (if the design uses a screw-on bottom):
Some grinders omit threads in favor of magnets, but a few designs do use threads. Internal threading in CNC can be done with thread milling or tapping operations. You must confirm the pitch and diameter are correct for a smooth open/close. - Screen or sifting holes:
If the design includes a chamber to catch finer material, many small holes might be patterned around the ring. A well-optimized drilling or helical interpolation routine can handle this quickly. For me, that patterning step is where a parametric CAM setup helps—just define one hole geometry and replicate across a circular pattern, maintaining consistent spacing.
3.6. Workholding and Fixturing Challenges
In multi-axis production, flipping the part multiple times is common. Each reorientation must preserve references so that the finished part remains concentric. Typically:
- First Setup: Machine top exterior, partial interior.
- Second Setup: Flip it, clamp the top, then machine the bottom interior, finishing the magnet pocket or holes.
- Third Setup (if needed): Re-chuck or hold with a custom fixture to finalize any side features or partial engravings.
Poor fixturing can create runout or alignment errors. To maintain a perfect circle, some machinists rely on a “soft jaw” approach, cutting the jaw shape to match the part. This ensures uniform radial pressure. If you see variance in final diameters by a few thousandths from piece to piece, fixturing is the prime suspect.
3.7. Deburring and Polishing
Once the main machining is done, the part edges might be sharp, with small burrs near the teeth or the magnet holes. Light manual deburring or automated finishing is crucial:
- Manual Deburring Tools:
Simple blade-style tools or small rotary burs can knock off the edges. For me, a consistent chamfer pass on the CNC is also common, reducing burr formation. - Polishing:
If the brand expects that brilliant luster, we might do progressive sanding or buffing. For aluminum, an even brush or polish can highlight the micro-lines from CNC, giving it a “machined aesthetic.” Or you can do a fully reflective polish with buffing compounds.
I’ve personally seen how an unpolished part can appear dull, even if the geometry is perfect. Spending time on this finishing step transforms a standard milled piece into a truly premium product.
3.8. Anodizing or Coating
Many brilliant cut grinders are anodized, giving them bold colors or protective coatings. The process typically involves:
- Pre-Anodize Prep:
A mild etch or cleaning to ensure uniform surface. - Anodizing Bath:
Using the correct type (Type II or Type III) for thickness. If you need bright colors, the dye is introduced after anodizing but before sealing. - Sealing:
Locks in the color, improving corrosion resistance.
Anodizing thickness can alter internal diameters slightly, so if your design has super tight clearance, you might offset certain surfaces in the CNC program. In my experience, a typical anodizing layer might be 10–20 microns thick. Enough to matter for a friction-fit or magnet pocket if you didn’t account for it. Alternatively, some advanced grinders might skip color and do a clear or even no anodize, then rely on polishing or brushing for the final look.
3.9. Assembly and Quality Inspection
Once each piece is machined and finished, it’s time for final assembly. The steps might include:
- Installing Magnets:
Press fit or epoxied in place. Must check polar orientation to ensure top and bottom snap. - Final Fit Check:
The lid rotates with minimal friction. No side-to-side slop. - Tactile & Visual Check:
I’ve found it helpful to rotate the parts under bright light, scanning for scratches or dull spots. - Laser Engraving or Branding (if required):
Some shops engrave brand logos or part numbers after assembly or on each separate piece.
Quality control might involve measuring critical diameters with calipers or micrometers, verifying magnet pocket depths with gauge pins, or checking spin friction. If you see any burr or misalignment, a quick rework might salvage that part.
3.10. My Firsthand Tips for CNC Machining This Product
- Design from the Inside Out:
Begin with internal geometry (teeth, pockets) in CAD, then shape the exterior. This approach helps ensure correct wall thickness and symmetrical alignment. - Use Stable Fixturing:
For circular parts, soft jaws or collet chucks keep radial consistency. Magnetic or vacuum fixtures can slip under load unless carefully managed. - Plan Tooling for Sharper Edges:
Those fine tooth edges dull cutters fast. Keep spares or rotate tools frequently. A dull cutter leads to chatter or burrs. - Iterate on Pilot Runs:
One or two test parts reveal issues with fit or finishing. I rarely get the perfect final shape on the very first CNC run. - Account for Post-Processing:
If you plan to bead blast or anodize, remember how those steps can change tolerances. A good rule is to leave an extra 0.01–0.02 mm clearance for any sliding interfaces. - Combine Operations If Possible:
Minimizing re-fixturing reduces tolerance stacking errors. Whenever possible, do multi-axis operations in one setup. - Don’t Underestimate Polishing Time:
That mirror-like brilliance demands either top-tier tool finish or methodical polishing sequences. Factor that into your cost and timeline.
3.11. Conclusion of the CNC Machining Process
Manufacturing a brilliant cut grinder using CNC Machining is a journey that merges creativity with engineering discipline. You start with raw metal rods, carefully remove material to form the signature teeth, pockets, and outer shape, then refine surfaces through a blend of precision toolpaths and finishing steps. At every stage—programming, fixturing, polishing—small decisions contribute to the final product’s ease of rotation, visually striking appearance, and brand prestige.
In the next chapters, we’ll examine finishing techniques like surface roughness control, anodizing, commercial challenges, cost analysis, real-life case studies, and tips for product developers or brand creators. This entire cycle underscores why CNC Machining stands as the best approach for a high-end grinder: it balances custom geometry freedom with strict dimensional control, ultimately delivering the immaculate performance expected by discerning users.
Chapter 4: Surface Finish, Tolerances & Assembly Precision
A high-end brilliant cut grinder stands out not just for its elegant geometry but also for a near-flawless surface finish. When I first encountered such grinders, I noticed how smoothly the lid rotated, how polished the surfaces looked, and how consistently each section snapped together. That level of refinement often results from meticulous CNC Machining steps plus well-planned finishing processes. In this chapter, I’ll explore how manufacturers achieve the grinder’s luxury feel by controlling surface roughness, tolerances, and assembly details.
4.1. Surface Finish Targets and Luxury Aesthetics
Surface finish is the first impression for many consumers. I’ve found that even subtle tool marks can undermine a product meant to represent premium craftsmanship. In the context of a brilliant cut grinder, finishes tend to vary:
- Matte or Brushed: Achieved through light bead blasting or sanding. Creates a subtle, muted sheen.
- Mirror Polish: Time-intensive, employing multiple grits of sanding or buffing until the surface literally reflects like a mirror.
- Anodized Coatings: Can yield vibrant colors or protective layers while maintaining a smooth base.
Balancing these aesthetic considerations with practical functionality is key. A too-slick finish might cause poor grip. A heavily brushed texture might hold onto debris. In my experience, a moderate bead-blast or fine satin finish often hits that sweet spot: refined yet user-friendly.
4.1.1. Polishing vs. Machined Texture
Some makers emphasize the “machined look,” preserving faint spiral or radial tool marks to highlight the CNC Machining heritage. While this appeals to certain buyers, others prefer a more uniform, polished surface. Either route can be valid, but consistency is crucial across production batches.
4.2. Dimensional Tolerances for Rotational Smoothness
The hallmark of a well-made grinder is how smoothly the top and bottom rotate relative to each other. Achieving that requires carefully planned tolerances on diameters, heights, and alignments.
- Radial Clearance: If the outside diameter is off by even a few hundredths of a millimeter, the lid might wobble.
- Axial Alignment: The magnet pockets and teeth must align on the same axis to avoid uneven friction.
- Concentricity: Ensures both the top and middle rings share the same center, critical for a consistent grinding motion.
I recall a project where we tested radial clearance at 0.05 mm total difference. It was enough to ensure free rotation, but not so large that the user felt “slop.” That’s a tight window. With cast or molded parts, shrinkage variations might exceed this. CNC Machining remains the best route for controlling these key tolerances reliably.
4.2.1. Using Datums in Machining
One technique is establishing firm datums on the part—like a central bore—that all other features reference. Each CNC setup references that same bore, so top and bottom align seamlessly when assembled. If you skip a consistent datum approach, you risk cumulative errors that hamper rotation.
4.3. Magnet Placement and Assembly Fit
Most brilliant cut grinders rely on magnets for a secure, snap-on closure. These magnets must seat at consistent depths and orientations:
- Pocket Depth Tolerance: Magnets seated too shallow might protrude, causing scraping. Too deep might weaken the hold.
- Magnet Polarity: If polarity is reversed, the lid repels the base instead of attracting it. Typically, I ensure we label or place magnets carefully to avoid mix-ups.
- Gluing or Press Fit: Some designs rely on a press fit, while others add a droplet of epoxy. Either method demands pockets sized within a few hundredths of a millimeter for consistency.
I’ve occasionally used a specialized fixture to press magnets into place. That fixture prevents over-insertion and helps keep magnets flush. Doing so ensures each grinder top “clicks” uniformly into the base, delivering the brand’s signature snap. That consistent user experience can’t happen without precise CNC-machined pockets.
4.4. Handling the Grinding Teeth Gaps
Teeth do the actual material breakdown. Their alignment and spacing define how fine or coarse the grind becomes. Typically:
- Teeth Height and Shape: Overly tall or steep teeth may require more torque to grind, while shallower teeth might not break material efficiently.
- Radial Spacing: The distance between teeth influences how the product passes through. Some designs have radial grooves that feed material into the center.
- Clearance at the Outer Diameter: The outer ring shouldn’t trap material excessively, so the clearance to the lid is carefully determined.
In my own efforts, adjusting tooth geometry by even a fraction of a millimeter changed the grind consistency drastically. CNC Machining allows repeated iteration of tooth design. Some brands have performed a dozen prototypes, each with varied tooth shapes, before landing on a final geometry that’s smooth yet effective.
4.5. Minimizing Burrs and Sharp Edges
Excessive burrs or sharp corners can ruin a user’s first impression. Burrs can also trap debris, hamper rotation, or cut unsuspecting fingers. So finishing steps, whether manual deburring or automatic tumbling, are essential:
- Small Chamfers: We often program a light chamfer pass around the edges. This preemptive measure removes the “knife edge” effect that arises from milling.
- Vibratory Tumbling / Barrel Finishing: For large runs, tumbling can simultaneously deburr many parts. However, I caution that it might slightly round off the crisp tooth edges if not closely monitored.
- Hand Deburring or Polishing: Perfect for low-volume or complex areas that automated processes can’t easily reach. Skilled operators typically do this under magnification to avoid flattening critical edges.
4.6. Ensuring Concentric Rotation and Minimal Axial Wobble
When the user twists the grinder’s top, it should rotate smoothly on its axis. Achieving that “perfect spin” is partly about tolerances, partly about the finishing steps that remove friction points.
Key points:
- Diameter Control: If either the inner or outer diameter is off, the rotation feels lopsided.
- Axial Alignment: We want the center of each piece to coincide. One approach is to machine each piece in a single setup if possible, so references remain consistent.
- Preventing Binding: If surfaces are too tight or if anodizing thickness wasn’t accounted for, the user might feel grinding of metal on metal.
I remember testing a set of finished grinders. Some tops turned too snugly—turns out we added an anodize layer that closed the radial gap from 0.05 mm to maybe 0.03 mm, causing slight friction. We had to tweak the CAM model to offset a bit for that finishing layer on the second batch. That’s how sensitive these tolerances can be.
4.7. Real-World Table of Common Tolerances and Finishes
Below is a table reflecting typical dimensional tolerances and surface finish parameters I’ve seen for brilliant cut grinders. These are approximate—actual specs vary by brand or shop preference.
| Feature | Typical Tolerance | Surface Finish Goal | Notes |
|---|---|---|---|
| Outer Diameter (Lid/Base) | ±0.02 mm | ~Ra 0.4–1.0 µm | Ensures consistent snap fit |
| Tooth Height | ±0.05 mm | ~Ra 0.8–1.2 µm | Affects grinding efficiency |
| Magnet Pocket Depth | ±0.02 mm | ~Ra 0.8–1.2 µm | Critical for magnet flush mount |
| Overall Part Thickness | ±0.03 mm | ~Ra 0.6–1.0 µm | Relates to final weight & balance |
| Concentricity (Between Lids) | 0.03 mm TIR or better | – | Maintains smooth rotation |
| Anodized Thickness (Aluminum) | 10–20 microns typical | Smooth coloration | Must offset in CAM if very precise |
| Chamfers/Edge Breaks | ~0.1–0.2 mm wide | ~Ra 1.0 µm (after finishing) | Minimizes burrs, ensures safe edges |
| Top-Bottom Fit Clearance | 0.03–0.05 mm radial total | N/A | Enough to prevent binding |
(“TIR” means Total Indicator Runout.)
In my shop, we treat these specs as a baseline. Some clients tighten or loosen them depending on cost and priority. If you see a brand marketing “ultra-precision,” they might push those tolerances even tighter, but that raises costs considerably.
4.8. Assembly Logic: The Final Touch
After machining and finishing, each piece is carefully assembled. At this stage:
- Magnet Insertion: Often done with a press or light adhesive. We confirm polarity with a simple magnet orientation jig—one slip and you get repelling lids.
- Rotation Check: The lid is placed on the base, tested for smooth rotation. We note if friction points exist.
- Teeth Alignment: We examine if the top teeth mesh well with bottom teeth, ensuring uniform material grinding.
- Visual Inspection: Under good lighting, we look for surface blemishes or missed burrs. Some shops use a 10x loupe to confirm the final cosmetic standard.
A brand that invests in careful final checks fosters a user experience that’s nearly frictionless. Achieving that consistent closeness is tricky but definitely feasible with a methodical approach.
4.9. My Personal Experience with Tolerances and Assembly
I’ve worked on similar rotating products—though not always grinders—and it’s fascinating how small details become so important. I remember a run of parts where the anodizing process caused slight thickness variations, leading to inconsistent friction among the units. Some were perfect, while others felt tight. We rechecked each step:
- The CNC toolpaths were correct.
- The raw measurements pre-anodizing were within 0.02 mm.
- Then came a reality check: the anodizing line might deposit up to 20 microns more or less if the parts hung differently in the tank or if solution agitation varied.
We learned to factor in a slightly bigger radial gap. That small tweak overcame the variable deposit thickness. The lesson reaffirmed that a brilliant cut grinder’s success isn’t about just CNC alone, but how finishing processes integrate with machining specs.
4.10. Conclusion of Chapter 4
Surface finish, tight tolerances, and precise assembly define the brilliant cut grinder’s luxurious appeal. While CNC Machining forms the foundation for dimensional accuracy, the finishing steps—be it polishing, anodizing, or careful edge deburring—complete the product’s transformation into a premium accessory. Achieving that perfect snap, silky rotation, and refined exterior demands synchronization between design, machining, finishing, and final assembly checks.
In the next chapter, we’ll address typical obstacles shops face when manufacturing these grinders at scale, plus some best practices for tackling gear-like teeth, complex fixturing, and advanced finishing techniques. If you’re hoping to produce a similar high-end grinder or any rotating part with demanding fits, Chapter 5 will provide valuable solutions and cautionary tales.
Chapter 5: Common Challenges & How to Overcome Them
Producing a brilliant cut grinder with CNC Machining can be rewarding, but it’s rarely straightforward. Between fixturing a round part, cutting intricate tooth patterns, and finishing each piece to a consistent standard, there are plenty of hurdles. I’ve seen shops, including my own, stumble over issues like tool chatter, poor anodizing coverage, or magnet misalignment. This chapter compiles the common pitfalls and the best ways to mitigate them.
5.1. Fixturing Round Parts with Complex Geometries
One of the earliest headaches is workholding. A grinder top is round, with curved internal features. Basic v-blocks or generic jaws may not secure it reliably.
- Soft Jaws:
Often, we machine custom aluminum jaws that conform to the outer diameter. This ensures radial clamping without deforming the part. - Collet Chucks:
Ideal for smaller diameters if the shape is sufficiently cylindrical. The collet provides uniform pressure, minimizing runout. - Specialty Fixtures:
Some shops create ring-shaped fixtures that press the part from inside or clamp the outside with an expanding or contracting mechanism. This approach can provide full 360-degree support, reducing risk of tilt or slip.
Whichever route you pick, documenting consistent clamping pressure is key. If one operator tightens a chuck more aggressively, you might see subtle distortions in final dimensions. In my own shop, I’ve seen how just a few foot-pounds difference can shift the outer diameter by 0.01 mm—enough to cause a grinder lid to lose that perfect spin.
5.2. Cutting Sharp Teeth Without Excessive Tool Wear
The tooth geometry typically calls for pointed or angled edges. Abrupt changes in cross-section can break or dull smaller endmills quickly. A few strategies I rely on:
- Use High-Quality Carbide Cutters:
Cheaper HSS endmills might struggle with repeated sharp corners. Carbide’s edge integrity is better for extended runs. - Program Sharp Corner “Rest” Toolpaths:
Some CAM systems let you define a “rest machining” approach that uses a smaller tool only where necessary. This spares the main roughing tool from doing high-stress corners. - Manage Tool Engagement:
Shallow step-downs or slower feed rates around tooth tips can preserve the cutter. If I see tool chatter or excessive burrs, it’s a sign my speeds or chip load is too high for that geometry.
Additionally, consider that some shops design the tooth geometry with slight radii at the tips, so it’s not a razor-sharp corner. That radius extends tool life and still yields a smooth grind.
5.3. Vibration and Chatter Control
Thin-walled rings or extended overhangs can vibrate under cutting forces, leading to chatter marks, poor surface finish, or dimensional inaccuracy.
Mitigation steps:
- Reduce Tool Stickout:
A shorter endmill is stiffer. Minimizing overhang reduces chatter drastically. - Optimize Speeds and Feeds:
If chatter arises, adjusting spindle speed or feed rate to avoid a harmonic sweet spot helps. - Use Damping Fixtures:
Rubber pads or specialized damping solutions in the fixture can help absorb vibrational energy. - Radial Chip Thinning:
Some advanced CAM toolpaths maintain a constant chip load, so the tool never fully engages corners. This can keep cutting forces stable.
I recall a batch of stainless steel grinder parts that chattered heavily. Switching to a “dynamic milling” or “adaptive clearing” approach cleared material more smoothly, and we added a second fixture support ring to limit vibrations. That resolved 90% of the issue.
5.4. Multi-Setup Consistency
Because the grinder typically requires multiple reorientations—machining top surfaces, flipping for underside, rotating for side features—each shift is a chance for alignment error.
Best practices:
- Datums and Probing:
Some shops adopt an automated probing routine after each setup, re-zeroing coordinates precisely. This ensures no cumulative offset creeps in. - Use Shared Reference Features:
If you can machine an alignment groove or pilot hole in the first setup, that aids in fixture alignment for subsequent steps. - Record Offsets:
Maintain consistent fixture offset logs. If you remove a fixture from the machine and reinstall it, the zero might be off unless you re-indicate or have a pinned location system.
5.5. Anodizing Inconsistencies
Anodized surfaces can be uneven if the part geometry has pockets or tight corners. I’ve seen color variations where deeper recesses or tooth valleys are less exposed to anodizing solution. Common solutions:
- Pre-Anodize Polishing:
Minimizes microscopic scratches that can cause color irregularities. - Racking & Positioning:
The orientation of the part in the bath matters. For example, if tooth edges block solution flow, you might get thin coverage. - Batch Consistency:
Using the same line, same time, same temperature to ensure color uniformity across all parts in one run.
I’ve also encountered “anodize burn” if the electrical current is too high or the part is racked poorly, resulting in blotchy discoloration near certain corners. Thorough communication with your anodizing provider helps reduce these issues.
5.6. Magnet Orientation Errors
A surprisingly common pitfall is reversing magnets so that the lid and base repel each other. Prevent this by:
- Marking Polarity:
We sometimes label magnets with a dot on the North face. The CNC operator or assembly worker references a sample orientation jig to ensure correct insertion. - Press-Fit Tolerances:
If the pocket is too tight, magnets might crack during insertion. A slight epoxy-based approach is more forgiving, but requires consistent adhesive amounts. - Testing Each Unit:
Quick rotate checks ensure the top properly snaps onto the bottom.
5.7. Costly Rework from Small Design Changes
If you rely on CNC Machining, it’s tempting to tweak tooth angles or chamfer sizes mid-production. But each design alteration can force retooling or reprogramming, adding cost. My advice:
- Prototype Thoroughly:
Use one or two test batches to finalize geometry. - Lock the Design:
For production runs, ensure marketing or brand managers are fully on board. - Maintain Version Control:
Keep old CAM files clearly archived in case you revert to a prior design.
Frequent changes in an ongoing production run lead to confusion about which version is current, risking inconsistent inventory.
5.8. Maintaining Consistency Over Larger Runs
The brilliant cut grinder often sells as a premium item. If you begin making hundreds or thousands, scaling the same level of detail can be challenging. From what I’ve encountered:
- Tool Life Tracking:
Each endmill or drill bit can handle a certain number of parts before dulling. If a shop doesn’t track that, part #101 might differ from part #1. - Routine Fixture Checks:
A well-used fixture might accumulate dust, swarf, or minute changes in clamp pressure. Regular cleaning or verifying fixture alignment ensures repeatability. - Cycle Time vs. Quality Trade-off:
As volume grows, shops might be tempted to speed up machining. But that can degrade surface finish or produce more burrs. Striking a consistent approach is key.
5.9. Additional Table: Common Problems & Proposed Solutions
Below is a table summarizing typical issues that arise when CNC Machining a brilliant cut grinder, along with straightforward fixes.
| Problem | Likely Cause | Proposed Solution |
|---|---|---|
| Lid Wobbles / Slop | Excessive radial clearance | Reduce final OD clearance by 0.02 mm, recheck CAM |
| Grind Action Feels “Crunchy” | Burrs or tool marks on teeth | Add final finishing pass, thorough deburring |
| Magnets Not Snapping | Improper pocket depth or polarity | Standardize magnet orientation jig, refine pocket tolerance |
| Uneven Anodized Color | Poor bath circulation or racking | Adjust racking angles, ensure uniform solution flow |
| Chatter Rings / Visible Tool Marks | Insufficient fixture rigidity, mismatch speeds/feeds | Use dynamic milling, stable fixturing, fine finishing passes |
| Overheating Tools | Aggressive chip load, poor coolant | Reduce feed, add coolant. Use better tool coatings |
| Threaded Bottom Binding | Thread pitch or minor diameter mismatch | Re-check thread milling strategy, confirm real pitch |
| Inconsistent Fit in Final Assembly | Variation in fixture setup between runs | Use pinned fixture references, re-probe offsets daily |
| Polished Edges Still Sharp | Insufficient edge break or final buffing | Program small chamfer pass or manual deburr steps |
| Warping or Deformation | Excessive clamping force / heat buildup | Lower clamp pressure, slower feed to reduce heat |
5.10. My Personal Lessons on Quality Control
I’ve found that consistent QA checks at each production phase yield the best results. For instance:
- After Roughing: Quick dimension check ensures major diameters are correct before further refining.
- Post-Finishing: Inspect surfaces for tool lines or burrs while it’s still on the fixture.
- Final Dimensional: Check magnet pocket depths, overall height, plus random ring-lid assembly tests.
That structure catches mistakes early, so rework is less expensive and you don’t pass flaws to the next phase. Checking just at the end might force you to scrap an entire batch.
5.11. Conclusion of Chapter 5
Manufacturing a brilliant cut grinder using CNC Machining inevitably presents unique engineering and production challenges. From fixturing a round part with intricate tooth geometry to controlling anodizing thickness or magnet polarity, a host of potential pitfalls await. However, with the right approach—well-designed fixtures, careful toolpath planning, robust QA, and finishing steps—shops can replicate the polished, high-precision standard that defines this premium product category.
In subsequent chapters, we’ll explore cost analysis, the commercial feasibility for shops that might want to offer this service, real-world examples from a grinder case study, and tips for product developers or brand creators looking to stand out in a competitive market.
Chapter 6: Cost, Scalability & Commercial Feasibility
A brilliant cut grinder may look small, but the resources involved in producing it with CNC Machining can be significant. It’s one thing to craft a handful of prototypes—it’s another to manufacture these grinders consistently, at scale, without losing the premium edge. Having participated in multiple product ventures, I’ve learned that cost, production volume, and brand positioning are all closely intertwined. This chapter dives into the economics behind manufacturing a brilliant cut grinder, how shops might manage scaling, and whether this product is truly viable as a commercial offering.
6.1. Breaking Down the Cost Factors
Costs for a brilliant cut grinder don’t just stem from raw materials or machining hours—there’s also design, finishing, assembly, quality control, and potential marketing overhead.
- Raw Material:
Most commonly, aluminum bar stock is used. The price of aluminum can vary with market conditions, but generally, a bar large enough for a single grinder lid/body might cost only a couple of dollars in low volumes. Stainless steel or titanium push that raw material cost higher. - Machine Time:
CNC Machining is the primary expense if the geometry is complex. Cycle times for top and bottom pieces can add up if you do multiple setups and slow finishing passes.- Roughing and finishing each piece might take 10–20 minutes, or more if your feed rates are conservative.
- If your machine shop charges a standard rate, such as $60–$120 per hour of CNC time, that cost quickly adds up.
- Tooling & Consumables:
Smaller endmills for the teeth edges might wear down quickly, especially in stainless or titanium. Replacing or sharpening tools is a recurring cost. - Finishing & Surface Treatments:
Anodizing costs can be a few dollars per part in moderate volumes, more for custom colors or thicker Type III coatings. Polishing or bead blasting also adds labor, which could be $1–$3 per part if done at scale, but more if done individually by hand. - Assembly & Magnets:
Magnets might cost about $0.30–$0.80 each, depending on their size and strength. Adhesives or press-fit processes also require labor. Checking alignment in assembly consumes time too. - Packaging & Branding Materials:
If you want to deliver a premium unboxing experience, nice packaging might cost another $1–$3 per unit, plus the design overhead.
In my experience, each of these line items can be optimized. Larger volume orders reduce the per-part cost of raw materials and anodizing. However, the product’s complexity sets a minimum baseline—there’s only so much you can cut corners without undermining quality.
6.2. Batch Size vs. Unit Cost
A brilliant cut grinder is typically pitched as a high-end product, so it doesn’t aim for mass-market volumes in the tens of thousands monthly. But some scale is still necessary to justify certain overheads.
- Prototype/Small Batches (1–50 units):
Perfect for brand-new designs or pilot runs. The cost per unit can be quite high because CNC setup, programming, and fixturing are amortized over a small batch. You might pay $50–$100 in direct machining cost per piece, plus finishing. - Medium Batches (100–1,000 units):
This range is often the sweet spot for premium grinders. The fixture design cost is spread more thinly. Anodizing services might give you bulk discounts. You could see machining costs drop to $15–$30 per piece, plus perhaps $5–$10 for finishing and assembly. - Larger Batches (1,000+ units):
At this scale, you can consider dedicating a CNC cell exclusively to these parts, further driving down the per-unit cost. If your brand can sell them consistently, the overhead is justified.
I’ve seen shops produce small batches initially, test the market, then ramp up if demand grows. The ability to scale is precisely where CNC’s digital approach helps. Once you dial in the program and fixture, you can replicate it as many times as needed, maybe with multiple machines running in parallel.
6.3. Man-Hours and Automation
Man-hours also influence cost. Each piece might need:
- Loading and unloading from the CNC.
- Manual deburring or final polishing.
- Magnet insertion and functional checks.
If you handle every step manually, the labor can be substantial. On the other hand, partial automation is possible. I recall a small shop that used robotic arms to load and unload bar stock for repeated lathe operations, cutting the labor time in half. However, that requires capital investment.
For finishing, some might use vibratory finishing or tumblers for the initial deburr pass, automating a chunk of the polishing. But a brilliant cut grinder often needs a more refined final polish or at least a uniform bead-blast and anodize. At moderate volumes, a skilled operator might handle hundreds of units per day, but it still adds a labor cost.
6.4. Business Models: OEM vs. In-House Brand
If you’re a CNC Machining shop considering making your own line of brilliant cut–style grinders, you face a choice:
- OEM / Private Label Manufacturing:
- You produce grinders for another brand or client. They handle marketing, distribution, brand identity.
- You earn a stable manufacturing margin but rarely see direct brand recognition or retail profit.
- In-House / Proprietary Brand:
- You create your own brand, handle marketing, e-commerce, distribution.
- Potentially higher profit margins per unit, but you must invest in brand-building, packaging, and after-sales service.
From what I’ve seen, entering the consumer product space can be profitable if you have the marketing channels or a strong brand concept. But it’s also more complicated than typical B2B CNC orders. You’ll need to handle design, inventory, possible returns, or warranty claims. If you just want a consistent manufacturing job, offering OEM services might be simpler.
6.5. Price Positioning & Market Expectations
High-end grinders often sell at $75–$150 or more, reflecting the product’s metal build, premium finish, and brand prestige. A CNC shop might find that the product’s typical retail price is significantly above standard plastic grinders. Because CNC Machining is costly, you need that high retail margin to justify the manufacturing expense.
For example, if your direct manufacturing cost is $25–$35 per unit in moderate runs, you might sell them wholesale at $50–$70, giving your brand or retailer a decent margin. In direct-to-consumer (D2C) e-commerce, you could set $80–$120 as a final price, depending on perceived brand value. Some niche brands even exceed $150 if the design includes advanced finishes or unique metals like titanium.
In my experience, consumers in the herbal or coffee grinder market are willing to pay extra for smooth operation, durability, and aesthetic touches. The “brilliant cut” name itself conveys exclusivity. However, if your final product lacks that intangible sense of luxury, commanding premium prices is harder.
6.6. Scalability: From Small Batches to Ongoing Production
CNC Machining scales more linearly than, say, injection molding. You don’t need new molds for higher volumes. Instead, you might:
- Add more CNC Machines:
If your shop gets consistent monthly orders, dedicating a machine or two to grinder production keeps throughput high. - Optimize Toolpaths & Fixturing:
Iterating your CAM strategy might drop cycle times by 20–30%. - Refine Finishing Steps:
Automate deburring or create specialized jig stations for final checks.
One challenge is forecasting demand. If you overproduce, you hold expensive inventory. If you underproduce, you risk stockouts and lose sales. The fact that these grinders are relatively small and sold at a premium does help offset storage costs. I’ve seen brand owners keep modest inventory levels and run “just in time” machining once they see a surge in orders.
6.7. Finding a Profitable Niche
At first glance, you might ask: “Why focus on something as niche as a brilliant cut grinder?” But from my perspective, that’s precisely the appeal. The weed accessory and specialty herb sector is booming, with consumers willing to pay more for high-quality, long-lasting gear.
Key Differentiators could include:
- Material Variants: Offering aluminum, stainless, or even brass versions.
- Custom Engravings: Personalized logos or user monograms.
- Unique Tooth Patterns: Each brand might claim a “signature grind” geometry.
- Color Customization: Anodizing in a spectrum of bright hues or two-tone finishes.
By combining CNC Machining with creative design, your brand can carve out a distinct space. Because few shops can replicate these tolerances and finishing, your product remains somewhat exclusive.
6.8. Potential Collaboration Paths
If you’re a CNC operator or small shop, you might:
- Partner with a Lifestyle Brand:
They handle marketing, you handle manufacturing. You produce consistent batches and enjoy stable orders. - Launch Your Own E-Commerce Store:
This requires marketing savvy, but you can keep more profit. - Offer White-Label Production:
Client gives you design specs or branding needs, you produce under their label.
I recall a colleague who specialized in CNC machining precision accessories for multiple lifestyle brands. That model worked well: the brand took care of distribution and promotions, while the shop’s stable monthly production fed each brand’s inventory pipeline. This approach can create loyal, long-term relationships if you consistently deliver.
6.9. Managing Risk & Inventory
One lesson I’ve learned: stock can tie up capital. If a design doesn’t sell as expected, you might hold thousands in unsold grinders. Conversely, if you’re purely an OEM for a brand that pre-pays or sets up a contract, you mitigate that risk.
Best Practices:
- Small Initial Runs: Validate the design in the market, gather feedback, fix minor flaws, then scale.
- Flexible Production Scheduling: Don’t tie up all your CNC capacity in a single product if it’s not guaranteed. Keep room for other profitable jobs.
- Clear Payment Terms: If you’re manufacturing for a brand, specify partial deposits or purchase orders that cover your raw material costs.
For me, diversifying services has always been safer. One specialized product can yield strong margins, but relying on it entirely can be risky if trends shift or a competitor emerges.
6.10. Table: Approximate Unit Cost Breakdown Example
Below is an illustrative breakdown for a run of 500 aluminum grinders, each parted into top, bottom, middle ring. All figures are hypothetical but aligned with real-world ballparks I’ve encountered.
| Cost Element | Est. Cost per Unit | Notes |
|---|---|---|
| Aluminum Material | $2.00 | 6061 rod, moderate market price |
| CNC Machining (Labor + Machine Time) | $15.00 | Multi-setup, ~15-20 min cycle total |
| Tool Wear & Consumables | $1.50 | Endmills, drills, cutting fluid |
| Deburring & Polishing | $1.50 | Manual or slight automated finishing |
| Anodizing | $2.00 | Standard color, medium batch size |
| Assembly (Magnets, inspection) | $2.00 | Magnets $0.50 + labor, final Q.A. |
| Packaging & Branding | $1.00 | Basic box, label, instructions |
| Overhead & Margin | $3.00 | Shop overhead, yield loss, small markup |
| Total Unit Cost | $28.00 | – |
In this scenario, if you retail them at $80–$120, you’ve got a workable margin, factoring in distribution or retailer cuts. A smaller batch of 100 might raise the per-unit machining cost to $25, pushing total above $35–$40. That’s still feasible if your brand positioning supports a higher retail price.
6.11. Is the Brilliant Cut Grinder a Good CNC Product?
In my opinion, yes, if:
- You can consistently maintain the dimensional precision and finishing that customers expect.
- You embrace smaller but more profitable runs—this is not a mass commodity item.
- You handle or partner for the marketing side, or at least secure stable OEM clients.
For purely cost-driven markets, injection-molded plastic grinders will always be cheaper. But that’s not the point. The brilliant cut grinder thrives on exclusivity, craftsmanship, and the mechanical satisfaction of a frictionless spin. CNC Machining is the only route that realistically delivers that brand promise in moderate volumes.
6.12. Conclusion of Chapter 6
Cost, scalability, and brand identity all converge in the brilliant cut grinder market. CNC Machining underpins the product’s high-end aura, but it carries certain expenses. Nonetheless, the alignment of fairly small production batches, premium pricing, and the product’s mechanical intricacies make CNC an ideal manufacturing solution. By carefully managing overhead, adopting efficient toolpaths, and ensuring robust finishing, shops can craft these grinders profitably. The key is balancing volumes to recoup setup costs and forging a brand story that justifies the final retail price.
Next, in Chapter 7, we’ll shift focus to materials, customization, and branding options—highlighting how different metals, color finishes, and logos can shape the identity of a brilliant cut grinder design.
Chapter 7: Materials, Customization & Branding Options
Producing a brilliant cut grinder via CNC Machining involves more than simply choosing aluminum. The metals used, surface finishes applied, and the branding or personalization each add unique character. If your goal is to stand out in a crowded accessory market, offering a range of color treatments, metal alloys, and custom engravings can drive consumer interest. This chapter covers the ways you can differentiate the final product, from metal selection and advanced coatings to the brand identity that ties it all together.
7.1. Aluminum, Stainless, Brass, or Titanium?
Aluminum remains the default for most brilliant cut grinders due to its cost, machinability, and corrosion resistance. But some brands differentiate themselves by exploring other alloys:
- Stainless Steel: Heavier, adding a robust feel some users love. More wear-resistant, though also costlier to machine.
- Brass: Ideal for decorative appeal and solid weight. Brass’s golden hue can be eye-catching, but it’s prone to tarnish unless sealed or polished regularly.
- Titanium: Extremely strong and lightweight, but also difficult to machine. Yields a high-end, nearly indestructible grinder that can command a premium price tag.
In my experience, each material influences not only the look but also the “hand feel.” If your brand wants the user to sense heft and durability, stainless or brass might be a strategic choice. If you value a light, agile grinder for everyday portability, anodized aluminum stays the best option.
7.2. Anodizing and Color Palettes
A hallmark of many brilliant cut grinders is their vibrant color selection, achieved through anodizing. This electrochemical process forms a protective oxide layer on aluminum, which can then be dyed. Typical color choices include black, silver, red, blue, green, and purple. I’ve even seen multi-color or fade effects for special editions.
Key considerations:
- Uniformity: If your geometry has deep pockets, those areas might end up slightly darker or lighter if the current density or solution flow differs.
- Wear Resistance: Hard anodizing (Type III) yields a thicker, more scratch-resistant coating, but sometimes with a duller color palette.
- Surface Prep: A polished base produces a glossier anodized finish; a bead-blasted base yields a matte result.
I recall how controlling the micro-surface finish prior to anodizing often prevented splotches or streaks. Consistency is crucial if you’re branding these as premium. Customers expect each color batch to match the marketing photos closely.
7.3. Laser Engraving, Logos, and Personalization
Branding a brilliant cut grinder often involves subtle or bold logos. Laser engraving is a common technique that’s easy to incorporate after machining and anodizing.
- Placement: Usually, top or side of the lid. But some place small logos on the inside as a surprise detail.
- Depth vs. Marking: A light laser mark just removes the anodized surface, revealing raw aluminum beneath. For deeper engravings, you might specify multiple passes.
- Custom Orders: Some shops let customers upload their own artwork, turning the grinder into a personalized gift.
If you’re offering custom designs at scale, be sure to automate the process. I’ve handled small runs where each item had a unique monogram. By connecting a laser marking system to a digital order database, we minimized manual data entry errors.
7.4. Surface Textures and Patterns
Rather than a plain matte or glossy finish, you can incorporate patterns:
- Knurling:
Machined ridges around the perimeter for grip. This is especially helpful if the user wants extra traction. - Micro-Engraved Patterns:
Some brands lightly engrave geometric or swirling designs onto flat surfaces. - 3D Textures:
Using advanced 3D toolpaths, you can create wave-like textures that stand out visually.
I’ve seen a brand produce a “diamond pattern” on the top for grip, plus a swirling side pattern purely for aesthetics. Each extra step increases machining time, but can elevate the product’s uniqueness in a competitive marketplace.
7.5. Alternate Metals: Brass, Bronze, Copper, and Exotic Alloys
If you want to appeal to connoisseurs or collectors, offering a limited run of less common alloys can spark interest. Brass adds a warm gold tone, acquiring a natural patina over time. Bronze can shift color similarly. Copper is visually striking but can corrode or leave greenish residue on hands, so it’s less common.
Titanium is an exotic upgrade that drastically ups cost but signals a near-indestructible piece. Machining titanium is tough, requiring slow feeds to avoid tool breakage, so the price per piece might double or triple. For small runs, though, this exclusivity can pay off if your brand cultivates a high-end image.
7.6. Creating Limited Editions and Seasonal Drops
Scarcity marketing often works well in lifestyle products like a brilliant cut grinder:
- Seasonal Colors:
Releasing unique anodized shades (e.g. “Sunset Orange”) or patterned finishes for the holidays. - Collaborations:
Partner with an artist or influencer to design a special laser-engraved pattern. - Numbered Editions:
Laser etch a unique serial number, capitalizing on collector mentality.
I’ve seen such limited runs sell out quickly, reinforcing brand loyalty. From a CNC Machining standpoint, it’s easy to do short bursts of custom finishing once you have the base geometry locked. Over time, these special editions can build brand buzz and drive consistent revenue streams.
7.7. Table: Common Materials & Branding Variations
Below is a table summarizing metals, finishing choices, and typical branding approaches used in brilliant cut grinders:
| Metal | Common Finish | Branding Methods | Unique Selling Point | Cost Level |
|---|---|---|---|---|
| Aluminum | Anodized (colored), polished, bead-blasted | Laser-engraved logo or text | Lightweight, wide color range | $ – $$ |
| Stainless Steel | Polished, brushed, black oxide | Etched logo, subtle marking | Heavy, durable, premium feel | $$ – $$$ |
| Brass | Natural polish or lacquer | Deep laser engraving or stamped logos | Vintage look, can tarnish over time | $$ |
| Titanium | Stonewashed, bead-blasted | Engraving (complex patterns) | Ultra-light yet strong, exclusive | $$$ |
| Copper | Clear coat or patina finish | Light laser marking only | Eye-catching color, patina effect | $$ |
7.8. Personalizing Mechanicals: Tooth Patterns, Magnetic Force, etc.
Customization doesn’t stop at cosmetics. If you’re establishing a new brand or producing for a client, you can fine-tune mechanical aspects:
- Tooth Count and Shape:
A certain tooth geometry might produce a coarser grind. Others produce a fluffy, fine grind. By adjusting height, angles, or spacing, you define your signature “cut.” - Magnet Strength:
Some prefer stronger magnets so the lid never pops off accidentally. Others want moderate force for easier opening. Changing the magnet grade (N35 vs N52, for instance) or adjusting pocket depth modifies this. - Ring/Hole Patterns:
If a sifting ring is included, the diameter and number of holes influences how quickly material passes through. This can be another brand differentiator—like “fast throughput for big batches” vs. “ultra-fine sifting.”
7.9. Positioning the Brand Image
In lifestyle products, brand story matters. If you’re highlighting CNC Machining, you might emphasize:
- Precision Engineering:
Machined from a single block, minimal tolerance, micro-finish. - Sustainability:
Durable metal alternatives to disposable plastic. Possibly incorporating recycled aluminum or local suppliers. - Artisanal Aesthetic:
Despite being CNC, it can still feel “crafted” if finishing is done carefully by hand.
Marketing language like “precision milled to tolerances under two-thousandths of an inch” helps non-technical buyers appreciate the difference from cheap grinders. I’ve seen websites hosting short CNC shop videos to visually reinforce this point—makes potential customers realize they’re buying more than just a “metal chunk.”
7.10. Potential Pitfalls in Customization
Be cautious: every added personalization step can complicate the process. If you offer 10 colors plus 5 tooth variations plus optional branding, you’re effectively multiplying your stock-keeping units (SKUs). This can strain inventory management and escalate costs. Overly broad customization can also bloat lead times if your CNC workflows must keep switching programs.
Tips:
- Start with Core Variants: For instance, 2–3 popular colors, 1 standard tooth shape.
- Limited “Signature” Runs: If you want to test an experimental tooth design or color, produce a small batch.
- Batch your operations: Group the same color or mechanical variant in the same production window to minimize retooling or anodizing line changes.
7.11. My Experience with Branding Partnerships
I recall collaborating with a local influencer brand wanting a run of 300 aluminum grinders. They insisted on a unique tooth shape and a teal-to-lavender anodizing fade. We warned them about potential color transitions being inconsistent across large surfaces. Despite the risk, we tried a gradient dye approach. The final results varied somewhat, but the brand spun that into “unique color patterns,” marketing each grinder as one-of-a-kind. They sold out quickly and built hype for a second run.
That taught me how unpredictability in advanced finishing can become a “feature” if pitched correctly. Still, it’s crucial to set realistic buyer expectations so they don’t feel disappointed if no two units look 100% identical.
7.12. Merging CNC Machining with Laser or 3D Printing?
While the main product is usually machined metal, occasionally you can incorporate 3D-printed polymer inserts or decorative elements. If a brand wants a translucent or colored plastic window, you could create an inlay that snaps into a CNC-machined groove. This merges the metal’s sturdiness with a playful flair. Laser cutting might also shape thin decorative plates or cling to the underside of the grinder’s lid. These multi-material designs can broaden your product line beyond standard all-metal builds.
7.13. Conclusion of Chapter 7
Selecting the right metal, designing unique tooth patterns, and offering creative finishing are the keys to building a distinctive brand around a brilliant cut grinder. By leveraging CNC Machining for fundamental geometry, you gain the freedom to pivot quickly among color variants, special engravings, or alternative alloys. This synergy of engineering precision and artistic customization often resonates with buyers seeking a premium product that merges function and style.
In the next chapters, we’ll explore real-world case studies of shops that turned CNC machining of grinders into a viable business line, plus examine how shops might decide if adding this product to their service offerings is truly worthwhile. Finally, we’ll share best practices for product developers or brand creators eager to design or source their own brilliant cut–type grinders.
Chapter 8: Case Study – How a Shop Made a Brilliant Cut-Style Grinder
To demonstrate how CNC Machining brings a brilliant cut grinder to life, it helps to see a real or hypothetical case study of a shop that decided to produce these grinders. I’ve worked in machine shops where we tackled similar rotating consumer products, so I’ll base this story on that experience. We’ll follow the process from initial concept to final shipment, detailing the steps, challenges, and solutions that shaped a successful outcome.
8.1. Project Kickoff: Client Inquiry & Feasibility
It started when a niche lifestyle brand approached the shop, saying they wanted a premium grinder with a “brilliant cut” aesthetic. They had some sketches—rough 3D models—showing a three-piece design with symmetrical, curved teeth and a magnet-based snap fit. The brand insisted on a flawless anodized finish, plus a laser-engraved logo on top.
Steps:
- Initial CAD Review
The brand’s CAD files had inconsistent fillet radii on the tooth edges, which could hamper uniform grinding. My shop’s engineers proposed standardizing the radii and adding small chamfers to reduce burr formation. - Material Choice
We recommended 6061 aluminum for a balance of machinability, strength, and cost. The brand considered 7075 for extra hardness, but 6061 was adequate. - Cost Estimate
Based on an anticipated run of 500 units, we quoted a per-unit machining fee plus finishing (anodizing) and laser marking. The brand accepted the ballpark figure, seeing it aligned with their premium retail pricing plan.
At this point, we knew we’d rely heavily on multi-setup CNC Machining—one to shape the top piece, one for the mid ring, and another for the bottom piece.
8.2. Fixture Design & Programming
One of the first real tasks was creating jigs and fixture solutions to secure round blanks. We also began drafting CAM toolpaths:
- Soft Jaw Approach
We decided to clamp each blank in custom-made aluminum jaws that matched the part’s outer diameter. That minimized runout and allowed us to machine each blank from top to bottom. - CAM Toolpaths
- Roughing: We used adaptive clearing for large material removal, leaving 0.2 mm stock around critical surfaces.
- Semi-Finish & Finish Passes: For the tooth geometry, ball-nose endmills with a small step-down gave a near-polished look.
- Magnet Pocket: Programmed a precise boring tool to hold ±0.02 mm tolerance in depth and diameter.
- Rotation Checking
Our engineers tested a small pilot run (5 sets) using prototype fixturing. We discovered slight chatter around the tooth tips, so we slowed feed rate by about 20% in those localized zones.
Takeaway: Investing time in fixture design and carefully orchestrating toolpaths drastically reduced rework. Some shops might skip that stage, but we saw how crucial it was to nailing the grinder’s signature “brilliant cut” finish.
8.3. Making the First Batch of Parts
With the fixture and CAM strategy dialed in, we launched the first batch of 50 sets. Each set had:
- Top Lid
- Middle Plate (with sifting holes)
- Bottom Chamber
For each sub-part, we did:
- Setup 1: Face the top, machine outer profile, create magnet pocket.
- Flip: Clamp from outside, machine inner teeth, remove internal material, do finishing passes.
- Deburr: Quick pass to remove any major burrs.
Cycle Times
- The lid took ~15 minutes, the ring ~12 minutes, and the bottom ~15 minutes, including flipping and finishing. Over 50 sets, that’s quite a few machine hours. We ran multiple parts in parallel on two CNC machines to expedite it.
Interim QA
We measured diameters after each setup with micrometers and verified pocket depths with a depth gauge. About 10% of the pieces needed minor rework, usually around burrs or magnet holes slightly overshooting. Our tolerance approach kept us from scrapping entire parts.
8.4. Surface Finishing & Anodizing
Once raw machining finished, we grouped parts by type:
- Bead Blasting
For a uniform matte base, we lightly bead blasted each part. We had to be careful not to over-blast the tooth edges, risking rounding them too much. - Anodizing
- The brand chose black, red, and a special teal color.
- We separated the parts into color batches. Each batch hung on racks inside the anodizing bath. We reminded the anodizing team to check coverage inside tooth areas.
- Color Consistency Check
After anodizing, we discovered about 5% had slight color banding. Possibly the racking angle or solution flow caused uneven thickness. We sorted those as “B-grade,” offered a discount, or reprocessed them if feasible.
Magnets Inserted
We then installed magnets in the lid and bottom. We used a small arbor press, ensuring correct polarity. Each magnet pocket had a tolerance of ±0.02 mm, so magnets pressed flush. A dab of industrial-grade epoxy prevented them from loosening. This step had to be done after anodizing to avoid potential damage to magnets in the acid bath.
8.5. Laser Engraving the Brand Logo
Finally, the brand’s logo—a stylized script—was laser-etched on top of each lid:
- Fixturing
We used the same custom jaws in our laser station. By referencing the part’s center with a simple pointer, we aligned the logo perfectly. - Laser Settings
The best results came from a fiber laser with moderate power, enough to ablate the anodized layer and reveal a bright silver text. Overly strong settings might burn the underlying aluminum or cause color distortion.
At that point, each grinder set was nearly complete. We bagged them in dust-free pouches to avoid post-laser smudges. A final rotation test ensured lids turned smoothly, magnets snapped properly, and color matched the brand’s standard.
8.6. Packaging and Shipping
The brand had custom boxes printed. We inserted foam cutouts so the lid, ring, and bottom piece fit snugly. Some shipments included a small brush or manual. Because we had set a production window of four weeks for 50 sets, we managed to finish on schedule—just over three weeks. That buffer let us handle reworks or retakes on the anodizing step.
Cost Observations
- We discovered each set cost roughly $30–$35 in direct labor and materials at that scale, plus overhead.
- The brand planned to retail them at $100–$130, comfortably covering margin.
8.7. Lessons Learned from the Shop’s Perspective
- Prototype Thoroughly:
Our pilot run of 5 sets revealed issues in tooth pathing and bead blast coverage. That small test saved us from large-scale errors. - Watch the Anodizing Step:
Color uniformity, especially in tight corners, can be tricky. We ended up refining racking angles after the first batch. - Small Tweaks in Fixture:
We had to revise the fixture once to reduce clamping pressure. Over-tightening caused minor distortions. - Assembly Time:
Installing magnets and checking polarity took longer than we expected. We eventually built a magnet orientation jig to standardize the process. - Communication with the Client:
The brand frequently asked for small design changes mid-run (like slightly deeper teeth). We recommended finishing the batch first, then applying changes to the next run. This avoided mixing versions.
8.8. Overall Outcome
By the end, the brand was satisfied with the crisp teeth, the color variety, and especially the “snap” from the magnets. Their marketing campaign emphasized “precision CNC machining” as a badge of quality. Feedback from their customers was positive, praising the smoothness and the luxurious feel.
At a production volume of 50 sets, it wasn’t a huge profit driver for the shop, but it served as an impressive portfolio piece, demonstrating advanced finishing. Later, the brand scaled up to 200–300 sets in subsequent batches, improving the shop’s throughput efficiency. That’s where we saw better margins—once the fixture and process were dialed in, we could produce more units faster, lowering the per-unit cost.
Conclusion: This case study underlines how a machine shop overcame challenges in fixturing, finishing, and assembly to produce a brilliant cut–style grinder. By focusing on consistent CNC programming, robust QA, and thoughtful finishing, they delivered a product worthy of the premium label.
Chapter 9: Should You Offer This As a CNC Machining Service?
After seeing how complex CNC Machining a brilliant cut grinder can be, shops might wonder if it’s worth adding to their service lineup. It’s undeniably a niche product, bridging the lifestyle accessory market and precision manufacturing. Yet, for the right machine shop or brand, producing these grinders can be both profitable and reputation-boosting. In this chapter, we’ll weigh the pros and cons, from revenue streams and brand exposure to the operational demands you’ll face.
9.1. Potential Benefits for CNC Shops
- Higher Margins on Premium Products
Unlike commodity parts, brilliant cut grinders command a higher retail price, letting shops charge accordingly for precision. If you’re tired of cut-throat pricing on standard brackets or fittings, a unique product line can break that cycle. - Showcase of Advanced Capabilities
The fact that you can produce intricate tooth geometry, near-mirror finishing, and tight fits shows potential clients you’re skilled at complex milling. If you share photos or samples, it can impress other prospective customers (e.g., aerospace or medical). - Diversification
Relying solely on large industrial contracts can be risky. Offering a consumer-facing item, even if it’s done as OEM for a brand, diversifies your portfolio. You might develop in-house design variations too, capturing direct retail profit.
I recall one small CNC shop that pivoted to making premium metal accessories like pens and grinders. That pivot helped them survive an economic downturn when automotive orders slowed. They found a new audience and discovered synergy between mainstream CNC projects and specialized boutique products.
9.2. Challenges: Why Some Shops Might Refrain
- Low to Medium Volume
If you’re used to large production runs, the scale of 100–500 grinders per batch might not fill your machines enough. Idle time or partial scheduling could hamper your efficiency. - High Finishing Expectations
Achieving a perfect finish is time-consuming. If your shop primarily does rough industrial parts, you’ll need new finishing workflows, possibly new equipment or partnerships with finishing houses. - Potentially Steep Learning Curve
Programming complicated tooth geometry or dealing with magnet pockets might require advanced CAM knowledge. Additionally, managing color consistency in anodizing can be an iterative process. - Branding & Inventory
If you plan to launch your own brand, you assume marketing costs and inventory risks. That’s not every shop’s forte.
9.3. Evaluating Profit Potential
Despite the complexities, many shops find brilliant cut grinders financially appealing. Let’s assume:
- A moderate batch size of 200 units
- Material: 6061 aluminum rods
- Machining time: 25 minutes total per grinder set (lid, ring, base)
- Anodizing, finishing, packaging integrated
If your shop cost is around $25–$35 per set (including overhead), a brand might pay $50–$70 each for OEM supply, netting decent profit margins after factoring in labor, tool wear, and administrative overhead. This margin can improve if you standardize steps or scale up. True profits also come from refining the cycle time. Shops that invest in better toolpaths or automation might cut cycle time to under 20 minutes, increasing throughput.
I recall a scenario where we shaved 5 minutes per set by optimizing fixture changes. Over 200 units, that saved nearly 1,000 minutes—over 16 hours of CNC run time freed for other jobs or additional grinder sets. Those efficiency gains quickly accumulate as volume grows.
9.4. Building a Niche Reputation
In the CNC machining landscape, being known as “the shop that mastered high-end grinders” can open the door to similarly intricate consumer products—think beverage openers, mechanical pens, or special watch parts. The brilliant cut grinder is a conversation starter, especially at trade shows or in marketing materials. People see the fine detail, the color anodizing, and the tight rotation, instantly recognizing craftsmanship.
If you’re focusing on OEM, you might quietly produce grinders for multiple brands. That approach yields consistent orders if their marketing is strong. The risk is that you remain behind-the-scenes, with no direct brand recognition. But if your shop is comfortable with that arrangement and fosters trust, it can become the “go-to” partner for any brand seeking advanced metal accessories.
9.5. Technical Requirements to Assess Before Offering
- Multi-Axis CAM Skills:
The tooth geometry demands advanced 3D contour strategies. If your programming staff is new to 3D surfaces or tight tolerance pockets, invest in training or software add-ons. - Finishing Capabilities:
Do you have an in-house bead blaster, vibratory polisher, or the ability to partner with an anodizing facility that handles color consistently? Without stable finishing solutions, you risk frequent color rejections or inconsistent texture. - Quality Assurance & Traceability:
If you produce multiple color variants or custom logos, you’ll need robust labeling and a QA system. This ensures the correct color or design goes to the correct batch. - Fixture Innovation:
Round parts with symmetrical features require specialized fixturing, either soft jaws or possibly collet chucks. You must be prepared to design or machine these fixtures. - Assembly Workflow:
Magnets, final snap checks, possibly adding screens or brand tags—these steps require a mini assembly line. You should have enough staff or time to handle that post-machining phase effectively.
9.6. Table: Pros & Cons for a CNC Shop Entering the Grinder Market
| Factor | Pros | Cons |
|---|---|---|
| Profit Margin | Premium product => higher margin potential | Low volume => overhead might not amortize easily |
| Brand Reputation | Demonstrates advanced CNC + finishing capabilities | Must meet high consumer aesthetics, more QA complexity |
| Equipment Requirements | Normal CNC mills/lathes suffice with good fixturing | Possibly need advanced 3D CAM, specialized finishing gear |
| Finishing & Assembly | Value-adding steps justify premium pricing | More manual labor steps, from magnet insertion to polishing |
| Competition | Fewer shops offer such a specialized item | Hard to break into brand-driven market if overshadowed by known names |
| Long-Term Relationship Potential | Repeat OEM orders from various lifestyle brands | Maintaining color consistency & brand demands can be demanding |
| Risk Profile | Potentially stable niche if brand & marketing align | Inventory or design changes can cause cost overruns |
9.7. Marketing and Outreach
If you decide to promote the brilliant cut grinder as part of your CNC services, marketing channels might include:
- Your Portfolio or Website
Show high-resolution photos or short videos of the machining process or final product. Focus on the rotating smoothness or the glittery anodized surfaces. - Social Media / Maker Communities
People on platforms like Reddit or Instagram who appreciate mechanical craftsmanship could be prime leads for small brand collaborations. - Exhibiting at Trade Shows
Displaying these grinders at a booth can impress visitors with tangible examples of your capabilities. Keep a few samples for them to handle.
Sharing behind-the-scenes glimpses of CNC machines cutting the distinctive grinder teeth can help convey the artistry. A short time-lapse of finishing or magnet insertion can highlight the “premium, handcrafted with advanced technology” vibe.
9.8. Balancing Core CNC Work and Grinder Production
One practical worry: dedicating machine capacity to an in-house product might take resources away from your usual B2B orders. You’ll need to carefully schedule production runs so that if a big industrial client requests urgent parts, you can pivot. Some shops solve this by:
- Setting Dedicated Production Windows: e.g., every Thursday, the machine runs grinder parts. The rest of the week is for B2B jobs.
- Outsource Certain Steps: If your internal finishing capacity is limited, you might rely on an external polishing or anodizing facility. This keeps your CNC machines free for continuous cutting.
9.9. Overall Recommendation
If you see a synergy between your existing CNC workflows and the creation of premium metal accessories, offering a brilliant cut grinder service can be worthwhile. The product’s geometry and finishing demands align well with multi-axis milling or turning. It’s an opportunity to carve out a niche in the lifestyle market or partner with smaller brands that prefer a local, high-quality machine shop. That said, you do need to invest in fixturing, finishing strategies, and a consistent QA pipeline.
Those who do it right can enjoy the satisfaction of producing a truly refined, consumer-facing product that showcases your shop’s mastery of CNC Machining. As we’ll see in the upcoming chapter, it also requires a certain mindset if you’re a product developer or brand builder hoping to launch your own grinder line: design, marketing, cost forecasting, and packaging all come into play.
9.10. Conclusion of Chapter 9
Deciding whether to produce a brilliant cut grinder as part of your CNC service boils down to assessing volume potential, your finishing resources, and the brand’s demand for a high-end look. The stable margin and brand synergy might be quite appealing, especially if you’re seeking a signature product to highlight your advanced machining capabilities. On the other hand, it can also be a specialized lane that demands more manual finishing and brand-savvy marketing. Done well, it’s an eye-catching testament to what precision CNC can achieve, forging profitable and enduring partnerships in the premium accessory market.
FAQ
- What is a brilliant cut grinder, and how does it differ from standard grinders?
A brilliant cut grinder typically has precisely milled metal parts, a smooth rotation, tight fitting, and high-end finishing—differentiating it from mass-produced plastic or cast-metal grinders. - Why is CNC machining preferred over casting or molding for these grinders?
CNC provides tighter tolerances, smoother finishes, and flexible design iteration. Casting often demands heavy secondary machining to achieve the same precision. - Which metals are commonly used for a brilliant cut grinder?
Aluminum (6061, 7075) is most common. Stainless steel, brass, or titanium are also used for premium versions, albeit at higher cost. - How important is the tooth geometry?
Extremely. Tooth shape determines grind consistency, user torque, and smooth operation. Subtle changes in angle or spacing can radically alter the grind. - What tolerances should I expect or specify?
Lid and base diameters might hold ±0.02 mm, ensuring minimal wobble. Magnet pocket depths typically ±0.02 mm for consistent snap fit. - Can I produce these in small volumes without huge costs?
Yes, but the cost per piece will be higher due to CNC setup and finishing overhead. Some brands start with 50–100 units as a pilot run. - Is anodizing mandatory?
Not necessarily, but it offers color, corrosion protection, and brand differentiation. Polished or bead-blasted metal is also an option. - How do magnets get installed without polarity errors?
Manufacturers use orientation jigs or label magnets. Press-fitting or light epoxy secures them. A single reversed magnet can ruin a whole batch’s functionality. - What if I want stainless steel or titanium versions?
Machining times and tool wear go up, so expect higher costs. They do offer a heavier, more durable, or more exclusive product. - Is 3D printing an option for prototypes?
Possibly. Metal 3D printing can model tooth geometry, but finishing and post-processing might be extensive. Many prefer CNC for final production. - How do I ensure color consistency across multiple anodized batches?
Work with a reliable anodizing partner, specify consistent racking and solution parameters, and accept minor variations as part of the “hand-finished” aesthetic. - Do I need a multi-axis CNC machine, or is 3-axis enough?
Many shops use 3-axis with multiple setups. Multi-axis can reduce fixturing complexity but isn’t strictly mandatory if you plan carefully. - What are typical lead times for 100–200 pieces?
Usually 4–6 weeks, factoring in raw material procurement, CNC scheduling, finishing, and final inspection. This can vary by location and shop workload. - Is the grinder market saturated, or can new brands compete?
It’s competitive, but new angles—unique materials, artistic finishes, or marketing to specialized niches—can carve out a following. - How can I keep costs down while preserving quality?
Simplify geometry, reduce color variations, avoid extreme tooth complexity, and negotiate bulk finishing deals. If volumes rise, you’ll see efficiency gains. - Are magnets always needed, or can threads suffice?
Some prefer threaded caps, but magnets typically offer quicker access and a premium snap feel. It’s a design choice. - Does a brilliant cut grinder require specialized packaging?
High-end customers often expect a premium unboxing. Simple foam inserts or a well-branded box can reinforce that. It adds cost but can boost perceived value. - What QA checks do shops run before shipping?
They’ll test lid rotation, magnet engagement, dimensional tolerances (with micrometers or CMM), color uniformity if anodized, and final assembly for burrs. - Can I collaborate with a shop for a partial service only, like just the tooth section?
Typically, yes. Some shops will produce the main CNC portion while you handle final assembly or finishing externally. - How do I handle user feedback or returns if I’m the brand owner?
Have a plan for repairs or magnet replacements. If you maintain a relationship with your CNC partner, you can address part reworks swiftly.
References & Additional Reading
To deepen your knowledge about brilliant cut grinder manufacturing and CNC Machining, here are some reputable sources and websites:
- MachinistGuides.com – Comprehensive articles on CNC processes, fixturing, and finishing best practices:
https://www.machinistguides.com - Practical Machinist Forum – Real-world machinists discussing advanced milling, lathe tips, and finishing techniques:
https://www.practicalmachinist.com - GrindersForLife.com – A known brand recognized for their high-end CNC’d brilliant cut grinder, providing product features and user experiences:
https://grindersforlife.com - Metal Finishing Magazine – Articles on anodizing, polishing, and advanced finishing solutions for aluminum and steel:
https://www.metalfinishing.com - ManufacturingTomorrow – News and insights on emerging manufacturing tech, including multi-axis CNC and additive processes:
https://www.manufacturingtomorrow.com
By exploring these references, you’ll gain deeper insights into material selection, CNC best practices, finishing methods, and real brand examples that shape the brilliant cut grinder market.
Other Articles You Might Enjoy
- Bench Grinder Uses In CNC Shop Should Know:Complete Guide for Operators and Engineers
I’m thrilled to share my in-depth perspective on the many ways a Bench Grinder can transform life in a CNC shop. I’ve been in manufacturing for years, and I’ve seen…
- Grinder Types And Operation Tips: Explained for Surface, Cylindrical, and CNC Use
What is a Grinder? When I first started working in precision machining, I remember feeling a bit overwhelmed by all the different types of machines. One machine that particularly stood…
- Machining Techniques for Parts: Unlocking CNC and Cutting-Edge Tech
I. Introduction I remember the first time I realized how critical machining is to modern manufacturing. I was interning at a small shop, watching a CNC machine carve intricate features…
- Stainless Steel Fasteners: What Designers and CNC Machinists Must Know
Why Stainless Steel Fasteners Matter in CNC Applications As someone who has spent significant time around CNC machines and designing mechanical assemblies, I've learned one critical truth: the smallest parts…
- Brass Punch Machining Guide: Materials, Techniques, and Best Practices
I’m excited to share my comprehensive guide on brass punch machining. I’ve spent years working with different CNC setups, trying various alloys, and optimizing cutting parameters. In this guide, I’ll…
- The Growing Demand for Custom Fasteners: How to Manufacture and Source Specialized Components
Hello, and welcome to my comprehensive guide on fasteners. I’ve spent a significant part of my career working with manufacturers, design engineers, and machining experts who rely on fasteners in…
- Powder Coating Cost Calculator Guide: Estimating Jobs by Size, Shape, and Volume
Introduction: Why Accurate Powder Coating Cost Estimation Matters When I first started exploring powder coating as an option for metal finishing, I underestimated how important accurate cost estimation really was.…
- The Growing Demand for Custom Fasteners: How to Manufacture and Source Specialized Components
Hello, and welcome to my comprehensive guide on fasteners. I’ve spent a significant part of my career working with manufacturers, design engineers, and machining experts who rely on fasteners in…
- How Wire Brushed Finish Complements CNC Machining for Superior Surface
CNC machining has revolutionized the manufacturing industry by enabling the precise production of complex parts. However, even with the advanced capabilities of CNC machines, the surface quality of the final…