Chapter I:Introduction
I want to start by sharing how I first realized the power of CNC-cut acrylic signs.
I was working with a small retail client who wanted eye-catching store signage without spending a fortune on metal letters or neon.We tried standard plastic letters, but they lacked the modern appeal we aimed for.Eventually, we discovered acrylic signs.When I saw the crystal-clear edges and the professional finish, I knew this was a game-changer.
Acrylic signs combine sleek looks with solid durability.They can be cut into any shape or size, and they offer a crisp, modern feel.You can often see them in office lobbies, retail displays, event stages, and even wedding backdrops.
But manual methods—like hand cutting or scoring—only go so far if you want to maintain perfect edges and consistent shapes.That’s why many fabricators rely on CNC machining.
CNC technology drives a spindle or router along precise paths defined by digital design files.
By following these computer-controlled instructions, the machine produces smooth cuts and consistent dimensions.Whether you’re creating large-format acrylic signs for a trade show or small nameplates for your boutique, CNC cutting ensures accuracy every time.
My first impression when I watched CNC milling on acrylic was one of awe.
The bit whirled at high speed, carving out letters and shapes with minimal haze at the edges.
With the right feed rate and tool selection, the edges emerged almost polished.
But how do we get from a simple acrylic sheet to a professional sign displayed in a store or an event venue?
That’s exactly what I’ll detail in this guide.
Why Acrylic Signs?
Acrylic signs stand out for many reasons.
They’re lightweight yet rigid, so they’re easy to mount.
They’re moisture-resistant, so they don’t warp or degrade like wood in humid conditions.
They also come in transparent, frosted, or colored varieties, giving you endless design possibilities.
Whether you need a minimalist nameplate or a decorative layered sign with LED backlighting, acrylic can handle it.
I’ve seen acrylic signs for product displays in pop-up shops, for brand walls in co-working spaces, and for directional signage at weddings.
Whenever you need a combination of clarity, color vibrancy, and professional appeal, acrylic is the go-to solution.
Why CNC for Acrylic Signs?
Cutting acrylic by hand can lead to rough edges, cracks, or inconsistent shapes.
Laser cutting, meanwhile, provides smooth edges but sometimes leaves behind heat marks or discoloration.
CNC routing is a balanced approach—especially if you control the speed, use an optimal bit, and maintain proper cooling.
You get polished edges, precise shapes, and uniform repetition.
It’s ideal if you’re mass-producing signage for multiple retail locations or if you’re working on detailed event signage with intricate logos or script lettering.
When we produce acrylic signs with CNC, we can also add drilled holes, countersinks, or engraved elements within one setup.
That flexibility lets you incorporate stand-offs or mounting hardware seamlessly.
We can even create 3D signage by stacking multiple acrylic layers, each precisely cut.
What This Guide Covers
Over the next chapters, I’ll break down the entire process of making CNC-cut acrylic signs.
First, I’ll highlight the advantages of using CNC.
Then, I’ll walk through different acrylic materials, from extruded to cast, along with typical thickness choices.
We’ll dive into the CNC production process step by step, exploring how to prepare design files, set up your machine, and handle finishing tasks.
Later, I’ll explain common retail and event uses for acrylic signs, including brand logos, directional signs, special event décor, and more.
We’ll talk design considerations like font size, spacing, and color coordination.
I’ll also share some real-world case studies, based on my own experiences and client projects, to show how businesses and event planners implement CNC acrylic signs effectively.
Finally, I’ll detail how you can commission custom acrylic signs, what to expect in terms of cost or lead times, and how to choose the right CNC partner if you’re outsourcing.
This should help if you’re a store owner, an event planner, a designer, or anyone else looking to turn your vision into a tangible sign.
Who Should Read This
If you’re in retail, you might want a fresh look for your product displays or a distinctive sign for your storefront window.
If you handle event design, you may crave unique acrylic name boards or stage backdrops.
If you’re a marketing team member, you could be seeking a stylish office logo.
And if you’re a CNC operator, you might be curious how to tailor your machine settings for acrylic.
In all these cases, the steps and tips here aim to streamline your process and spark ideas.
I’ve personally navigated the intricacies of picking the right acrylic, calibrating the spindle speeds, and refining post-processing techniques like flame polishing.
Throughout this guide, I’ll interject personal insights, so you can avoid pitfalls that I’ve seen in real shops.
Key Terms to Keep in Mind
- Acrylic Signs: The star of our show, referencing signage made from acrylic sheets.
- CNC: Computer Numerical Control, used to precisely cut or engrave materials.
- Router Bits / End Mills: The tools that carve into acrylic.
- Polishing / Finishing: Steps to make edges clean and glossy.
- Mounting / Hardware: The final puzzle piece, ensuring your sign is displayed securely.
With that said, let’s jump into the heart of CNC acrylic signs.
We’ll start with a closer look at the unique advantages that CNC brings to the table.
From crisp edges to repeat orders, you’ll see why so many professionals choose CNC for acrylic signs.
Chapter II: Advantages of CNC-Cut Acrylic Signs
I still remember the first time I compared a CNC-cut acrylic sign to one shaped by hand.
The CNC version had perfectly smooth edges, uniform letter spacing, and consistent thickness across each character.
In contrast, the hand-cut sign showed slight wobbles and uneven angles.
That’s when I realized: if we want professional acrylic signs, a CNC machine offers major perks.
Let’s look at specific reasons why CNC matters.
While there are alternative methods—like laser cutting or manual scoring—CNC stands out for precision, repeatability, and customization.
I’ve seen these benefits firsthand, whether I’m producing a single nameplate or hundreds of identical acrylic signs.
1. High Precision and Consistency
One key advantage of CNC is its ability to follow exact coordinates.
When we load a design file (often in DXF or AI format), the CNC router or milling machine reads each path precisely.I’ve watched it trace curves and corners on acrylic signs within fractions of a millimeter.
Because it follows the digital toolpath, you can produce multiple identical copies without variance.
In retail or event scenarios, brand identity matters.Logos need consistent shapes and spacing.CNC ensures the same size and proportion every time.When you’re doing multiple store rollouts or event sign packages, that uniformity is a big plus.
2. Clean, Polished Edges
I’ve met clients who worry about rough edges on acrylic signs.
They’ve seen cheap signage with cracks, chips, or burrs.
Manual cutting can leave a ragged finish, requiring extra sanding.
Laser cutting sometimes leaves a heat-induced discoloration or slight surface residue.
CNC routing, however, can achieve near-polished edges right off the machine, assuming we use the right bit, feed rate, and spindle speed.
For me, one of the biggest “wow” factors in CNC acrylic signs is how professional those edges look.
If I want an ultra-polished look, I might flame-polish them afterward or do a quick buff.
But even without those steps, CNC-based cuts can appear crisp.
That clarity helps when signs use translucent or transparent acrylic, revealing edges that become part of the design.
3. Versatile Thickness and Shapes
Acrylic signs can range from 1/8-inch thickness for delicate lettering up to 1-inch thick for bold, stand-off letters.
CNC machines can handle all these thicknesses with the correct tooling.
When I have a thicker piece, I just adjust the pass depth and ensure stable clamping.
For fancy shapes, like curved corners or cut-out script fonts, the CNC’s multi-axis control is invaluable.
I recall a wedding planner who requested layered acrylic signs with intricate floral silhouettes.
We stacked multiple acrylic sheets to create a 3D effect, each layer having unique cutouts.
A CNC machine tackled those shapes precisely, giving a sense of depth and elegance.
Trying that by hand would be incredibly tedious and error-prone.
4. Engraving and Drilling in One Setup
Another advantage is the ability to do more than just cut outlines.
CNC can also drill mounting holes or even engrave patterns into the acrylic’s surface.
That’s perfect for events where we want custom text etched into a sign, or for retail displays requiring holes for standoffs or screws.
I’ve done projects where we switched from a cutting end mill to an engraving bit mid-process, all on the same machine.
Being able to handle these tasks in a single setup reduces labor.
There’s no need to switch machines or realign the material.
I just program separate toolpaths.
The CNC workflow is efficient, especially when we’re working with large sheets or multiple acrylic signs.
5. Repeat Orders Become Easier
When you design a set of acrylic signs for a client, you might not realize they’ll reorder more in a few months.
But if you save your CNC files, reproducing those signs is straightforward.
I’ve encountered many clients who later expanded their chain of stores or changed the date on an event but kept the same sign format.
With the digital files on hand, we simply reload them, place fresh acrylic, and run the job again.
That consistency in reorders means less guesswork and faster turnaround.
6. Reduced Material Waste
Because CNC follows defined toolpaths, there’s less wasted acrylic compared to guesswork or manual cutting.
We can nest shapes on a sheet, maximizing yield.
I used to create rough prototypes with leftover scraps, too.
If I optimize the nesting software, I can fit multiple signs or sign components on a single sheet, reducing cost.
Clients appreciate the savings, and I appreciate minimizing material waste.
7. Scalability for Large Projects
Retail and event signage sometimes needs to scale quickly.
A single brand might want signage in 50 store windows, or an event planner might need hundreds of acrylic name tags.
With CNC, we can scale.
Once we finalize a design, we run the machine as many times as needed.
If the machine is large, we can place bigger sheets and cut multiple pieces in one pass.
There’s minimal risk of shape drift or human error.
I’ve known shops that run the same acrylic sign design overnight in auto mode, churning out high volumes with consistent quality.
8. Combination with Digital Printing
CNC cutting also integrates well with printed elements.
We can print graphics on acrylic (direct UV printing or vinyl) and then CNC-cut the outer contour.
That’s handy for marketing signage or brand visuals.
I saw one campaign that used vibrant UV prints on a translucent acrylic panel, then cut a stylized shape.
The result was an eye-catching sign that matched the brand’s color palette exactly.
The precision of CNC ensured the cut boundary aligned perfectly with the printed area.
9. Enhanced Professionalism and Perceived Value
Consumers and event attendees often judge a brand by the little details, such as signage quality.
CNC-cut acrylic signs have that polished, high-end vibe.
They reflect light nicely.
They appear more permanent than flimsy posters or paper cutouts.
That sense of quality can elevate a retail store’s atmosphere or an event’s ambiance.
I’ve heard positive feedback from clients who claim the acrylic signs “made” the space feel professional.
Data Table: Comparing Cutting Methods for Acrylic Signs
Below is a table comparing three main cutting methods: Manual, Laser, and CNC.
| Criteria | Manual Cutting | Laser Cutting | CNC Cutting |
|---|---|---|---|
| Edge Quality | Often rough or uneven | Smooth, but may have slight heat discoloration | Clean edges, minimal finishing needed |
| Precision & Repeatability | Highly operator-dependent | High precision, especially on small details | Very high precision, easy to replicate designs |
| Thickness Range | Limited, difficult for thicker sheets | Can cut up to moderate thickness; above that can be slow or heat warp | Widely variable, from thin to thick if feed rates are correct |
| Speed & Workflow | Slow, labor-intensive | Quick for thinner sheets, but setup cost can be high | Moderate speed, can handle drilling or engraving simultaneously |
| Setup & Skill | Requires practice, consistent skill | Needs specialized laser machine, safety protocols | Requires CNC router/mill, G-code knowledge, but is straightforward once set |
| Heat Impact | Low heat, but risk of cracks | High localized heat, possible melt or discoloration | Some friction heat, but controllable with correct speeds/tooling |
| Cost per Part | Low initial cost (hand tools), but high labor time | Medium to high machine cost, but fast per piece | Medium machine cost, efficient in volume runs |
I developed this comparison from my own experiences seeing each method in action.
For large-scale retail or event usage, CNC stands out if you want flexibility plus consistent edge quality.
10. Seamless Integration with Design Software
CNC toolpaths often start in vector design programs like Illustrator or CAD software like Fusion 360.
That synergy helps me refine details before committing to material cuts.
I can group letters, adjust fonts, or incorporate intricate shapes that might be tough to do manually.
Once I’m confident in the design, I generate the G-code or machine instructions.
That digital-to-physical pipeline is a big reason we see so many creative acrylic signs now.
11. Potential for Layered and 3D Effects
CNC allows partial-depth cuts or layering multiple acrylic sheets.
I’ve done signage where each layer had a different color or thickness, stacked with spacers for a 3D effect.
This layering is visually striking for events like product launches or corporate parties.
Because the CNC can route shallow grooves, you can also embed LED strips or place inlays in the surface.
That’s advanced, but it expands what acrylic signs can look like.
12. User-Friendly Once Set Up
Some might assume CNC is too technical.
In reality, once your machine is configured, the workflow can be repeated.
You just load the acrylic, zero your axes, choose the correct router bit, and press start.
If you’re not personally operating the CNC, a specialized shop can handle these steps.
As I gained experience, I found my comfort level rose quickly.
Now I can run small test cuts or go straight to final production with minimal stress.
A Note on Safety
While CNC is precise, remember it’s still heavy machinery.
I always clamp the acrylic securely to prevent shifting.
Chip evacuation or dust collection matters because acrylic chips can accumulate.
Ventilation helps if you’re cutting a lot, as melted acrylic vapor can be irritating.
But with sensible precautions, I find CNC cutting to be quite safe in a typical workshop.
Personal Observation
One reason I wholeheartedly endorse CNC for acrylic signs is the professional impression it leaves on my clients.
When I show them test cuts, they can’t help but run their fingers along the smooth edges.
It’s a small detail, but it speaks volumes about quality.
In event scenarios, I’ve witnessed guests marvel at how crisp the signage looks, even from up close.
That intangible boost to brand perception often justifies the investment in CNC.
Conclusion of Chapter II
CNC cutting delivers numerous advantages for acrylic signs: from precise edges and easy repetition to layering options and drilled holes.
Whether you’re a store owner needing dozens of identical displays or an event planner wanting custom shapes, CNC is a sure way to achieve a polished finish.
Manual or laser approaches have their place, but in my experience, CNC hits the sweet spot for consistency, edge quality, and design versatility.
As you consider making or ordering acrylic signs for your retail or event needs, keep these benefits in mind.
They can elevate your signage from a basic plastic board to a professional statement piece.
Chapter III: Acrylic Materials Overview
I’ve often been asked why we choose acrylic over other plastics for sign-making.
There are plenty of plastic substrates—PVC, polycarbonate, styrene—but acrylic signs remain popular for their clarity and professional look.
Not all acrylic is the same, though.
In this chapter, we’ll break down key material variations, typical thicknesses, color options, and how each factor plays into the final sign appearance.
1. Cast vs. Extruded Acrylic
One of the first decisions I make when sourcing acrylic for signs is whether to go with cast or extruded sheets.
I remember early on, I mixed them up and wondered why certain sheets cost more, or why some cut more smoothly on the CNC.
Eventually, I learned each type has unique properties.
- Cast Acrylic
Cast acrylic forms when liquid PMMA (polymethyl methacrylate) is poured into a mold, then cured.
This process results in a more uniform thickness tolerance and typically greater optical clarity.
Cast acrylic also responds better to certain finishing methods, like flame polishing.
In my experience, cast acrylic is less prone to melt or gum up during CNC routing if I use appropriate feed rates.
However, cast sheets often carry a higher price point. - Extruded Acrylic
Extruded acrylic is produced by pushing molten acrylic through a die, resulting in continuous sheets.
It’s usually cheaper, but can have thickness variations across the sheet.
Some extruded acrylic brands cut fine on CNC, though it’s slightly more prone to edge chipping.
When I run extruded acrylic, I pay extra attention to spindle speed and consider using a bit designed for plastic to reduce edge haze.
Data Table: Comparing Cast vs. Extruded Acrylic
Below is a table contrasting key factors between cast and extruded acrylic.
I’ve formed this table from my personal observations and typical manufacturer specs.
| Criteria | Cast Acrylic | Extruded Acrylic |
|---|---|---|
| Manufacturing Method | Liquid PMMA poured into molds; cured | Molten acrylic pushed through a die to form continuous sheets |
| Thickness Tolerance | Generally tighter (± 5-10%) | Can vary more across a sheet (± 10-15%) |
| Optical Clarity | High clarity, consistent light transmission | Generally good but sometimes less uniform |
| Cost | Higher price per sheet | More economical, especially for large volumes |
| Machinability (CNC) | Tends to cut cleaner, less melting or burring | Slightly higher risk of edge chipping, needs careful speed control |
| Thermal Response | Can handle polishing/heat better | More prone to distortion if overheated |
| Common Use Cases | High-end acrylic signs, premium displays, LED panels | Budget-friendly signs, mass production, general decor |
I’ve worked with both.
If a client wants top-tier acrylic signs—especially for large retail logos or event centerpieces—I might recommend cast acrylic.
For simpler signs or when the budget is tight, extruded acrylic still produces solid results, provided the CNC parameters are right.
2. Typical Thickness for Acrylic Signs
Another common query is: “How thick should my acrylic sign be?”
I think about two factors: visual impact and structural needs.
Thinner sheets around 1/8 inch (3 mm) can suffice for small nameplates or interior signage that’s mounted against a wall.
But for free-standing signs or event signage that might be handled, something thicker like 1/4 inch (6 mm) or 3/8 inch (9 mm) feels sturdier.
- 1/8 inch (3 mm):
Good for small logos, desk nameplates, or layered designs.
Light and easy to mount, but can flex if the sign is large. - 1/4 inch (6 mm):
A versatile mid-range thickness.
More rigid, suitable for moderate-sized acrylic signs in retail.
If I want a stable sign that won’t easily bend, 6 mm is my go-to. - 3/8 inch (9 mm) or 1/2 inch (12 mm):
Ideal for large, stand-off letters or free-hanging signs.
This thickness looks premium, with a more noticeable edge presence.
Sometimes I use thick sheets to emphasize depth, especially if I’m backlighting the sign. - Over 1/2 inch (12 mm):
Great for super high-end signage or structural pieces.
I recall a client who wanted thick acrylic blocks as both signage and product pedestals.
The CNC milled them so the edges shone like glass.
This approach can be pricey, though.
Thickness also influences how you handle CNC speeds and feeds.
Thicker acrylic accumulates more friction heat, so you might do multiple shallow passes to avoid melting.
I’ve done up to 3/4 inch acrylic before, though it required a robust CNC spindle and good chip evacuation.
3. Color and Finish Options
Acrylic signs don’t have to be clear.
Many times, retail or event planners want bold brand colors or frosted effects.
The good news is that acrylic comes in numerous finishes:
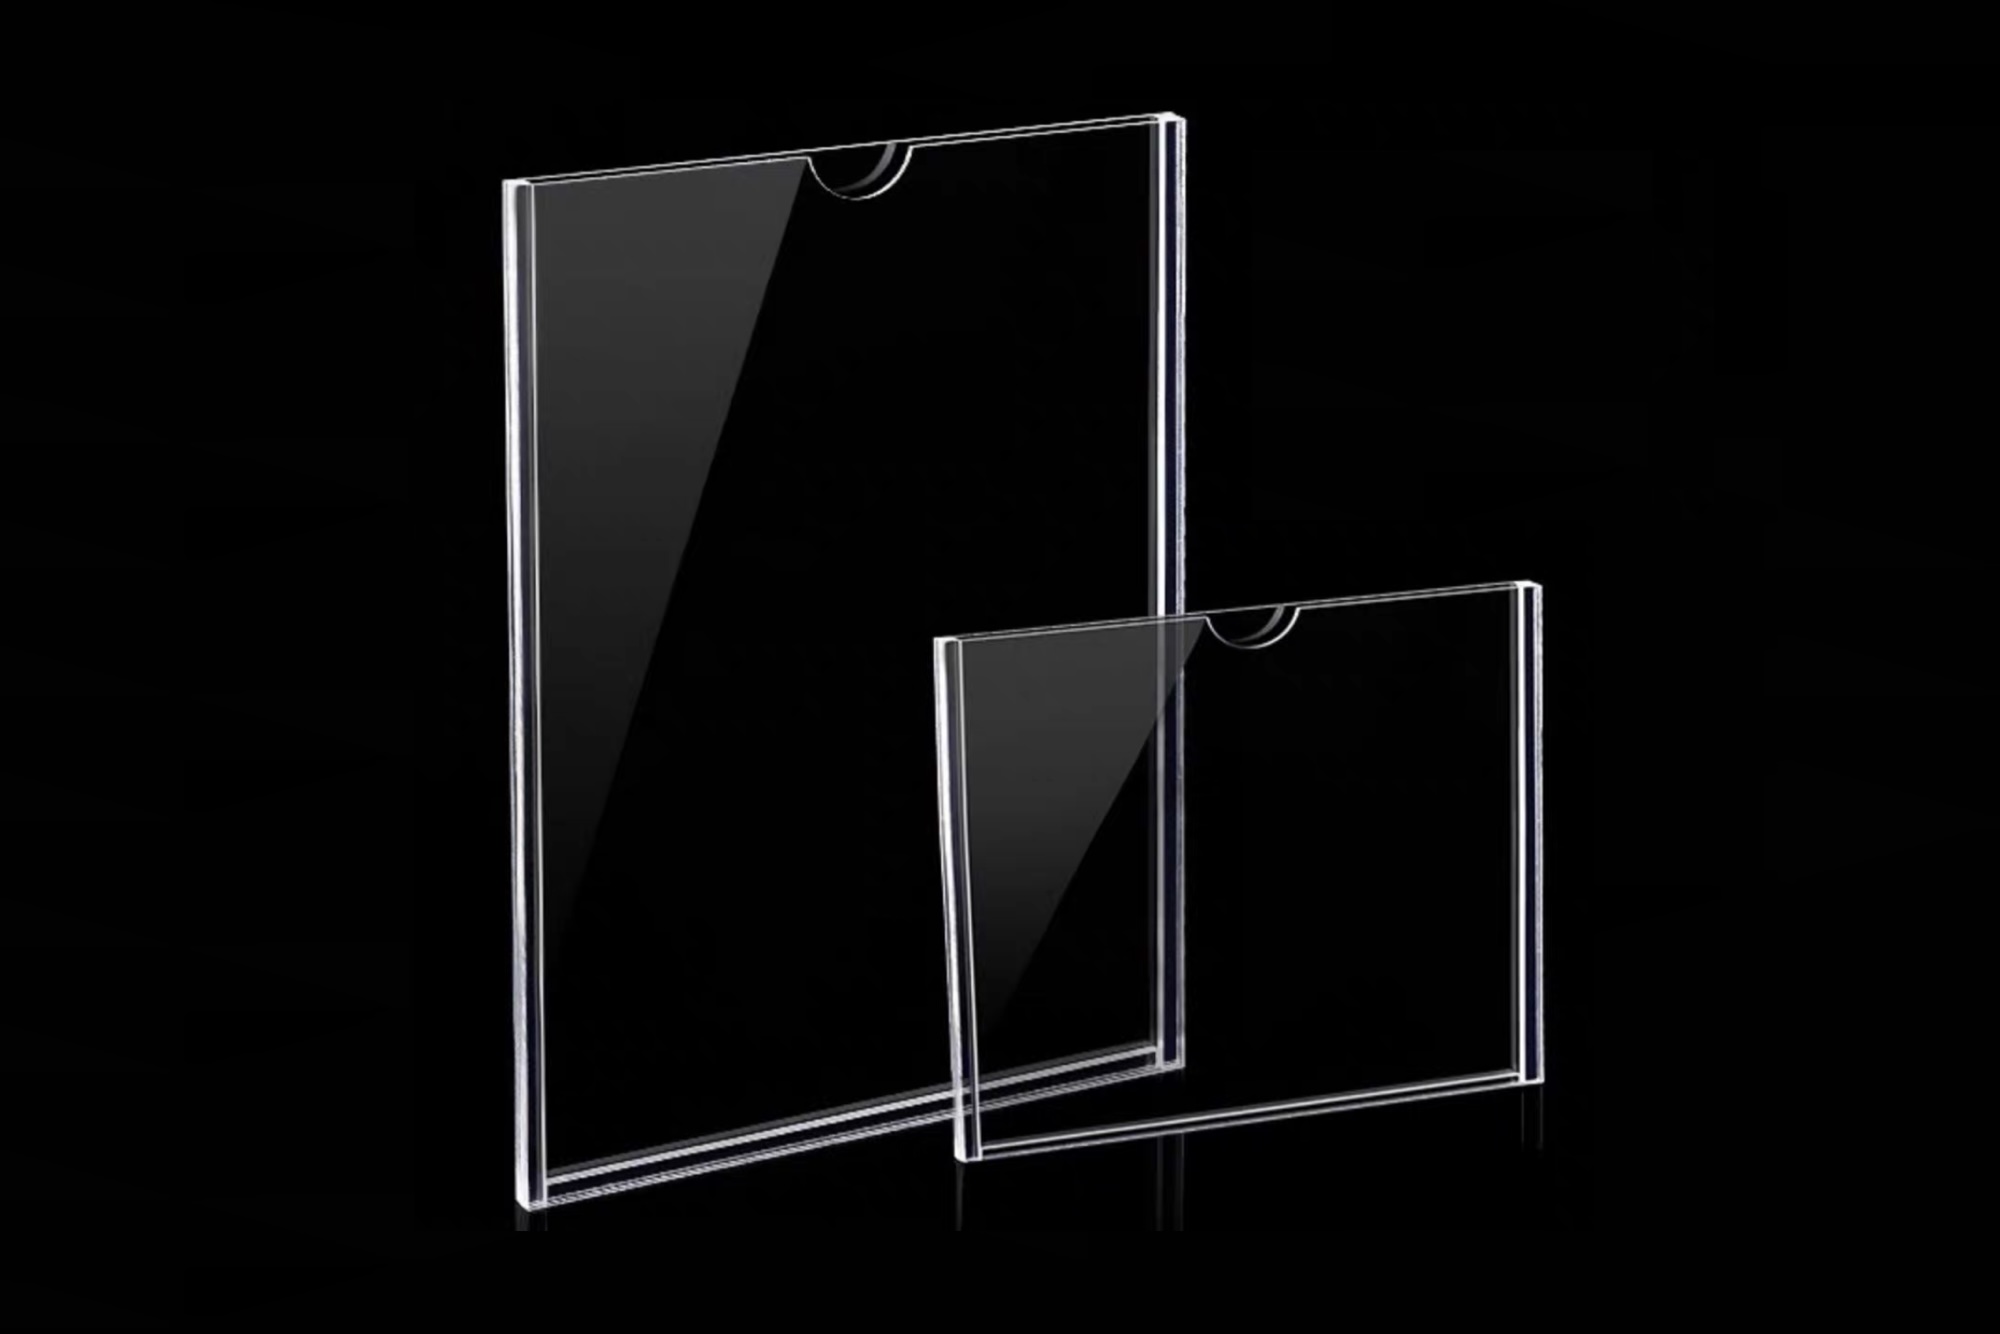
- Clear: Classic choice for floating or frameless signage, often combined with standoffs.
- Frosted / Matte: Offers a more subtle, diffused appearance, great for privacy screens or subdued signage.
- Colored Opaque: Red, blue, black—tons of color variations.
I once worked with a vibrant red acrylic for an event sign, and it made a strong visual statement. - Translucent Colors: These let some light pass through, so they’re perfect for backlit signage.
I’ve used translucent white for subtle LED glow backgrounds. - Mirror Acrylic: Reflective finish, somewhat fragile to cut but yields a high-impact result.
- Textured / Patterned: Less common but available, typically used for decorative panels.
When I pick a color or finish, I consider brand guidelines or design themes.
For a wedding sign, maybe a frosted acrylic sign matches the romantic vibe.
For a tech store’s brand, a tinted translucent piece might align with modern aesthetics.
4. UV Stability and Outdoor Use
Sometimes, we place acrylic signs outdoors—like store exteriors or festival directional signage.
Not all acrylic handles UV exposure equally.
Some older or lower-quality extruded sheets may yellow over time if constantly in direct sunlight.
Cast acrylic often has better UV resistance, although the manufacturer’s specs matter.
If a client insists on an outdoor acrylic sign, I confirm if it’s labeled as “UV stabilized.”
I’ve also recommended protective coatings or clear laminate layers for longevity.
In many climates, acrylic signs can last years outside before any noticeable fading.
5. Impact Resistance vs. Polycarbonate
While acrylic signs have decent toughness, they’re more prone to cracking than polycarbonate if heavily impacted.
That’s something to keep in mind if the sign might be in a high-traffic area where collisions occur.
However, acrylic is still fairly durable for typical retail and event usage.
If we need bulletproof-level impact strength, we’d choose polycarbonate or toughened glass.
But those don’t match acrylic’s clarity and CNC workability as perfectly for signage.
In my experience, for normal signage tasks, acrylic’s impact resistance is sufficient—just don’t whack it with a hammer.
Plus, if you’re mainly mounting it on a wall or a display stand, that reduces the risk of random hits.
6. Protective Films and Surfaces
Acrylic sheets often ship with a protective film on both faces.
I keep that film on as long as possible during the CNC process to protect the surfaces from scratches.
After the final cut, I peel it off to reveal a pristine face.
If a sheet lacks protective film, I might apply a layer of masking tape or transfer paper to minimize scuffs.
I once had a brand-new acrylic sheet without film.
I ended up with micro scratches from dust during handling.
It was a lesson learned—always check for or add protective layers to avoid surface damage, especially if the sign will be transparent.
7. Combining Acrylic with Other Materials
Sometimes, acrylic signs include metal or wood elements for contrast.
We might cut an acrylic back panel and overlay brushed aluminum letters.
Or we embed acrylic letters into a wooden background.
In these combos, we need to ensure thickness compatibility and plan how the pieces align.
I’ve done layered signs for an upscale fashion boutique: a black acrylic base with rose-gold mirror acrylic letters.
The CNC steps involved cutting two sets of shapes—one in black, one in mirror—and then bonding them.
The final result had a luxurious vibe.
It’s all about exploring creative synergy between different materials.
8. Choosing the Right Vendor or Brand
Numerous acrylic suppliers exist, each with varying quality.
I prefer recognized brands like Plexiglas, Perspex, or Plaskolite for consistent quality.
Some local distributors offer budget-friendly sheets, which might be extruded acrylic with unknown brand labeling.
That can work for short-term event signage, but you risk color inconsistencies or thickness fluctuations.
I learned early on that cheap acrylic sometimes has internal stress.
When the CNC bit hits certain spots, stress cracks appear.
If you notice warping or tiny cracks, you may be dealing with lower-grade stock.
It’s worth spending a bit more for brand-name sheets if your acrylic signs must look flawless.
Data Table: Common Acrylic Thicknesses & Use Cases
Below is a second table summarizing typical thickness ranges I’ve handled for acrylic signs, along with recommended applications.
| Thickness (Inches) | Thickness (mm) | Primary Use Cases | Pros | Cons | Example Projects | Cost Range |
|---|---|---|---|---|---|---|
| 0.06 (1.5mm) | ~1.5 | Very small labels, light craft projects | Extremely lightweight | Can warp or crack easily | Name tags, small decorative tokens | Low |
| 0.125 (1/8) | ~3 | Basic interior signage, layered cutouts | Affordable, easy to cut | Might flex on large pieces | Wall-mounted nameplates, directional arrows | Low to moderate |
| 0.1875 (3/16) | ~4.8 | Medium-sized signs with moderate rigidity | Less flexible, still easy to machine | Slightly heavier than 1/8″ | Retail display panels, door signage | Moderate |
| 0.25 (1/4) | ~6 | Most popular for standard acrylic signs | Good balance of rigidity and cost | Heavier shipping for large signs | Storefront logos, layered event backdrops | Moderate to higher |
| 0.375 (3/8) | ~9.5 | Larger or free-standing signs, high-end aesthetics | Feels premium, sturdier | More expensive, more mass | Lobby statement pieces, corporate branding | Higher |
| 0.5 (1/2) | ~12.7 | High-end signage, architectural features | Significant thickness, impressive depth | Pricey, may require strong mounting | 3D effect letters, premium event signage | High |
| 0.75+ (3/4 or more) | 19+ | Specialty projects, structural or decorative blocks | Very substantial, glass-like appearance | Very expensive, heavier CNC process | Pedestals, designer furniture, luxury signage | Very high |
I compiled these ranges from my personal logs and from discussions with local acrylic distributors.
Obviously, local availability or brand specifics may shift slightly, but these guidelines hold up well in practice.
9. Considering Acrylic Sheets for Lighting
A specific sub-category is diffusion-friendly acrylic.
If you plan on adding LED strips behind or beneath the sign, you might want a variant labeled “light-diffusing acrylic.”
It helps scatter the light more evenly, reducing hotspots.
I once built an event sign with color-changing LEDs embedded behind frosted acrylic letters.
The sign glowed softly, catching everyone’s attention.
If you attempt to backlight standard clear acrylic, you might see bright spots wherever the LEDs sit.
That’s not always a deal-breaker—some designs even like that look—but special diffuser sheets create more uniform illumination.
10. Handling Large-Format Sheets
Retail signage can get big, sometimes 4×8 feet or larger.
Most acrylic suppliers offer standard sizes like 4×8 or 4×10.
Cutting or transporting these large sheets can be tricky.
When I have to CNC a giant panel, I make sure my machine bed can accommodate the entire piece.
If not, I might tile the design or rotate the sheet.
For events, those big acrylic backdrops can look spectacular, but plan your CNC approach carefully to avoid material shifting or alignment errors.
11. My Personal Experience with Acrylic Sheet Selection
I recall a job for a mall kiosk that required glossy black acrylic signs to match the store’s luxury aesthetic.
We tried cheaper extruded sheets first, but I noticed swirl marks under certain lighting.
The client was picky, so we switched to cast acrylic from a reputable brand.
It cost more, but the final result was flawless.
The black sign had a glassy reflection, and the client was thrilled.
That was a lesson for me: never underestimate how different quality levels can appear under real-world lighting.
12. Sustainability Considerations
Acrylic is derived from petrochemicals, so it’s not the most eco-friendly material by default.
However, some manufacturers produce partially recycled acrylic or brand it as “green cast.”
It’s still early in adoption, but I’ve seen event planners increasingly ask about environmental impact.
You might consider how to recycle or repurpose leftover offcuts.
Sometimes smaller acrylic scraps become keychains or prototypes.
I prefer to minimize waste by nesting multiple sign components on each sheet.
13. Pricing Factors
The cost of acrylic signs depends on sheet quality, thickness, color, and brand.
Cast acrylic generally costs more than extruded, tinted or specialty finishes add to the price, and thickness obviously affects cost.
If you’re producing a large sign or multiple units, the material cost adds up quickly.
But for many, the visual payoff justifies the expense.
If you run a mid-size CNC shop like I do, carrying an inventory of common thicknesses can help you quote projects faster.
14. Summary of Material Choice
When I start a new project, I ask:
- Is the sign for short-term or long-term use?
- Will it be indoors or outdoors?
- Do we need color or a special finish?
- What’s the budget for materials?
- Will it be backlit or layered?
Answers to these questions guide me toward cast or extruded acrylic, a certain thickness, or a particular finish.
Sometimes I let clients hold sample pieces to feel the difference.
They might love the heft of 1/4-inch acrylic or the upscale thickness of 1/2-inch.
In events, aesthetics reign supreme, so I might choose a gorgeous mirrored or frosted sheet.
In retail, durability and brand alignment matter just as much.
Conclusion of Chapter III
Acrylic signs derive much of their impact from the raw materials you select.
Whether you’re choosing cast or extruded sheets, picking from a rainbow of colors, or deciding on a thickness that suits your design, these factors shape the final result.
I’ve had times when simply switching from extruded to cast acrylic eliminated edge haze issues, or when shifting from 1/8-inch to 3/8-inch gave a sign that premium “wow” factor.
Take time to weigh your application’s demands—indoor vs. outdoor, short-term event vs. permanent retail fixture, or basic text vs. layered artistry.
Each consideration helps you pinpoint the ideal acrylic for your CNC project.
Going forward, we’ll see how these material choices integrate into the CNC production flow itself.
Next, we’ll dive into the step-by-step of designing and cutting acrylic signs with CNC.
From file prep to finishing methods, I’ll walk you through the entire process so you can transform raw acrylic sheets into polished, professional signage.
Chapter IV: CNC in the Acrylic Sign Making Process
I’ve always found it satisfying to watch a simple acrylic sheet transform into polished signage.
CNC technology is the heart of this transformation, guiding every cut, hole, and engraved detail.
In this chapter, we’ll explore each step in creating CNC acrylic signs—from preparing design files to that final pass where your sign emerges, edges smooth and shapes spot-on.
1. Planning and File Preparation
Everything starts with a design concept.
For me, that concept often comes from brand guidelines or event themes.
If I’m cutting acrylic signs for a retail chain, the client typically provides vector artwork of their logo.
If it’s an event planner, they might supply text or decorative motifs.
Either way, I ensure the file is in a workable format for CNC—usually DXF (CAD-based) or AI/SVG (vector design).
I remember one case where a client delivered only a low-resolution JPEG.
We had to recreate or “vectorize” that image so the CNC machine could recognize smooth lines and curves.
That process taught me to emphasize vector files from the start.
Once I have the correct file format, I’ll check for design pitfalls, like overlapping lines or extremely thin stroke widths that might snap during cutting.
Sometimes I simplify complex geometry.
For instance, if the sign’s script font is super delicate, I might thicken it slightly to avoid fragile shapes.
After finalizing the vector data, I move to a CAM (Computer-Aided Manufacturing) software to define toolpaths.
2. Choosing the Right CNC Router or Milling Machine
CNC for acrylic signs can vary from small desktop routers to large industrial machines.
The main requirement is that the spindle speed can reach the sweet spot for acrylic—often 18,000–24,000 RPM.
We want high speed with a moderate feed rate, so we slice through acrylic smoothly.
If I’m handling bigger acrylic signs, I prefer a router with a sturdy frame and a vacuum bed or reliable clamp system.
The vacuum bed is invaluable for preventing material slip.
Nothing kills a sign faster than a slight shift mid-cut.
I’ve also used simpler clamp fixtures or double-sided tape for smaller pieces, but vacuum suction is a game-changer for large-scale production.
3. Bit Selection and Tooling
Tooling can make or break your acrylic signs.
I recall early attempts where I used standard wood bits.
We ended up with melted edges, rough corners, and a sticky residue on the bit.
Now, I specifically use acrylic CNC bits or “O-flute” bits designed for plastics.
Here’s why:
- O-flute geometry features a single cutting edge with ample space for chip evacuation.
- This design reduces friction heat, preventing melting or gumming.
- Polished flutes further enhance chip flow, leaving cleaner edges.
Sometimes I use a down-cut bit if I worry about surface chip-out, though with acrylic, up-cut or O-flute bits are more common.
For engraving, I switch to a v-bit or special engraving bit.
I learned not to push feed rates too high—acrylic can melt quickly if friction builds.
Finding the sweet spot typically involves small test cuts at varying speeds.
4. Machine Setup: Speeds, Feeds, and Coolant
Many first-timers ask me about meltdown issues with acrylic signs.
If the router moves too slowly, the friction heat accumulates and melts the plastic.
If it moves too fast without enough RPM, you risk chipping or incomplete cutting.
Balancing spindle speed and feed rate is key.
I’ll share some typical ranges I’ve found effective:
- Spindle speed: 18,000–24,000 RPM
- Feed rate: 60–100 inches per minute (approx. 1500–2500 mm/min) for 1/8″ or 1/4″ thickness
- Depth per pass: ~0.06″ to 0.12″ (1.5 to 3mm), to avoid too much friction in one pass
In some shops, they use a mist coolant or forced air to cool the cut zone.
I personally like having an air blast that blows chips away, reducing friction.
Excess chips left in the kerf can recirculate and cause melting.
A little lubrication—like a plastic-safe coolant—also helps.
But I’ve run many jobs successfully with just forced air, as long as I choose an appropriate feed rate.
5. Securing the Acrylic Sheet
Before hitting the “start” button, I ensure the acrylic is firmly in place.
A vacuum table can hold entire 4×8 sheets if the CNC is large.
If you’re using a smaller machine or piecewise approach, clamp the corners or sides while keeping the cutter path free.
Sometimes I add tabs in the toolpath so cut-out letters don’t shift when fully detached.
I just manually remove those tabs later.
During one project, I forgot to add tabs.
The cut-out letters started bouncing around once they separated from the stock.
I ended up with scuff marks on the edges.
Now I almost always enable small tabs or onion skin techniques for smaller shapes.
Onion skinning means leaving a thin layer of material at the bottom, then finishing it in a second pass.
6. Performing Test Cuts
Whenever I start with a new acrylic type or thickness, I do a quick test piece.
That way, I can confirm if the edges look smooth or if I’m seeing melt.
It’s much cheaper to waste a 4×4 inch test square than to ruin an entire sheet for a big sign.
I might adjust feed rates or depth after seeing the test result.
For instance, I once had a job cutting extruded acrylic that needed an intricate swirl design.
My initial feed rate was too slow, and the swirl corners melted.
After bumping the feed rate from 60 IPM to 80 IPM, the friction decreased, and the edges turned out crisp.
Test cuts save time, money, and frustration.
7. Multi-Pass Cutting and Corners
With thick acrylic signs—say 1/2 inch or more—I prefer multi-pass cutting.
One pass might be 2–3 mm deep.
This approach lowers the load on the spindle and reduces heat buildup.
Yes, it’s slower, but it’s worth it for a clean result.
Between passes, the chips clear out, letting the next pass cut fresh material.
I also watch out for corner slowdowns or acceleration patterns.
Sharp corners can accumulate friction if the machine lingers too long.
If we’re cutting letters with internal corners, I might define a “dog-bone” or “T-bone” fillet to ensure the corner fits.
This is more relevant when the sign’s design has nested parts or we plan to inlay something.
But for standard acrylic letters, a normal inside corner radius from the toolbit is usually acceptable.
8. Engraving and Infill Options
Acrylic signs aren’t just about outlines.
Sometimes, you want text or logos engraved on the surface.
With CNC, I can route shallow pockets or lines to create an etched effect.
Then I might fill those lines with paint, or backfill them with a contrasting color.
I recall an event sign we made by engraving intricate floral patterns just 1 mm deep.
We then painted those grooves in metallic gold.
After it dried, I lightly sanded away any paint residue on the surface.
The result was a beautiful flush design that caught the light differently from the rest of the sign.
9. Switching Tools Mid-Job
For advanced acrylic signs, I sometimes need multiple tools in one job.
First, a rough cut bit for major outlines, then an engraving bit for details, or a drill bit for mounting holes.
Some CNC machines have automatic tool changers (ATC), which is amazing for production.
On smaller machines, I do manual tool swaps.
I re-zero the Z-axis if the bits vary in length.
Tool swapping keeps the entire workflow in one setup, preventing repositioning errors.
10. Removing Cut Pieces Safely
Once cutting ends, I carefully remove the sign parts.
If I used tabs, I snip or sand them.
If I onion skinned, I might run a quick finishing pass to release each shape.
Acrylic can crack if I yank it out forcefully.
So I peel away scraps or use a thin blade to separate it gently.
I check each piece’s edges for any melting or fuzz.
If there’s slight burr, I remove it with a plastic scraper or a quick sanding pass.
But hopefully, if the speeds and feeds were dialed in, the edges are near flawless.
11. Post-Processing and Finishing
Acrylic signs can look good right off the CNC, but we can elevate them further with finishing techniques:
- Flame Polishing:
I pass a small propane or hydrogen flame quickly along the edges, smoothing any micro imperfections.
The heat level must be precise, or you risk warping.
I love how edges turn crystal clear, especially on thicker acrylic. - Sanding / Buffing:
For matte edges or to remove deeper tool marks, progressive sanding (from 320 to 1000 grit) can help.
Then a buffing compound yields a glossy result, though it’s labor-intensive. - Painting or Backpainting:
Sometimes, I paint the rear side of clear acrylic to create a front “glass-like” effect.
We can also reverse-print a design on vinyl and apply it to the back. - Adhesive Bonding:
If layering multiple acrylic sheets, use adhesives like Weld-On or acrylic cement.
They create near-seamless bonds.
But watch out for drips, because these solvents can mar the surface.
I personally prefer flame polishing if the geometry is simple.
For complex shapes or tight corners, sometimes manual sanding is safer.
Clients tend to notice that final polish—makes the acrylic signs pop under light.
12. Cleaning and Protective Film
During machining, debris and dust may settle on the sign’s surface.
I gently wipe it with a microfiber cloth and a mild plastic cleaner.
If the manufacturer’s protective film remains, I remove it only after everything else is done—drilling, flame polishing, and so forth.
A pro tip: static can attract dust to acrylic signs.
An anti-static spray or wiping solution helps.
I had an event sign once that clung to every speck of dust in the shop.
We ended up rinsing it with water and wiping gently before packaging.
13. Mounting and Hardware Options
Now that we have a finished sign, we want to display it.
Common ways include:
- Standoffs:
Cylindrical metal standoffs that let the sign float off the wall.
Great for a sleek, modern look.
We might CNC the mounting holes for precise placement. - Adhesive Tapes or Glue:
If the sign is small or you want a flush mount, you can use high-strength double-sided tapes.
Check the weight limit though. - Framing:
For bigger or more traditional projects, a frame or track system might help.
The CNC can cut notches if needed. - Ceiling Suspension:
Sometimes, acrylic signs hang from cables in a window display.
We might incorporate small drilled holes at the top edges for wire or fishing line.
I found that adding small grommets or protective washers prevents cracking around hole edges.
14. Quality Control Check
Before handing over acrylic signs to a client, I perform a quick quality control:
- Edge Condition: Are they free of chips, cracks, or burrs?
- Dimensions: Does the sign match the requested size or shape?
- Surface Scratches: Did the protective film prevent scuffs?
- Mounting Holes: Are they aligned and consistent in size?
- Engraving Depth (if any): Is it uniformly cut, no partial lines missed?
I once found a hairline crack near a mounting hole that had been drilled too close to the edge.
Better to catch that in the shop than have the sign fail during installation.
If everything checks out, we’re ready to deliver or install the sign.
15. Packaging and Transport
Acrylic signs can be fragile if you drop them or throw them around.
To avoid damage, I wrap them in protective foam or bubble wrap.
For large pieces, I might sandwich them between corrugated boards and secure them with tape.
If shipping multiple signs, layering them with foam in a sturdy box works.
You can also keep the manufacturer’s film on until final installation, which helps with scratch prevention.
Conclusion of Chapter IV
From design prep and bit selection to multi-pass cutting and final polishing, every step in the CNC process shapes your acrylic signs.
This hands-on approach yields crisp edges, engraved details, and precisely drilled holes, ensuring your signage stands out at retail locations or events.
Once you master the right speeds and feeds, meltdown or rough edges become things of the past.
I’ve personally enjoyed the creative control that CNC offers—stacked letters, embedded logos, delicate engravings—all in the same job.
Clients notice that craftsmanship in the final piece.
In upcoming chapters, we’ll explore how these CNC acrylic signs shine in specific retail and event contexts (Chapter V), design considerations for fonts and layering (Chapter VI), and real-world examples of completed signage (Chapter VII).
Then we’ll walk through ordering or outsourcing options if you prefer not to do the cutting yourself (Chapters VIII–X).
For now, you have a practical roadmap for CNC.
Whether you’re a shop owner, a designer, or just curious about how acrylic signs take shape, these steps demystify the process.
With solid file prep, the correct router bit, and a thoughtful finishing routine, you’ll craft acrylic signs that look polished and professional—a testament to the power of CNC technology.
Chapter V: Common Applications of Acrylic Signs
I’ve encountered countless uses for acrylic signs in my projects—sometimes in places I least expected.
Acrylic is so versatile that it appears in retail store windows, trade show booths, wedding receptions, corporate offices, and more.
In this chapter, I’ll walk through major applications in both retail and events, highlighting why acrylic signs work so well in each setting.
1. Retail Storefronts and Window Displays
When I step into a bustling shopping district, I often see glossy acrylic signs in window displays.
Whether they’re brand logos, product announcements, or sale signs, these acrylic pieces reflect light beautifully and grab attention.
Store owners love how acrylic signs can be cut into custom shapes—like silhouettes or stylized brand mascots.
Many times, I see them hung on transparent fishing lines or cable systems, creating a floating effect.
It’s elegant and doesn’t block the view of the merchandise inside.
Acrylic also tolerates typical indoor conditions, so it doesn’t discolor or warp under store lighting.
Some shops even combine two layers of acrylic, with a colored backing sheet behind a clear top layer for extra depth.
2. Interior Branding and Decor
Inside a store, acrylic signs often serve as section markers or brand identity features.
Imagine entering a boutique with a large acrylic wall logo behind the cash wrap area.
The sign might have a subtle backlight or be standoff-mounted so it casts a slight shadow.
That premium look enhances the brand’s perceived value.
I recently worked with a home goods retailer who requested acrylic product category signs above each aisle.
They wanted something more refined than standard printed cardboard.
We CNC-cut letters from frosted acrylic and mounted them against bright LED strips.
Customers said it made the aisles easier to navigate while giving a modern flair.
3. Promotional and Seasonal Displays
One of my favorite aspects of acrylic signs is how quickly you can swap them out for promotions or seasonal changes.
If a retailer runs a holiday sale, we might create a set of snowflake-themed acrylic signs to hang around the store.
They appear more upscale than disposable paper posters.
And next season, the store can store them away or reorder new designs.
A friend of mine who manages a local clothing boutique keeps a library of seasonal acrylic signs—spring florals, summer beach icons, autumn leaves, holiday ornaments—ready to rotate each quarter.
Because they’re CNC-cut, they match the brand’s color scheme and design style consistently.
4. Trade Show and Exhibition Booths
Anyone who has attended a trade show knows that standing out is crucial.
Exhibitors often invest in large, eye-catching signage.
I’ve seen event booths with giant acrylic signs featuring the company’s logo or tagline.
These signs can be backlit or layered to create a 3D effect.
At one software expo, I noticed an exhibitor used multiple clear acrylic panels, each engraved with a portion of their product’s schematic.
They hung them in a staggered formation with LED lights shining through, resulting in a futuristic vibe that attracted visitors.
The brand manager later told me it was one of their most photographed booth elements.
5. Mall Kiosks and Concession Stands
Kiosks or small concession stands in a mall environment often lack large wall space for signage.
That’s where acrylic signs excel.
You can mount them directly onto kiosk surfaces or hang them overhead using a small bracket.
They’re also robust enough for public areas, as long as no one tries to knock them down.
At a tech repair kiosk I collaborated with, we installed a sleek black acrylic sign with a brushed silver inlay for their logo.
Customers said it gave the kiosk a high-end feel, differentiating it from simpler, less polished stands nearby.
6. Corporate and Office Signage
Moving beyond retail, I see acrylic signs in corporate hallways, reception desks, and conference rooms.
They often convey a company’s professional identity.
Nothing says “modern office” like a clear or frosted acrylic panel on the lobby wall, front-lit or backlit to create a halo effect.
Visitors walk in, see that sign, and immediately sense an organized, forward-thinking environment.
In many offices, each department or meeting room might have an acrylic nameplate.
These smaller acrylic signs typically attach with stand-offs or adhesives.
They’re easy to update if a department name changes.
I once replaced an entire floor’s worth of nameplates because the company rebranded.
Since we had the CNC files, cutting a fresh batch was straightforward and consistent.
7. Hospitals and Clinics
Healthcare facilities often need signage that’s easy to sanitize, durable, and clearly legible.
Acrylic signs fit that bill.
They’re non-porous, so you can wipe them down with disinfectant without worrying about damaging the surface.
Plus, CNC routing ensures large text or icons remain crisp for patients who need straightforward directions.
At a children’s clinic, we created acrylic signs shaped like friendly animals to guide families to different sections (pediatrics, lab, pharmacy).
The bright colors and playful shapes helped reduce stress for young patients.
It was heartwarming to see them point at the signs with excitement.
8. University and School Signage
Educational institutions also benefit from acrylic signs.
Hallway directionals, room number plates, or donor recognition walls can all use acrylic.
CNC allows easy replication of each sign in a series.
I recall a college building that needed hundreds of room plaques with braille elements.
We engraved the braille onto acrylic, then used a special paint fill.
The consistent depth was possible because the CNC machine followed precise toolpaths.
School mascots or event announcements can also be rendered in acrylic.
During commencement ceremonies, I’ve seen large acrylic letters of the school’s motto displayed on stage.
They’re lightweight enough for quick setup and removal.
9. Weddings and Special Events
Some of the most creative acrylic signs appear in weddings.
Couples love the modern yet elegant look of transparent signage—welcome boards, seating charts, table numbers, and bar menus.
I’ve personally worked on intricate seating charts where each guest’s name was engraved into a frosted acrylic panel.
Guests said it felt upscale, almost like a custom piece of art rather than a simple sign.
For wedding backdrops, layering clear acrylic with floral or decorative elements behind it can create a 3D effect.
When the bride and groom pose in front, the signage complements the scene beautifully.
I’ve seen wedding planners coordinate acrylic signs with color schemes or metallic accents, ensuring a cohesive event design.
10. Conference and Seminar Displays
Professional events like conferences or seminars need directional signage, sponsor boards, and stage elements.
Acrylic signs shine here because they’re polished and professional.
Sometimes they’re placed on easels by the entrance or used as podium logos.
I attended a marketing conference where each breakout room had a glossy acrylic sign listing session topics.
The brand synergy was striking, especially compared to simpler printed foam boards.
When done right, these signs are reusable for future events.
All you need is to switch out a smaller nameplate or overlay for changing session details.
11. Art Installations and Galleries
Acrylic signs can also appear in artistic contexts.
Galleries might label exhibits with small, discreet clear panels or use large acrylic text to label entire sections.
Artists sometimes incorporate acrylic shapes into installations.
Since CNC can cut complex geometry, it’s a perfect tool for custom art pieces.
I remember a local sculptor who CNC-cut dozens of acrylic discs in varying sizes, each etched with patterns.
She hung them in a spiral formation from the gallery ceiling, creating a reflective mobile that dazzled in spotlights.
While not strictly “signage,” it demonstrates how the same techniques can produce functional or decorative acrylic displays.
12. Outdoor Displays (Short-Term)
Though acrylic is primarily used indoors, certain sign types can appear outdoors short-term.
Street fairs, pop-up events, or directional markers might rely on thicker acrylic for a weekend or two.
While prolonged sun exposure can risk yellowing or warping (if it’s not UV-resistant), short stints usually pose no problem.
I once helped a food festival with kiosk signage that they used for a three-day event.
We made sure to store them after use, so they could reuse them next year.
Just be cautious about high winds or potential impacts, because acrylic, while sturdy, can crack under severe stress.
13. Standoff-Mounted vs. Direct-Mounted
In many of these applications, how you mount the sign matters.
For example, standoff mounts add a premium look, creating a small gap between the acrylic and the wall.
It’s popular in offices or boutiques.
Direct mounting with adhesive or screws flush against the surface is more common when you need a lower profile.
I find standoffs especially appealing for logos or nameplates.
It gives an illusion that the sign is floating.
Clients often comment on how it “finishes” the presentation, almost like the sign is a gallery piece.
In events, standoffs might be less common, since everything is temporary.
Then we might use tape, Velcro, or a quick bracket system.
14. Combining LED or Lighting Effects
Illuminated acrylic signs are a big hit in nightlife venues, clubs, or high-impact retail displays.
Either an LED strip outlines the perimeter or backlights the entire sign from behind.
Clear or frosted acrylic glows softly if you place LED modules around the edges.
Translucent white acrylic allows for uniform light diffusion, ideal for marquee-style signs.
I recall designing a bar menu sign with edge-lit acrylic.
We engraved the text so the light refracted inside the letters.
When customers approached, they saw glowing text “Bar Menu” suspended in mid-air.
It was mesmerizing and definitely boosted the bar’s modern feel.
15. Interactive and Digital Integration
Some advanced setups combine digital screens or sensors with acrylic signs.
I’ve seen event booths with interactive LED sensors embedded behind the acrylic surface, so when someone touches it, it changes color or reveals information.
Though this is more complex, the acrylic face offers a clean, protective layer over the electronics.
In retail, a digital display behind a transparent acrylic panel can show dynamic animations or product features.
You might see pop-up kiosk displays where the front is acrylic, but behind it is a monitor.
It’s a futuristic look, blending physical signage with digital content.
16. Personal Observations
I’ve delivered acrylic signs to fashion stores, phone repair kiosks, wedding coordinators, tech conferences, and beyond.
Every time, the consistent feedback is how professional they appear.
I’ve also found that people love the possibility of custom shapes.
They might request starbursts, script fonts, geometric patterns—things that stand out more than typical rectangular boards.
Because CNC can handle those shapes accurately, we seldom have to say no to creative ideas.
17. Potential Downsides
While acrylic signs are amazing in these applications, it’s worth noting a couple of potential issues:
- They can scratch if roughly handled or placed in busy foot traffic areas.
- They can crack under heavy impact, so be mindful in high-contact zones.
- If used outdoors long-term without UV-stabilized sheets, they may yellow.
Still, for indoor or short-term outdoor usage—especially in retail or event contexts—these issues are manageable.
Conclusion of Chapter V
From store windows to wedding arches, acrylic signs have infiltrated a wide range of spaces.
Their modern, polished aesthetic suits everything from high-end boutiques to casual pop-ups.
When combined with CNC cutting, acrylic signs can be shaped, engraved, and illuminated to match virtually any design theme.
The next time you stroll through a mall or attend a gala, take a closer look at the signage.
Chances are, it’s made from acrylic, meticulously cut and polished.
In our upcoming chapters, we’ll dive deeper into design considerations (Chapter VI) and share specific case studies (Chapter VII).
Then we’ll discuss who benefits the most from CNC acrylic signs (Chapter VIII), how to order or produce them (Chapter IX), and how to select the right CNC service (Chapter X).
For anyone looking to create dynamic visual statements at retail or events, acrylic signs deliver an impressive balance of style and practicality.
Chapter VI: Design Considerations for CNC Acrylic Signs
I recall many times when clients arrived with a creative idea for acrylic signs, but we had to adapt it for CNC feasibility.
Sometimes, an overly fancy font or super thin strokes could lead to breakage or uncuttable details.
Other times, spacing was so tight that the sign looked cluttered.
In this chapter, we’ll explore design principles that help your acrylic signs stand out, remain sturdy, and convey messages clearly.
1. Font Choice and Readability
When dealing with acrylic signs, especially smaller pieces, not all fonts translate well.
Script fonts with delicate loops or narrow lines might break during cutting.
Blocky sans-serif fonts, on the other hand, produce bolder, more stable letters.
I’ve personally seen a wedding sign that used an ultra-thin cursive.
During CNC cutting, some letters snapped off.
We had to enlarge the text slightly and thicken the strokes.
- Minimum Stroke Thickness:
Try to keep letter strokes at least 1 mm thick (or more) if you’re cutting standalone letters.
Thicker strokes reduce the chance of snapping. - All-Caps vs. Mixed Case:
All-caps can be easier to read from a distance, but sometimes you want the elegance of a script or mixed case.
I do test cuts or on-screen measuring to ensure each letter is wide enough in critical points.
2. Spacing and Kerning
I’ve had designs where letters were so close that the CNC tool couldn’t pass between them.
You need enough spacing (kerning) for the router bit.
If letters overlap in your design, you might inadvertently fuse them into a single shape.
In some contexts, that’s intentional (like a script that flows), but in others, it’s a design flaw.
- Tool Diameter Consideration:
If I’m using a 1/8″ bit, I need at least that much clearance between separate cut paths. - Avoid Overlaps (Unless Intentional):
Merging shapes can be cool for a logo or stylized text, but confirm it’s what you want.
I once had a brand’s logo with negative space so tight, the CNC left an uncut bridge.
We had to revise the file.
3. Overall Layout Size
If you’re placing your acrylic signs in a large store window, bigger is better for visibility.
But if you’re making table nameplates for a wedding, you might want smaller pieces.
At the design stage, consider how far people will stand from the sign.
A sign behind a reception desk might require letters that are at least 2–3 inches tall for comfortable reading.
- Distance-to-Size Ratio:
A common rule of thumb is one inch of letter height for every 10 feet of viewing distance if you want easy reading.
For more distant signage, scale up accordingly.
4. Shape Complexity
CNC can handle intricate shapes, but complexity influences production time and risk of breakage.
Intricate corners or flourishes can slow the cutting process, increasing the chance of meltdown or small chips.
If a design is extremely ornate, we might consider adding bridging tabs or adjusting speed.
I’ve done a floral motif for an event sign that took hours to cut because of hundreds of tight corners.
The result was gorgeous, but it required carefully tuned feeds and speeds.
Ask whether every swirl or flourish is essential or if some details can be simplified without losing the design’s charm.
5. Layered or Multicolor Designs
One strategy to create eye-catching acrylic signs is layering.
You cut multiple pieces of acrylic—maybe different colors or thicknesses—and bond them.
This can create a 3D effect or color contrast.
For instance, a clear base plus colored letters or shapes on top.
When layering, make sure each layer’s edges align properly.
- Registration Marks:
If you’re layering shapes that must line up, add small reference holes or marks so you can align them precisely. - Adhesive Choice:
Use an acrylic cement that won’t haze or discolor.
Check cure times before stacking.
6. Edge Finishing Techniques in the Design Stage
Sometimes, you want a polished edge or a frosted edge.
If you prefer a frosted edge, you might skip flame polishing.
If you want a crystal-clear edge, design your sign so the edges are large enough to flame polish easily.
For tiny cutouts or internal corners, flame polishing might be challenging.
Plan for that in your design if crisp edges are a priority.
7. Engraved Accents
Besides cutting outlines, you can engrave text or patterns into acrylic signs.
This can be shallow engraving on the front or backside, sometimes filled with paint.
For example, event signage might feature an engraved floral border.
Ensure you maintain enough spacing between engraved lines to avoid confusion or visual crowding.
If you’re back-engraving (mirroring text on the reverse side for a front-view read), double-check that your design is flipped properly.
8. Consider the Mounting Method
Design also includes how you’ll mount or display the sign.
If it’s standoff-mounted, you need holes in the corners or strategic locations.
If it’s hanging from wires, maybe top holes or a bracket slot is necessary.
I’ve seen designers forget to add mounting holes until after cutting the entire piece, forcing a risky post-process drilling that can crack the finished sign.
- Hole Placement:
Keep holes at least an inch away from edges if possible.
That reduces the risk of cracking. - Stand-off Spacing:
If the sign is large, consider multiple stand-offs or supports to prevent sagging.
9. Color and Finish Coordination
Acrylic signs come in many finishes (clear, frosted, mirrored).
Your design should complement that finish.
A transparent acrylic sign with intricate text might look busy if the background behind it is also complex.
Sometimes, a frosted effect helps text pop against busy backgrounds.
For mirrored acrylic, keep shapes simple because reflections can distort.
Be mindful of how lighting will affect color illusions or glare.
10. Branding and Consistency
In retail or corporate usage, design consistency across different signs is essential.
That includes consistent color codes, consistent letter heights, and uniform margin spacing.
I once produced a series of directional signs for a mall.
We used the same corner radius, the same font size, and the same color scheme for every sign.
It helped unify the overall environment.
For events, you might unify the design style across welcome signs, seating charts, and table numbers.
CNC helps by replicating shapes and fonts precisely.
11. Legibility in Various Lighting Conditions
Retail windows might face direct sunlight.
Event halls could have dim ambiance or colorful uplighting.
Your design should remain legible in those conditions.
If you’re using translucent or tinted acrylic, ensure enough contrast between text and background.
Frosted or white lettering might vanish against a pale wall.
A bright backdrop can wash out pastel lettering.
Consider mocking up how your sign looks in bright vs. dim light.
I’ve had to pivot from a translucent material to an opaque one because the client realized the sign was lost in bright daylight.
12. Preparing for Multi-Part Assembly
If your design spans multiple acrylic panels—like a multi-section wall installation—plan for consistent spacing or alignment.
Add little notches or alignment holes so you can place each panel the same distance apart.
I once did a hallway sign system with five vertical acrylic bars, each offset by half an inch.
We had to precisely cut the mounting holes at identical positions, or the bars would look crooked.
13. Balancing Aesthetics and Durability
It’s easy to get carried away with fine details, but sometimes simplifying ensures the sign lasts longer.
For a high-traffic area, thicker letters or shapes may reduce breakage risk.
For an event sign that’s purely decorative and one-time use, you can push the design’s complexity.
But if you plan to reuse it, you might want more robust shapes.
14. Time for a Quick Example
I recall designing an acrylic sign for an electronics store’s new brand identity.
We had a stylized letter “E” with intricate circuit-like patterns inside.
We realized the pattern lines were too narrow for a 1/8″ bit.
So we either had to use a smaller 1/16″ bit (increasing cutting time and risk) or scale up the design.
Ultimately, we scaled it up to maintain the circuit detail without risking meltdown or breakage.
The final piece measured about 2 feet wide and looked stunning under the store’s spotlights.
15. Anti-Glare or Reflection Considerations
Acrylic can be quite reflective.
If you’re placing a sign under direct overhead lighting or near windows, glare might obscure parts of the design.
Frosted acrylic or a matte layer helps reduce reflections.
Alternatively, mount the sign at an angle to minimize direct reflection.
I’ve seen even small changes in angle drastically cut glare.
16. Accessibility (ADA Requirements)
In some environments—like public buildings or offices—there may be accessibility guidelines for signs.
The Americans with Disabilities Act (ADA) has standards on tactile letters, braille, and contrast.
If you’re designing acrylic signs for these spaces, ensure the letters meet size and relief guidelines.
Engraving braille on acrylic is possible, but you need precise toolpaths and fill materials.
17. Prototyping and Mockups
Before finalizing a big sign, I sometimes create a small prototype or partial mockup.
That helps confirm if font sizes are legible, color combos are pleasing, or if layering works.
Prototypes can also reveal if an edge is too fragile.
Clients appreciate seeing a mini version before we commit to large sheets.
Conclusion of Chapter VI
Designing acrylic signs for CNC cutting involves balancing creativity with practical limits.
We juggle fonts, thickness, shape complexity, mounting holes, and overall spacing.
We must consider lighting, brand consistency, and usage scenarios—be it a busy retail store or a softly lit wedding hall.
I’ve learned that a little planning upfront can save big headaches later.
When everything aligns—strong font choice, well-spaced shapes, the right thickness, and a finishing approach that suits the environment—acrylic signs truly shine.
They become both functional and decorative, reflecting the brand or event’s personality.
Next, in Chapter VII, we’ll explore real-life case studies.
We’ll see how these design tips come into play in actual projects, from small boutique signage to massive event backdrops.
Those examples should give you further insight into how different industries apply acrylic signs to leave a lasting impression.
Chapter VII: Case Studies / Examples
I find nothing drives home the value of acrylic signs like real-world stories.
Over the years, I’ve gathered a roster of success stories (and a few cautionary tales) that show how CNC-cut acrylic signs elevate brands, events, and experiences.
Let me share several case studies, each highlighting different design nuances, materials, or finishing methods.
Case Study 1: High-End Retail Boutique
Client: A luxury clothing boutique in a trendy shopping district.
Need: A large, elegant sign behind the cashier area plus smaller product category signs around the store.
Process:
- We started with the brand’s script-style logo—very delicate loops on certain letters.
- The shop insisted on a refined, almost calligraphic appearance.
- Concerned about breakage, we tested a 1/16″ CNC bit on 1/4″ cast acrylic.
- To prevent meltdown, we used shallow passes and a high feed rate, plus air cooling.
- The final pieces were flame polished, resulting in a crystal-clear edge.
Outcome:
- The main logo sign, about 36 inches wide, mounted with brushed silver standoffs.
- Smaller product category signs (like “Dresses,” “Accessories”) placed on shelves with discreet stand-offs.
- The store’s owner reported a dramatic improvement in brand perception, with customers frequently asking, “Where did you get those beautiful signs?”
Case Study 2: Corporate Office Lobby
Client: A tech startup wanting a bold statement piece in their lobby.
Need: A 3D layered acrylic sign with the company’s tagline plus a stylized gear icon.
Process:
- We used 1/8″ black acrylic for the bottom layer and 1/4″ clear acrylic for the top letters.
- The bottom layer was laser-etched with a subtle circuit pattern.
- For the top letters, we CNC-cut them to a chunky block style.
- We adhered the letters to the black layer with acrylic cement, offset by small acrylic rods for added depth.
- Once assembled, the sign was about half an inch thick in total.
Outcome:
- The layered sign caught the attention of visitors, giving a futuristic vibe.
- The client said it aligned with their brand’s “modern, innovative” message.
- Because they used a blocky font, it was easy to ensure sturdy shapes.
- They plan to replicate the sign in a second office using the same CNC files, guaranteeing brand consistency.
Case Study 3: Outdoor Festival Booth
Client: A craft beer brand sponsoring a 3-day music festival.
Need: Temporary acrylic signs for a booth, indicating beer flavors and brand identity.
Process:
- We chose 3/16″ extruded acrylic for cost reasons, since the signs were short-term.
- Each sign was about 24 inches wide, with the brand’s logo and witty flavor names.
- Because it was outdoors, we coated the edges with a UV-protective spray, though not guaranteed to last forever.
- We used basic direct mounting with small holes at the top corners and zip-tied them to the booth frame.
Outcome:
- The bright logos stood out, even under the sun.
- Minimal warping or color fade occurred, as the usage was only three days.
- The brand rep told me the acrylic signs added a professional touch compared to flimsy cardboard or vinyl banners.
- They saved the signs for a future event, hoping to get more use out of them.
Case Study 4: Wedding Reception Decor
Client: A wedding planner who curated a romantic, modern reception.
Need: A welcome sign, seating chart, table numbers, and directional pieces (like “Bar,” “Dance Floor”).
Process:
- We used 1/8″ frosted acrylic for most signs.
- The welcome sign was bigger—2 feet wide—engraved with the couple’s names and wedding date.
- Then we color-filled the engraved text in metallic gold paint.
- For table numbers, we CNC-cut standalone numbers in a swirly font and used small stands.
- The seating chart was a single 24″ x 36″ sheet with engraved guest names, also in gold fill.
Outcome:
- Guests raved about the modern, classy vibe.
- The frosted finish hid fingerprints and smudges, important in a bustling wedding environment.
- The wedding planner said acrylic signs gave the event an upscale feel without the weight or fragility of glass.
- The couple took the welcome sign home as a keepsake.
Case Study 5: Trade Show Engagement
Client: A software company exhibiting at a major industry trade show.
Need: Impactful booth signage that highlights product features, brand name, and a 3D “techy” design.
Process:
- The main sign was a 48-inch-wide shape resembling the brand’s logo, cut from 3/8″ cast acrylic.
- We flame-polished the edges and then backlit it with LED strips hidden behind an aluminum frame.
- Smaller acrylic signs featured bullet points about the software.
- Each smaller sign had a slight tilt, pinned at the corners with standoffs, so visitors could read them at an angle.
Outcome:
- The booth garnered high foot traffic, with many visitors snapping photos of the glowing acrylic sign.
- The brand’s marketing lead told me it was the best booth design they’d had in years.
- They plan to reuse the signage at future conferences, offsetting the initial investment.
Case Study 6: Mall Directory System
Client: A shopping mall wanting a uniform look for directional signage and store directories.
Need: Over 50 acrylic signs in various sizes, from large directory boards to small restroom arrows.
Process:
- We standardized on 1/4″ frosted acrylic for the main panels, with bold black lettering.
- Each sign had the mall’s logo near the top, then either arrows or a floor map below.
- Because of the large quantity, we set up an assembly-line approach on the CNC.
- After cutting each piece, we engraved certain text elements and color-filled them for legibility.
Outcome:
- The uniform frosted finish tied all areas of the mall together visually.
- Mall visitors found the directories clearer than previous print-based signs.
- Maintenance staff appreciated that cleaning these acrylic signs was straightforward.
- The project took weeks but established a strong wayfinding system that the mall can update by replacing or re-engraving individual panels.
Case Study 7: Interactive Art Installation
Client: An artist creating an experiential exhibit at a cultural center.
Need: Multiple acrylic panels shaped like puzzle pieces, which visitors could rearrange on metal pegs.
Process:
- We used 1/4″ extruded acrylic in various colors.
- Each panel had interlocking edges, akin to large jigsaw puzzle tabs.
- The CNC cut out each tab precisely so they fit snugly.
- The artist also wanted swirl engravings on the surfaces for a layered effect.
- We tested for friction to ensure panels slid easily but didn’t wobble.
Outcome:
- Visitors spent time rearranging the panels, creating new compositions.
- The vibrant acrylic colors stacked to produce mesmerizing light interplay.
- The artist credited the CNC process for enabling tight tolerances that made the interactive concept feasible.
Common Themes from These Examples
- Material Choice Matters: High-end retail or corporate clients often pick cast acrylic and thick sheets. Short-term events might opt for extruded or thinner stock to save cost.
- Finishing Techniques Boost Visual Impact: Flame polishing or paint filling engravings can elevate the final product.
- CNC Precision Enables Complex Shapes: Whether it’s swirling script or puzzle-piece interlocks, CNC handles details that manual methods can’t match.
- Mounting and Lighting Influence Perception: Standoffs, LED backlighting, or layering add flair and underscore a brand’s theme.
- Reusable for Multiple Events: If cared for properly, acrylic signs hold up well. They can be stored and repurposed.
Potential Pitfalls Noted
- Fragile Fonts: Overly thin or intricate script can snap.
- Improper Speeds/Feeds: Melting or chipped edges degrade sign quality.
- Skipping a Prototype: Large, expensive signs can end up misaligned or with design flaws if not tested.
- Mounting Holes Too Close to Edges: This can cause cracks or breakage.
Conclusion of Chapter VII
These real-world examples demonstrate how acrylic signs serve diverse needs—luxury branding, event decor, functional wayfinding, or even interactive art.
CNC technology expands design possibilities, from layered effects to engraved details.
When done right, acrylic signs become a memorable focal point, boosting everything from store aesthetics to wedding ambiance.
Chapter VIII: Who Should Use CNC Acrylic Signs?
I’ve touched on various industries and scenarios in previous chapters.
Now let’s systematically identify who benefits most from CNC acrylic signs and why.
Whether you’re a small business owner, event planner, marketing coordinator, or CNC operator, you might find yourself in these categories.
1. Retail Businesses and Franchises
Why Acrylic?
Retailers thrive on visual impact—window displays, brand logos, aisle markers, promotional signage.
Acrylic signs offer the polished, modern look that resonates with today’s consumers.
When I step into a boutique or mall store, acrylic signage often conveys an upscale aesthetic.
Franchise owners, in particular, need consistent signage across multiple locations.
CNC ensures uniform shapes and exact color matches if we’re layering or painting.
Benefits
- Brand Consistency: Each store can get the same set of sign designs, repeated as needed.
- Updatable / Reusable: Seasonal changes or store revamps are easier if we store digital files.
- Minimal Maintenance: Acrylic is easy to wipe clean, vital in busy retail spaces.
Considerations
- If the brand demands a “rustic” vibe, acrylic might clash with a heavily wooden interior.
- Some franchisors require uniform sign specs, so coordinate with them before cutting.
2. Event Planners and Wedding Coordinators
Why Acrylic?
Events—especially weddings—adore the graceful yet contemporary look of acrylic.
It’s perfect for welcome signs, seating charts, table numbers, directional boards, or bar menus.
Plus, you can get creative with frosting, engraving, or color fills that match event themes.
I’ve seen wedding setups that feature acrylic signs with elegant calligraphy.
They’re a step above paper or foam boards.
Benefits
- Reusability: If you keep the sign generic (like “Welcome” or “Reception”), you can reuse at multiple events.
- Customization: Engrave the couple’s names or event logo.
- Lightweight and Transportable: Good for traveling to different venues.
Considerations
- Acrylic can scratch if not packaged carefully.
- For outside weddings, confirm if your acrylic is suitable for short outdoor exposure.
- If you want gold or metallic paint fills in engravings, factor in drying times.
3. Corporate Offices and Commercial Buildings
Why Acrylic?
Modern offices often prefer sleek, minimalistic signage.
From the lobby logo sign to conference room nameplates, acrylic signs add a professional vibe.
I’ve even seen directories or occupant listings done on large acrylic panels with standoffs in the hallway.
They reflect a sense of innovation and clarity.
Benefits
- Professional Appearance: Crisp edges and polished surfaces convey competence.
- Durability: If the sign’s not in a high-traffic corridor (i.e., not prone to knocks), it lasts for years.
- Easy Upgrades: If a room’s name changes or you add a new department, create a fresh piece matching the existing style.
Considerations
- Some offices require ADA compliance with tactile letters or braille.
- Larger corporate signs might be heavier, needing more robust mounting.
4. Restaurants, Cafes, and Bars
Why Acrylic?
Menus, “Open/Closed” signs, restroom indicators—acrylic can handle them all.
Translucent or frosted acrylic signs with LED backlighting can create ambiance at night.
For instance, a cocktail bar might use a glowing acrylic sign behind the bartender station.
It looks classy and ties into the venue’s lighting scheme.
Benefits
- Easy Wipe-Down: Especially if signs might get greasy or smudged.
- Customizable for Seasonal Menus: If you make an engraved or layered sign, you can swap out sections.
- Lighting Potential: Edge lighting or halo lighting adds a dramatic effect.
Considerations
- If your aesthetic is more rustic or industrial, acrylic signs might clash unless you combine them with wood or metal.
- Acrylic near high heat or steam (like in a busy kitchen) could warp if it’s too close to the heat source.
5. Designers, Brand Agencies, and Marketing Teams
Why Acrylic?
Design professionals appreciate the precision and customization offered by CNC.
They can propose unique shapes, color layers, or engraved patterns to clients.
Acrylic signs can become part of brand rollouts or marketing campaigns.
I’ve seen agencies create eye-catching point-of-purchase displays or brand activation stands with acrylic letters or logos.
Benefits
- Full Creative Control: CNC handles complex geometry, letting designers push boundaries.
- Flexible Quantities: One-off prototypes or large runs for national campaigns.
- Professional Impact: Crisp lines reinforce brand identity and design integrity.
Considerations
- Designers must ensure production feasibility.
- Rely on a good CNC partner to handle the technical side if they’re not cutting in-house.
6. Hospitals, Clinics, and Educational Institutions
Why Acrylic?
These spaces need signs that are easy to clean, durable, and visually consistent.
From departmental directories to safety instructions, acrylic signage is common.
In schools or universities, it can label labs, classrooms, or administrative offices.
In hospitals, it might indicate wards, waiting areas, or highlight emergency routes.
Benefits
- Cleanability: Acrylic can be sanitized quickly, a must in healthcare.
- Professional Uniform Look: Large institutions like consistent signage across multiple floors.
- Option for Braille Engraving: With CNC, you can integrate braille for compliance.
Considerations
- Check local regulations on signage.
- Some hallways might require flame-retardant or specific safety-rated materials, though standard acrylic is often acceptable with certain backing.
7. Museum and Gallery Curators
Why Acrylic?
Museums need labels that don’t distract from exhibits, yet remain legible.
They also want removable or updateable solutions.
Acrylic stands or label plates can be discreet, especially if they’re small and transparent.
CNC cutting ensures uniform edges and shapes that blend with museum aesthetics.
Benefits
- Minimal Visual Interference: Clear acrylic can almost vanish, letting the art shine.
- Can Be Freestanding or Wall-Mounted: Perfect for dynamic exhibit rotations.
- Customization for Thematic Displays: For special exhibitions, curators might shape signage to match the theme.
Considerations
- Glare under bright gallery lights.
- The potential need for protective measures if large crowds pass near them.
8. CNC Operators and Fabrication Shops
Why Acrylic Signs?
If you’re a CNC operator or run a fab shop, offering acrylic sign services can open new revenue.
Small shops often start with wood or metal routing but discover a big market for acrylic signage.
Retailers, event planners, and local businesses frequently need custom signs.
Benefits
- Demand and Repeat Orders: Clients come back for expansions or rebrands.
- Creative Variety: Each job can be unique, from layered designs to engraved pieces.
- Scalability: Once you have the design files, producing multiples is straightforward.
Considerations
- You need the right bits, vacuum bed, and dust/chip management.
- Marketing your services to local businesses or event planners is key.
9. Startups and Home-Based Entrepreneurs
Why Acrylic Signs?
You don’t need a huge warehouse to produce acrylic signage if you own a reliable CNC router.
Many entrepreneurs run small custom sign shops from garages or coworking maker spaces.
They focus on niche markets—like wedding signs or small business branding.
Benefits
- Lowish Equipment Barrier: Desktop CNC routers can handle smaller acrylic pieces.
- High-Profit Margin: Custom, personalized signs can carry premium pricing.
- Online Sales or Local Delivery: You can list your products on Etsy or local platforms.
Considerations
- Larger projects may exceed the router’s bed size.
- Handling and shipping bigger acrylic signs can be tricky.
- Building a clientele base from scratch requires marketing effort.
10. DIY Enthusiasts and Makers
Why Acrylic Signs?
Hobbyists might craft personalized nameplates, home decor signs, or small event pieces for friends and family.
Acrylic is relatively easy to cut with a hobby-grade CNC if you manage speeds and feeds carefully.
Benefits
- Personal Satisfaction: Creating a unique sign for your workshop, a kid’s room, or as a gift.
- Experimentation: You can explore layering techniques or incorporate LED lighting.
- No Large Equipment Required: Just a small desktop router and a bit set for plastics.
Considerations
- Hobby-grade CNC machines may require multiple passes or slower speeds.
- Flame polishing edges might be riskier in a non-professional environment, so you may stick to sanding or buffing.
11. Advertising and Trade Show Agencies
Why Acrylic Signs?
Ad agencies or trade show specialists love unique booth elements.
Custom CNC acrylic signs can highlight brand logos, product names, or sponsor boards.
These agencies often coordinate multiple vendors but can rely on a specialized CNC shop for acrylic signs.
Benefits
- Creative Freedom: They can push for complex shapes or layered designs to impress clients.
- Reusability: Many trade show items get stored and reused if not event-specific.
- Brand Impact: Acrylic signage stands out in crowded expo halls.
Considerations
- Turnaround time might be tight for big expos.
- They may request color matching for brand guidelines, so be prepared for paint or vinyl overlays.
12. Home Decor and Interior Designers
Why Acrylic Signs?
While not as common, some interior designers incorporate acrylic signs or decor in residential spaces.
This might be a statement piece in a living room or a personalized nameplate in a child’s bedroom.
I’ve also seen them used for accent walls, combining wood panels and acrylic letters to create a modern vibe.
Benefits
- Customization: Perfect for clients wanting unique or monogrammed displays.
- Light Reflectivity: Acrylic can add a sense of brightness to smaller rooms.
Considerations
- Overusing acrylic in a home might feel too commercial.
- Must ensure the style aligns with the overall interior theme.
13. Non-Profit Organizations
Why Acrylic Signs?
Non-profits often host fundraisers, galas, or awareness events needing signage that stands out.
They may also want permanent donor recognition walls in lobbies.
Acrylic signs provide a polished way to acknowledge major donors, with engraved or color-filled names.
Benefits
- Professional Image: Helps donors feel respected and valued.
- Easy to Update: If new donors appear, you can cut additional plaques or nameplates.
- Lightweight for Temporary Events: Non-profits often move signage from one fundraiser to another.
Considerations
- Budget constraints might limit material thickness or finishing.
- Outdoor events need short-term usage or tent coverage.
14. Large-Scale Production vs. One-Off Pieces
We see from these categories that some users need large volumes of signage—like retail chains, malls, or franchises.
Others need only a few custom signs—like a single wedding or small boutique.
CNC suits both.
Once the designs are in place, scaling up or doing single prototypes is fairly direct.
I’ve personally handled orders for a dozen signs or a thousand signs using the same base approach.
15. Conclusion of Chapter VIII
There’s a huge spectrum of individuals and organizations that benefit from CNC acrylic signs.
Retailers, event planners, offices, restaurants, trade show exhibitors, and even home-based makers can all harness acrylic’s clarity, durability, and design flexibility.
I’ve seen how each sector has its own style—weddings crave elegance, retail demands brand consistency, corporate settings need polished professionalism.
No matter the niche, acrylic signage merges function and aesthetics.
Chapter IX: How to Get Custom Acrylic Signs Made
Now that we’ve seen who benefits from CNC acrylic signs, let’s dive into the practical side: how do you get them made?
Whether you plan to produce in-house or outsource, this chapter breaks down the steps.
We’ll cover what info you need, typical pricing factors, lead times, and best practices for successful sign projects.
1. Defining Your Requirements
Before contacting a manufacturer or setting up your own CNC job, clarify your needs.
Ask yourself:
- What size and thickness do I want?
- Which color or finish suits my brand or event theme?
- Where will these acrylic signs be displayed (indoor, outdoor, near direct sunlight)?
- How will they be mounted (standoffs, adhesive, hung from wires)?
- Are there design files ready in vector format, or do I need design assistance?
I once had a client who only knew they wanted “something cool” for a product launch.
We spent hours in back-and-forth trying to nail down basic dimensions, color preferences, and how they’d install the signs.
A bit of prep on their end could’ve saved time.
2. In-House Production vs. Outsourcing
In-House Production
- Pros: Total control over process, easy to do quick changes or prototypes, no external scheduling conflicts.
- Cons: Requires a CNC machine (plus maintenance), space, tooling, and skilled operators.
- Best For: Shops that already own CNC equipment or plan to do ongoing acrylic sign production.
Outsourcing
- Pros: Access to experts, high-end equipment, no capital investment.
- Cons: Lead times might depend on the vendor’s workload, plus you pay for their markup.
- Best For: Individuals, small businesses, or event planners who need professional quality but lack in-house CNC setups.
I’ve worked both ways—sometimes I run a job on my own CNC, other times I rely on a specialized acrylic vendor for more complex tasks like UV printing or advanced finishing.
3. Providing the Right Design Files
Most CNC shops prefer vector files (DXF, AI, EPS, or SVG).
If you only have raster images (PNG, JPG), someone must convert them to vectors.
That can add cost or cause inaccuracies if the image is low-resolution.
Ensure your text is outlined, so there’s no missing font issue.
Label each color or layer if you have a layered design.
- File Labeling:
If you have multiple pieces—like letters for a sign—label them logically (e.g., “Letter_A”, “Letter_B”). - Dimensional Info:
Indicate real-world dimensions in the file or provide a scale reference.
4. Choosing Materials and Finishes
We’ve covered acrylic variations in Chapter III, but you should specify:
- Cast or extruded (if relevant)
- Thickness (3 mm, 6 mm, etc.)
- Color (clear, frosted, mirrored, tinted, etc.)
- Finish (flame-polished edges, painted engravings, etc.)
If you’re unsure, ask for samples.
I’ve had clients who requested sample swatches for color matching.
Many shops keep small offcuts for demonstration.
5. Requesting a Quote
When requesting quotes from sign makers or CNC shops, provide:
- Design file (or at least a mockup)
- Quantity: Are you making 1 sign or 100 signs?
- Size: Overall dimensions or at least bounding box per sign.
- Material: Mention thickness and color.
- Finishing: Polished edges, paint fill, etc.
- Mounting: Holes or standoffs needed?
- Deadline: By when do you need them?
Shops can then calculate material usage, machine time, finishing labor, and packaging.
If you omit details, expect them to ask clarifying questions or supply a rough ballpark figure.
The more specifics you give, the more accurate the quote.
6. Cost Factors
Main cost drivers for acrylic signs include:
- Material: Thicker or specialized acrylic can cost significantly more per sheet.
- Machine Time: Complex designs take longer to cut, raising costs.
- Finishing Steps: Flame polishing, engraving, paint fills, or multi-layered assembly each add labor.
- Quantity: Single runs can be pricier per piece. Bulk orders often see discounts.
- Design Complexity: Intricate shapes or tight corners require slower speeds or smaller bits.
I’ve seen short-run, high-detail signs cost more per piece than a large batch of simpler shapes.
That’s because setup overhead is distributed across more units in a bulk run.
7. Typical Lead Times
Lead times vary by shop workload and sign complexity.
I usually see 1–2 weeks for moderate orders (like 10–20 custom signs).
Rush orders can be done in a few days if the shop is free, but expect a surcharge.
Large projects—for example, a mall directory system with dozens of big acrylic panels—could take a few weeks or more.
When I have a big queue, I slot new orders by complexity.
Small, simple jobs might get inserted quickly, while massive or intricate jobs demand more planning.
If your event date is fixed, communicate that early so the shop can plan accordingly.
8. Receiving Proofs or Mockups
Many shops provide a digital proof—a low-res simulation of how the sign will look.
Check for correct spelling, layout, and approximate scale.
For color references, a digital proof can be misleading if you’re matching brand Pantones, so you might request a small physical sample.
I recall one job where the client wanted a specific red shade, but the actual acrylic sample was more burgundy.
We had to pivot to painted acrylic or a vinyl overlay.
9. Finalizing the Order and Deposit
Once the quote is approved, shops typically request a deposit—often 50%.
They’ll order materials or schedule machine time.
If it’s a big enterprise client, there might be a purchase order system.
Keep lines of communication open in case of last-minute changes.
If you shift the design mid-production, that can add cost or cause rework.
10. Packaging and Shipping
Acrylic signs can crack if not packaged properly.
Expect your shop to wrap each piece in foam or bubble wrap, then box them securely.
For oversize signs, they may crate them or use custom cardboard packaging with protective corners.
Shipping costs can be substantial for large or heavy signs, especially if you choose expedited methods.
Sometimes it’s cheaper to pick them up if you’re local.
11. Inspecting the Finished Products
When you receive your acrylic signs, inspect them before final acceptance:
- Edges: Clean, no cracks or chips?
- Surface: Free of scratches or scuffs, especially if protective film was removed?
- Dimensions: Correct width, height, thickness?
- Mounting Holes: Properly located, correct diameter?
- Graphics or Engravings: Spelling correct, lines crisp?
Address issues with the shop promptly.
Some might fix minor flaws or re-cut certain parts.
For larger orders, keep a few spares if budget allows, in case a sign breaks during install.
12. Installation or Setup
Depending on the sign type, you might handle installation yourself or hire a professional installer.
For standoff mounting, measure carefully where each hole goes on the wall.
Use a level to ensure alignment.
If you’re hanging signs from a ceiling, confirm the hardware can support the weight.
I’ve seen a large acrylic sign fall because the anchor wasn’t properly secured.
For events, often the wedding planner or event staff sets up the signs.
They might use easels, stands, or simple hooks.
Remind them to handle acrylic carefully—especially the edges.
13. Maintenance and Care
Acrylic signs generally need minimal upkeep.
Here are some tips:
- Cleaning: Use a soft microfiber cloth and a plastic-safe cleaner or mild soapy water.
- Avoid Harsh Chemicals: Ammonia-based cleaners can damage or cloud acrylic.
- Dusting: Static can attract dust, so an anti-static spray or cloth helps.
- Storage: If you’re packing them away, keep them upright or flat with padding between layers.
I’ve known event planners who reuse the same welcome sign across multiple weddings by just switching vinyl overlays.
Keeping that acrylic scratch-free extends its lifespan.
14. Adjusting or Replacing Components
If the sign is layered, you might replace just the top layer if a portion changes (like a date or a sponsor logo).
This is why some clients prefer multi-part designs.
Swapping one panel is cheaper than remaking the entire sign.
Large corporate offices might reorder more nameplates if the staff grows or departments shift.
Since the CNC shop retains the original files, reproducing them is easy.
That’s an underrated advantage of digital fabrication.
15. Potential Pitfalls in Ordering
- Incomplete Specs: Delays and confusion arise if you don’t specify thickness, color, finishing, or mounting details.
- Unrealistic Deadlines: If you want 50 complex signs in 48 hours, expect rush fees or possible compromise on finishing.
- Poor Communication: Misaligned expectations about final edges, paint fill, or packaging can lead to disappointment.
- Skipping Prototypes: A massive sign might not come out as envisioned if you never tested a small sample cut.
Conclusion of Chapter IX
Getting custom acrylic signs made involves a straightforward process: define your specs, choose a production approach, get a quote, and finalize details with the CNC shop.
The more clarity you provide upfront—dimensions, color, finishing, usage environment—the smoother the project.
In my experience, a well-prepared client fosters a better outcome, reducing misunderstandings.
Once everything is set, you can look forward to unboxing crisp, polished acrylic signs that elevate your store, event, or office space.
Chapter X: Choosing a CNC Service Provider
At this point, you might wonder: “How do I find a reliable partner to cut and finish my acrylic signs?”
Not everyone has the time, budget, or expertise to invest in their own CNC router.
In this final chapter, we’ll explore how to evaluate CNC service providers, from checking their portfolio to negotiating lead times and costs.
We’ll also consider the qualities that separate a mediocre shop from an exceptional one.
1. Portfolio and References
A proven track record matters.
When I search for a CNC shop that handles acrylic signs, I look at their previous work.
Do they have photos of crisp edges and intricate designs?
Do they handle large signage or mainly small parts?
Ask if they can share references from past clients.
If others had positive experiences, you’re more likely to have one too.
A portfolio reveals the shop’s aesthetic range—some might excel at minimal, modern designs, while others do more whimsical or layered styles.
Ensure they’ve done projects similar in scope to yours.
If your sign is massive, pick a shop with a large-format CNC.
If your sign is highly detailed, pick one known for fine, precise cuts.
2. Equipment and Capabilities
Not all CNC machines are equal.
Some shops run older routers with limited bed size or lower spindle RPM.
Others have top-tier machines that can handle thick acrylic with ease.
I try to confirm these details:
- Maximum Bed Size: Ensures they can cut your sign in one piece if needed.
- Spindle Speed Range: Acrylic often benefits from higher RPM (18k+).
- Tool Changing System: Automatic tool changers speed up complex projects.
- Dust or Chip Management: Minimizing chip build-up prevents meltdown.
Ask if they have a vacuum table or reliable clamping.
Poor hold-down leads to subpar cuts or material shifting.
The best shops have robust fixturing to keep acrylic stable.
3. Material Expertise
Some CNC providers primarily cut wood or aluminum.
They may handle acrylic on occasion, but not be specialists.
Ideally, find a shop experienced with acrylic signs specifically.
They’ll understand feed rates, cooling methods, and finishing steps like flame polishing.
A shop that rarely works with acrylic might produce rough edges or meltdown spots.
I once tested a local metal-focused machine shop for a small acrylic job.
They used bits better suited for aluminum.
We ended up with suboptimal edges.
Ever since, I confirm a provider’s plastic expertise before handing over a big signage project.
4. Finishing and Post-Processing Options
Cutting is only half the story.
Quality finishing—sanding, flame polishing, paint filling—makes a difference in final appearance.
If you want multi-layer signs or engraved details, does the provider have a track record of doing that?
If you’re set on custom paint colors for engraved text, can they color-match?
Some shops outsource finishing.
That’s not a deal-breaker if they have reliable partners.
But it can add lead time and cost.
Others do everything in-house, which can simplify communication and speed.
5. Communication and Customer Service
CNC can be technical.
You might have questions about material thickness, design feasibility, or timeline.
A good service provider responds promptly, explains their process, and offers suggestions without pressuring you.
If a design might break in certain spots, they’ll advise thicker strokes or minor tweaks.
They function as a collaborative partner, not just an order taker.
Red flags include shops that rarely pick up calls, ignore emails, or rush you into decisions.
Look for a provider who invests time to understand your project’s goals—like brand style or event ambiance.
6. Turnaround Times and Scheduling
If you’re on a tight event deadline, confirm the shop’s capacity.
Busy providers might have a backlog of weeks.
Others with flexible schedules might handle quick turnarounds—usually with a rush fee.
Ask about typical lead times for a project of your size and complexity.
If your sign is large or has extensive engraving, it might require more hours on the router.
I’ve had instances where a small sign needed just a day or two, but bigger multi-layer signage with paint fills took two weeks.
Realistic scheduling keeps everyone happy.
Sometimes it helps to finalize designs early, so the shop can slot you into their production queue.
7. Pricing Transparency
A fair CNC provider breaks down costs: material, machine time, finishing, possible design or setup fees, plus shipping or installation if applicable.
They might quote a per-hour rate for the CNC or a flat rate per sign.
If you see a suspiciously low quote, be cautious—maybe they’re skipping finishing steps or using low-quality material.
On the flip side, sky-high quotes could mean they’re not specialized or just trying to overcharge.
Compare quotes from a couple of shops, ensuring both are quoting on identical specs.
One might be cheaper because they’re using extruded acrylic instead of cast, or they’re omitting flame polishing.
Clarify details so you compare apples to apples.
8. Willingness to Do Test Cuts or Samples
For large or intricate projects, it’s wise to run a sample or partial test.
Some shops charge a small fee for a sample, others might do it free if you proceed with the full order.
A test piece helps you see the edge quality and ensure no design issues.
If a provider refuses any sample or test approach, that might indicate inflexibility.
9. Location and Shipping
Local shops make sense if you prefer to pick up signage or do in-person check-ins.
But maybe you’ll find a specialized acrylic sign shop out of state that ships finished products.
In that case, factor in shipping costs and potential damage.
A professional shop typically crates or double-boxes large acrylic signs.
Sometimes, shipping can be expensive if your signs are big or if you need expedited delivery.
10. Reading Reviews and Testimonials
In this digital era, check Google reviews, Yelp, or industry forums for feedback on CNC shops.
If they consistently earn praise for acrylic signs or on-time delivery, that’s reassuring.
If you see complaints about melted edges or poor communication, proceed carefully.
I find you can glean a shop’s strengths or weaknesses from these reviews.
11. Visiting the Shop (If Possible)
If the job is significant, consider visiting the shop in person.
Touring their facility lets you confirm they have the right CNC machine for thick acrylic.
Observe how they store and handle materials.
Are acrylic sheets kept upright or lying around risk of scratching?
A clean, organized environment often correlates with professional outcomes.
I once visited a shop that had advanced CNC routers but a chaotic layout.
Sheets were stacked near the forklift path.
That worried me about potential damage or dust contamination.
We still proceeded, but I kept a closer eye on the final product.
12. Additional Services (UV Printing, Vinyl Overlays, etc.)
Some CNC providers also offer digital printing on acrylic or apply vinyl overlays.
That can expand your sign’s look—like printed graphics behind a clear layer.
If you need such services, see if the shop can handle them internally or if they outsource.
I’ve done some projects requiring full-color logos adhered to the acrylic after cutting.
Having a single vendor manage both cutting and printing simplifies logistics.
13. Payment and Deposits
Industry norms vary.
Many shops want a 50% deposit for custom acrylic signs, with the remainder due upon completion.
This covers their material and labor costs.
Larger corporate clients might have net-30 terms, but small shops often expect immediate payment.
Discuss payment details upfront so there’s no confusion.
14. Handling Revisions or Errors
No one wants mistakes, but they happen.
Maybe the sign arrives with an off-center engraving or the color is slightly off.
How does the shop handle corrections or rework?
A reliable provider admits errors, proposes a fix, or offers a discount if the mistake is minor.
I’ve encountered shops that get defensive instead of solving the issue.
Customer-friendly policies often indicate they value long-term relationships over quick profits.
15. Conclusion of Chapter X
Choosing the right CNC service provider can be the difference between receiving gorgeous, precise acrylic signs or enduring a frustrating experience with subpar results.
Look for a shop that understands acrylic signs specifically, offers the finishing services you need, communicates well, and delivers on time.
Read reviews, compare quotes, and don’t hesitate to request samples.
Armed with these tips, you’ll be better equipped to find a partner who respects your vision, meets your deadlines, and produces acrylic signs that wow your audience—whether in a store, an office, or an event.
FAQ
- What thickness of acrylic is best for indoor office signs?
Typically 1/4 inch (6 mm) is common, offering a good balance of sturdiness and cost.
Thicker acrylic can look more premium, but also weighs more and costs more. - Can I use extruded acrylic instead of cast for my signs?
Yes, extruded is cheaper.
However, cast acrylic generally cuts cleaner, has tighter thickness tolerances, and polishes better.
If budget allows, cast acrylic is recommended for high-end signage. - Will my acrylic signs scratch easily?
Acrylic is more scratch-prone than glass or metal, but normal handling is usually safe.
If you expect heavy contact or cleaning, choose thicker sheets or protective coatings. - What file format should I provide to the CNC shop?
Vector files like AI, DXF, EPS, or SVG.
Avoid raster formats unless the shop can vectorize them, which may add cost. - Is flame polishing necessary for good edges?
Not mandatory, but it yields a smooth, glassy finish.
You can also sand and buff edges.
For quick signage, a clean CNC cut might suffice without further polishing. - Can acrylic signs be used outdoors long-term?
Standard acrylic may yellow or degrade under prolonged UV exposure.
If needed outdoors, look for UV-stabilized acrylic or limit usage to short durations. - Is laser cutting better than CNC routing for acrylic signs?
Laser can produce smooth edges, but it may cause slight heat discoloration.
CNC routing offers more versatility for thick sheets and drilling.
Both are valid, but CNC is often favored for thicker or complex shapes. - How do I keep acrylic from melting during CNC cutting?
Use sharp O-flute bits, higher feed rates, adequate spindle RPM, and airflow or mist coolant.
Multiple shallow passes also reduce heat buildup. - Which finishing steps can I add for more impact?
Options include flame polishing, paint filling engraved text, layering multiple acrylic sheets, or backlighting with LEDs. - What mounting methods work best?
Common choices: standoffs, adhesive, screws, or wire hanging.
Standoffs create a modern floating effect.
Adhesive is simpler but permanent. - How big can acrylic signs get?
Potentially up to 4×8 feet or more, depending on sheet size and CNC bed capacity.
Larger signs may need thicker acrylic or multiple support points to prevent flexing. - Can acrylic signs include color printing?
Yes, if the shop offers UV printing or if you apply vinyl graphics.
You can also paint or reverse-print on a clear sheet for dynamic effects. - Are acrylic signs easy to ship?
They’re not too heavy, but can be fragile.
Good packaging—foam wrap, sturdy boxes—is essential.
Oversized pieces may require freight shipping. - What’s the typical turnaround time for custom acrylic signs?
Often 1–2 weeks, but it varies.
Rush options exist for an extra fee.
Large or intricate orders might take longer. - Do I need a deposit before production starts?
Most shops require 50% down or some deposit for materials and labor security.
Balance is due upon completion or shipment. - Can you engrave small text for labels or tags?
Yes, but there’s a limit to how tiny.
Engraving smaller than 3–4 mm tall can become tricky.
Test cuts help confirm legibility. - Do acrylic signs break easily if dropped?
They can crack or chip if subjected to force.
They’re more durable than glass but still require careful handling. - Can I reuse or repurpose acrylic signs for future events?
Absolutely, if they’re generic or if you can replace date-specific elements.
Some event planners store them safely and rebrand with removable decals each season.
Further Reading & Authoritative References
This guide is grounded in practical, hands-on CNC experience and supported by reliable, industry-standard sources. For readers seeking further technical details, fabrication methods, or material performance insights related to acrylic signs, we recommend the following authoritative references:
- Plexiglas® – Acrylic Sheet Technical Library
📎 https://www.plexiglas.de/en
One of the world’s leading manufacturers of acrylic (PMMA). Offers detailed specs on cast vs. extruded acrylic, machining guidelines, flame polishing, and UV resistance. - Plaskolite – Acrylic & Polycarbonate Fabrication Resources
📎 https://www.plaskolite.com
U.S.-based acrylic supplier providing datasheets, best practices for routing, finishing, and cleaning acrylic signs used in retail and architectural applications. - International Sign Association (ISA)
📎 https://www.signs.org
A global authority on signage design and fabrication. Publishes trends, best practices, ADA compliance guides, and installation standards for commercial signs. - Inventables – CNC Cutting Tips for Acrylic
📎 https://www.inventables.com/technologies/acrylic-sheets
Resource for makers and CNC operators. Features real-world tips on spindle speed, feed rates, and bit types for clean acrylic cutting. - Trotec Laser Blog – CNC vs. Laser for Acrylic Signage
📎 https://www.troteclaser.com/en-us/news
Offers comparisons between CNC and laser technology for cutting acrylic, including surface quality, edge clarity, and speed. - ThomasNet – Acrylic Material Guide
📎 https://www.thomasnet.com/articles/plastics-rubber/acrylic-materials/
An engineering-focused breakdown of acrylic properties, tolerances, and industrial applications in signage and display manufacturing. - YouTube Channels (Hands-On Learning)
- WANT.NET CNC – https://www.youtube.com/@wantnetglobal/videos
Visual guides and machining demos for routing, engraving, and polishing acrylic signs using desktop and industrial CNC setups.
- WANT.NET CNC – https://www.youtube.com/@wantnetglobal/videos
Other Articles You Might Enjoy
- CNC Machining Materials: Acrylic vs. Polycarbonate for Transparent Components
CNC Machining: An Introduction and the Importance of Material Type Computer Numerical Control (CNC) machining is a manufacturing process where pre-programmed computer software dictates the movement of factory tools and…
- Choosing Between Acrylic and Polycarbonate for CNC Machining: Clarity, Durability, and Machinability
Introduction to CNC Machining and Material Choices CNC machining, also known as Computer Numerical Control machining, is a critical aspect in the field of manufacturing. This process utilizes computerized controls…
- CNC Machining Materials Deep Dive: Acrylic vs. Polycarbonate for Transparent Parts
CNC Machining Materials Deep Dive: Acrylic vs. Polycarbonate for Transparent Parts Computer Numerical Control (CNC) machining is a production process that involves the use of computers to control machine tools,…
- Hard Plastic Sheets Explained For Makers And Machinists: Which One Is Right for Your Project?
Chapter 1: Introduction I've worked in manufacturing and DIY fabrication for years, frequently handling all types of materials. Among these, hard plastic sheets consistently proved versatile and reliable for various…
- Master CNC Machining with ABS Plastic Sheet: Tools, Tips, and Techniques
Introduction: Mastering CNC Machining with ABS Plastic Sheet When it comes to CNC machining, the choice of material can make or break a project. ABS plastic sheet is one of the most…
- Acetal Material Overview: Why It Excels in CNC Machining Applications
I. Introduction I’ve been fascinated by engineering plastics for quite some time. In my early days as a mechanical enthusiast, I spent hours experimenting with different polymers to see how…
- Machining Techniques for Parts: Unlocking CNC and Cutting-Edge Tech
I. Introduction I remember the first time I realized how critical machining is to modern manufacturing. I was interning at a small shop, watching a CNC machine carve intricate features…