Introduction: Why Brass Bushings?
I remember the first time I truly understood why brass bushings mattered so much in mechanical setups.
I was standing in a small workshop, looking at the inner components of a vintage printing press.
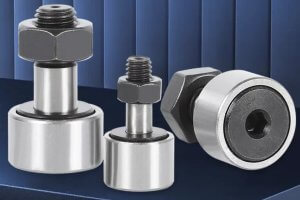
The press had several moving parts, each relying on a sleek cylindrical insert to keep friction under control and ensure smooth movement.
That insert was a classic example of brass bushings in action.
The workshop owner told me how well these bushings held up over time.
He said they hardly needed to be replaced, even under the press’s heavy loads.
He also mentioned how easy it was to replace them if necessary, saving him time and money.
So what exactly makes brass bushings so special?
In my view, brass bushings stand out because they offer an excellent balance of durability, corrosion resistance, and machinability.
Steel bushings can handle intense pressure, but they sometimes corrode faster in damp conditions.
Bronze bushings are also very popular, but brass often brings a simpler manufacturing process and better cost efficiency for certain applications.
Brass bushings are not just about static use.
They work well in dynamic systems, from rotating shafts in motors to sliding mechanisms in robotics.
I’ve seen them used in automotive prototypes, CNC equipment, and even home-brew hobby projects like small CNC routers.
When I reflect on the variety of places where I’ve spotted brass bushings—factories, maker labs, auto shops—I realize how common they are.
In many mechanical systems, friction is the silent destroyer.
Too much friction can degrade performance, increase heat, or cause sudden failures.
That’s where brass bushings truly shine.
By combining the inherent lubricating properties of brass with a finely machined interior, these bushings reduce friction significantly.
Also, since we’re talking about brass bushings in a CNC context, I want to mention their machinability.
If you’ve used a CNC lathe or mill to handle brass, you probably know how forgiving brass can be.
It’s relatively soft, which means you can run higher spindle speeds and achieve precise tolerances.
It doesn’t gum up your cutting tool as easily as some other metals, which is a big plus for production runs.
I’ve chatted with a few machinists who preferred brass for prototypes.
They said brass bushings were easier to design and turn around quickly, especially when the final assembly required multiple iterations.
I’ve also observed how an engineering team can quickly customize the internal geometry of a brass bushing—like adding lubrication grooves—using CNC techniques.
That agility makes brass bushings attractive in both mass production and short-run scenarios.
Overall, brass bushings offer a synergy of strength, smoothness, anti-corrosive properties, and ease of customization.
In this article, I’ll walk you through everything from their typical use cases to how you can machine them effectively on a CNC.
We’ll explore design guidelines, standard vs. custom considerations, and tips for installation.
I’ll also share insights on working with suppliers and mention some resources you can download to support your next project.
If you’ve ever wondered what goes into selecting the right bushing for your CNC-assembled machine, or if you’ve had trouble figuring out the best tolerances, you’re in the right place.
By the end of this series, I hope you’ll see why brass bushings remain a popular choice, how they can help reduce friction, and how you can optimize them for your specific use.
Common Applications of Brass Bushings
I used to think brass bushings were only for generic assemblies, like simpler rotational shafts in casual projects.
But after I got hands-on experience inside a few industrial facilities, I realized they’re practically everywhere.
Whenever machines rely on smooth sliding or pivoting action, it’s a good bet you’ll find brass bushings tucked away in the mechanism.
I remember walking through a mid-sized automotive parts plant, located in the Midwest, where I saw rows of machines assembling transmission components.
One of the lead engineers pointed out how they used brass bushings within the shifting mechanisms.
He said these bushings reduced friction between metal parts and allowed for smoother gear changes.
Without that friction reduction, the entire operation would have more wear, leading to costly downtime.
Let me give you some insight into a few typical settings where brass bushings play a crucial role:
- Automotive Systems:
Cars, trucks, and motorcycles all have pivot points, from brake systems to steering columns.
I’ve seen brass bushings in clutch pedals, shift levers, and throttle linkages.
Their corrosion resistance and ability to handle repetitive motion make them excellent in these environments.
When I swapped out a worn bushing in my own car’s clutch pedal assembly, I chose a brass variant.
That fixed a nagging squeak and gave the pedal a smoother feel. - Aerospace Components:
I had a friend who worked at an aircraft maintenance facility, and he once showed me how some control linkages use brass bushings to reduce friction without adding significant weight.
In aircraft systems, every ounce matters, and brass is relatively light compared to many alternatives.
Plus, brass doesn’t corrode easily in moist or salt-air environments, which can be crucial for planes that fly near oceans. - Industrial Machinery:
Walking through a paper mill was a real eye-opener for me.
Those enormous rollers rotate day and night under high tension, and they rely on certain bearings and bushings to function.
Although other materials can be used, brass bushings often show up in places where constant lubrication isn’t practical.
In my view, the self-lubricating or low-friction nature of brass really shines there.
When you have to replace bushings less often, you save time and keep production lines running more efficiently. - Marine Equipment:
Saltwater is tough on metals.
Brass, however, has a natural resistance to corrosion in marine environments.
I’ve observed brass bushings in boat steering linkages, fishing reels, and other marine components.
One fisherman I met in Florida replaced his reel bushings with brass, noting they lasted longer in saltwater than cheaper alternatives. - Robotics and Automation:
I used to be part of a robotics club, and we frequently prototyped custom assemblies for our robots’ arms.
We often used brass bushings to keep our rotating joints consistent.
Unlike plastic bushings, brass versions could take higher loads without deforming.
During an intense robotics competition, our biggest advantage was reliability—fewer breakdowns meant more time in the arena.
I remember how impressed some folks were that we never had jammed joints, largely thanks to those well-chosen bushings. - Mold and Die Industry:
Mold makers often rely on guide bushings, guide pins, and wear plates.
Brass bushings with embedded lubrication grooves are common in this field, especially for injection molds or stamping dies.
I visited a mold shop once where they had a standard practice: replace steel bushings with brass if the environment called for repeated high-speed movement.
They claimed it cut down on maintenance intervals.
Even a small improvement in mold uptime can translate into massive productivity gains for manufacturing. - Heavy Equipment:
Whenever I think of heavy-duty systems like bulldozers or excavators, I envision big pivot points under high stress.
Brass bushings can handle shock loads better than some materials, provided they’re chosen with the right thickness and design.
I have a cousin who works in construction equipment repair, and I’ve watched him press out old bushings from loader arms.
He often replaces them with brass variants because they stand up to both dirt ingress and heavy loads reasonably well. - Consumer Products:
It might sound surprising, but some everyday items use brass bushings too.
I’ve taken apart a few lawnmowers, vacuum cleaners, and even mechanical toys.
In many cases, I found small brass bushings helping reduce friction on rotating shafts or gears.
They’re not always labeled as such in product manuals, but if you open up the assembly, you’ll see those familiar golden sleeves. - DIY Projects & Small CNC Machines:
If you’re into homemade CNC routers or 3D printers, you might prefer linear bearings.
But I’ve seen home builders incorporate brass bushings into certain axes for cost savings or simplicity.
The user can custom-machine these bushings to fit their rails, rods, or lead screws.
Back when I tinkered with a DIY CNC rig, I used brass bushings in the Z-axis.
They were easier to lubricate than some plastic bushings, and I felt confident about the tolerance control because I machined them myself. - Motors and Generators:
Many electric motors or generator shafts incorporate bushings or bearings.
Sometimes, brass bushings serve as a backup to more sophisticated roller bearings, especially in older models or designs where space is tight.
I recall an antique generator restoration project where I replaced old, worn bushings with brand-new brass ones.
It improved the generator’s smoothness and lowered its operating noise slightly.
These applications show how versatile brass bushings can be.
You can find them in anything from delicate aerospace assemblies to robust construction gear.
That wide range is a testament to brass’s balanced properties: moderate strength, good wear resistance, decent corrosion resistance, and straightforward machinability.
In some cases, manufacturers might opt for bronze bushings or even specialized polymer bearings.
But in my personal experience, brass bushings often win out when the design calls for easy manufacturing, decent load capacity, and cost effectiveness.
When I compare brass to steel, I see a clear advantage in terms of corrosion resistance.
When I compare it to bronze, I note that brass sometimes machines more easily and can be cheaper, though it depends on the exact alloy grades.
One point that often comes up: do these bushings require lubrication?
In many high-load or high-speed applications, we need at least minimal lubrication.
However, brass bushings can function fairly well in low-lubrication environments.
I’ve worked on equipment that used grease pockets or embedded lubrication grooves in the bushing walls, a feature we’ll discuss later.
Those grooves can hold oil or grease, further reducing friction and wear over time.
Every time I see a well-maintained assembly still running on the original brass bushings after years, I’m reminded that choosing the right material pays off.
Sure, the initial selection can be daunting, especially with so many alloy options.
But once you narrow it down—based on load, environment, motion type, and cost—brass often emerges as a winner for a broad spectrum of applications.
Now, let’s consider the bigger picture.
The reason I decided to break down these uses is to show that brass bushings are not confined to one niche.
From the automotive and aerospace sectors to consumer goods and DIY builds, there’s a consistent demand for well-machined, reliable bushings.
I believe that’s a significant reason we see so many search queries like “brass bushings for CNC” or “custom brass bushings.”
People often want to know if they can handle the design and machining themselves, especially if they have access to a CNC lathe or mill.
Spoiler: they usually can, assuming they have the right tools and skill set.
Even if they don’t machine them in-house, many prefer to outsource the job to a specialized vendor.
I’ve seen job shops that focus almost exclusively on producing custom brass bushings for a variety of industries.
Their entire business revolves around fulfilling that consistent demand.
Sometimes, folks also question whether they should upgrade to higher-end bearings or bushings once they see how critical these components are.
But if the machine’s duty cycle or load doesn’t demand an ultra-premium solution, a well-designed brass bushing can be more than enough.
When I was working on a small project for a local machine shop, the owner said, “I’d rather have a good brass bushing that’s easy to replace than an overly complicated solution that fails unpredictably.”
That statement stuck with me.
To sum up, brass bushings cover an incredibly broad spectrum of applications.
They’re found in automotive transmissions, aircraft control linkages, production lines in factories, marine equipment, and hobby machines in your garage.
I’ve come to appreciate their straightforward nature and the engineering efficiency they bring.
Even if some of the more advanced bearing technologies might outshine them in specific use cases, brass bushings still hold a prime spot in many engineers’ toolkits.
CNC Machining Considerations for Brass Bushings
I remember my first attempt at machining brass bushings on a small CNC lathe.
I was working out of a friend’s garage, and the primary goal was to create custom sleeves for a custom automotive project.
I expected an easy job.
But I learned quickly that even though brass is user-friendly, there are still critical steps to follow if you want consistent results.
When I speak with machinists about brass bushings, they often highlight three main factors: spindle speed, feed rate, and tool selection.
Brass allows higher cutting speeds compared to many steels.
Yet, if you push it too hard or use the wrong tool geometry, you can still get chatter or chatter-induced flaws.
Setting proper parameters is key, which is why I’ve assembled this table below.
Recommended CNC Parameters for Brass Bushings
| Parameter | General Range | Comments |
|---|---|---|
| Spindle Speed (Turning) | 2,000 – 4,500 RPM | Fine-tune based on diameter & lathe capability |
| Feed Rate (Turning) | 0.002 – 0.008 in/rev | Start low, increase if surface finish is good |
| Depth of Cut (Turning) | 0.02 – 0.08 in (rough) | Less for finish passes; watch for deflection |
| Spindle Speed (Milling) | 3,000 – 6,000 RPM | Higher speed if using carbide tooling |
| Feed Rate (Milling) | 6 – 12 in/min | Adjust per flute count and tool diameter |
| Coolant / Lubrication | Mist or Light Cutting Oil | Helps reduce friction, improves surface finish |
| Tool Material | Carbide or HSS | Carbide lasts longer, HSS can work for prototyping |
| Tool Geometry | Positive Rake Angles | Reduces cutting forces and burr formation |
This table is just a starting point.
I’ve seen folks go higher with spindle speeds if they have stable setups and good coolant flow.
I’ve also used deeper cuts in short runs, but that can risk vibration if the part is thin or if your lathe isn’t rigid.
Tooling selection is another big piece of the puzzle.
Carbide inserts are popular because they resist wear and allow faster cutting speeds.
High-speed steel (HSS) tools are cheaper and can work if you don’t mind slower speeds or if you’re doing low-volume prototypes.
I’ve personally had decent luck with HSS tooling on smaller CNC lathes, especially when finishing the ID of a brass bushing.
Coolant strategy matters, too.
Brass doesn’t require heavy coolant, but a light mist or cutting oil can reduce friction and flush away chips.
I’ve tried running dry in the past.
That’s possible for short runs.
But if you care about consistent surface finishes, using at least a mist lube is wise.
Controlling Burrs and Surface Finish
When I first started machining brass bushings, I noticed burrs forming along the edges.
Brass can be “sticky” despite being softer than steel.
If your tool geometry or feed rate is off, you’ll see small burrs that require extra deburring steps.
To reduce burrs, use a sharper tool with positive rake and keep your feed rate steady.
I also like to do a light chamfer on edges to remove any sharp corners.
That’s particularly important if you’re press-fitting the brass bushing into a housing.
A slight chamfer helps guide the bushing in place without shaving material or seizing up.
Surface finish is another biggie.
For rotating shafts, you want a smooth ID and OD.
I find that a feed rate near the lower end of the recommended range often results in a better finish.
A finishing pass with minimal depth of cut (maybe 0.005 inches) can also improve surface quality dramatically.
Workholding and Part Rigidity
One mistake I made early on was failing to secure the brass stock properly.
If the brass rod shifts or vibrates, your tolerances will suffer, and you could ruin the piece.
I’ve used both three-jaw chucks and collet chucks.
A collet chuck can improve concentricity if you have access to one.
When you’re turning brass bushings with thinner walls, the risk of crushing or distorting the part is real.
I sometimes use custom soft jaws or special supports to keep everything aligned.
Milling vs. Turning
In many scenarios, you’ll rely on turning to get the basic cylindrical shape for your brass bushings.
But some designs involve side features, flanges, or grooves that might be easier to cut on a CNC mill.
I once worked on a custom flanged brass bushing that had radial lubrication grooves on the top face.
It was simpler to machine those grooves using a mill with a rotary table instead of trying to carve them while turning.
If you do need to mill, watch your holding setup.
I’ve clamped partially finished bushings in a vise, then used an end mill to carve shallow lubrication pockets.
The key is to minimize clamping pressure so you don’t deform the part.
Brass is forgiving, but it can still bend out of shape if you over-tighten.
CNC Programming Tips
I’m not a professional CNC programmer by trade, but I’ve written enough G-code to appreciate a few best practices for brass bushings:
- Ramp Up Slowly:
Start with moderate speeds/feeds in your first test pass.
Then, adjust once you see chip quality and surface finish. - Add Spring Passes:
Brass can expand slightly during turning if there’s internal stress.
A spring pass (repeating the same finishing cut) helps ensure consistent diameters. - Use Fewer Tool Changes:
If possible, group your operations so you’re not constantly swapping tooling.
Brass bushings often have a straightforward geometry, so you might use the same insert for roughing and finishing if it’s in good shape. - Measure Often:
I like to pause for an inspection pass, especially for the first few parts.
That way, I can confirm we’re still on spec.
Brass is more forgiving than hardened steel, but you still want consistent dimensions.
Dealing with Heat and Tool Wear
Brass doesn’t generate as much heat as some tough alloys, but you can still see tool wear if you push the feed rate too high.
Back when I tried cranking up the feed to rush a job, I ended up with a dull cutting edge halfway through the batch.
The surface finish deteriorated, and burrs grew worse.
A quick tool change fixed it, but I learned that a balanced approach is better if you want consistent results.
Some shops run brass bushings at insane speeds, especially in well-cooled CNC environments.
I’ve watched production lines where they churn out thousands of bushings a day.
They often rely on diamond-like carbon (DLC) or titanium nitride (TiN) coated tools for better wear resistance.
That can be worth it in higher volume, but it might be overkill if you’re just making a few prototypes.
Monitoring Tolerances
Because brass bushings often serve as precision fits around shafts, you need to hold tight tolerances.
If you overshoot the ID, your bushing might rattle and fail to provide the support needed.
If you undershoot, you risk friction or even galling.
I tend to keep a digital bore gauge and micrometer nearby whenever I’m working on bushings.
Measuring the ID right after a finishing pass helps you catch issues quickly.
A friend of mine uses a technique where he machines a test ring first, checking actual tool deflection and temperature effects.
If the ring matches his target diameter, he proceeds with the production run.
It’s a neat trick that helps him dial in the exact offset needed for consistent results.
Example Machining Workflow
Let me outline a quick workflow I’ve followed for small-batch brass bushings:
- Material Prep:
Cut brass rod slightly longer than the final bushing.
Deburr the edges. - Mount in Lathe:
Use a collet chuck if possible for best concentricity.
Verify runout with an indicator. - Rough Turning:
Remove outer material quickly with a carbide insert.
Leave 0.02 – 0.03 inches for finishing. - Drilling/Boring ID:
Drill pilot hole, then bore to near-final ID.
Leave about 0.005 – 0.01 inches for finish pass. - Finish Pass:
Use a fine feed rate, minimal depth.
Monitor any signs of chatter. - Measure:
Check OD and ID.
If needed, do a spring pass or final tweak pass. - Parting Off:
Part off the bushing carefully to avoid excess burrs.
Chamfer or deburr edges by hand or a quick re-chuck operation.
I’ve repeated that workflow countless times.
Each job might call for minor variations in feeds, speeds, or tooling, but the core process remains the same.
If you keep your lathe in good shape and pay attention to detail, you’ll get consistent, high-quality brass bushingsevery time.
Wrapping Up This Section
Now you have a solid understanding of the main CNC machining considerations for brass bushings.
From choosing the right spindle speed to managing burrs, there’s a lot to consider.
But in my experience, once you dial in your parameters, machining brass can be a breeze.
The material’s forgiving nature means even if you make a small mistake, you can often correct it on the spot.
Design & Selection Guidelines
I’ve always found that the design phase is where brass bushings can either shine or fail.
No matter how well you machine them, a flawed design can sabotage performance.
In this section, I’ll dive into the critical design considerations: dimensions, tolerance, material grades, and functional features like lubrication grooves.
Understanding Core Dimensions
Whenever I design a brass bushing, the two dimensions I think about most are the ID (inner diameter) and OD (outer diameter).
A mismatch in either can disrupt the entire assembly.
For instance, if your ID is too large for the shaft, you’ll get play and potential vibration.
If your OD doesn’t match the housing, you might not achieve the correct press or slip fit.
I remember an instance where I had to create a custom bushing for a lathe tool post.
The bushing was meant to hold a rotating tool holder.
I overshot the ID by just a small fraction.
As a result, the tool holder wobbled during operation, hurting surface finish on the workpiece.
That experience made me realize the importance of measuring everything multiple times.
Recommended Wall Thickness
A brass bushing generally needs a wall thickness sufficient to handle loads while preventing distortion.
You can’t just guess.
Wall thickness ties directly to the application’s stress and the type of load (radial, axial, or a combination).
Below is a table that sums up some typical guidelines I’ve seen or used for reference.
| Outer Diameter (OD) | Recommended Wall Thickness | Notes |
|---|---|---|
| < 0.5 in | 0.02 – 0.04 in | For small bushings, watch tolerances |
| 0.5 – 1.0 in | 0.04 – 0.06 in | Common range in hobby CNC builds |
| 1.0 – 2.0 in | 0.06 – 0.12 in | Industrial standard range |
| 2.0 – 3.0 in | 0.12 – 0.20 in | For moderate to heavy loads |
| 3.0 – 4.0 in | 0.20 – 0.30 in | Consider integral flanges or ribs |
| > 4.0 in | 0.30+ in | Often requires custom analysis |
This table doesn’t replace an engineer’s calculations, but it’s a helpful baseline.
Sometimes, I’ll go thicker if I expect shock loads or extremely high stresses.
One time, I reinforced a brass bushing with an outer steel sleeve because the assembly was in a heavy off-road vehicle suspension system.
It was a cost-effective way to gain extra strength without losing brass’s friction advantages.
Brass Grades: H59, H62, C360, etc.
Not all brass is the same.
If you’ve ever purchased raw brass stock, you’ve seen multiple grades, each with its own composition and machinability.
H59, for example, has a good balance of strength and formability, while H62 is slightly different in copper-zinc ratio.
C360 (also known as “free-cutting brass”) is beloved by machinists for its excellent machinability rating—often cited around 100%.
I’ve had the best results with C360 for general-purpose brass bushings.
Its lead content enhances machinability, meaning I can maintain tight tolerances easily.
However, if the environment requires extra corrosion resistance, I might pick a naval brass variant (like C464).
Here’s a brief overview:
- H59: Decent strength, moderate machinability. Cost-effective.
- H62: Slightly more copper content, good overall corrosion resistance.
- C360: “Free-cutting brass,” ideal for CNC turning, minimal tool wear.
- Naval Brass (C464): Optimized for marine environments, higher corrosion resistance.
At one point, I used H62 brass bushings in a small fixture that went overseas.
The end-user reported minimal corrosion after a few months in a humid factory.
That was a relief—nobody wants a surprise layer of green oxide buildup.
Tolerance Recommendations for Press-Fit or Slip-Fit
Brass bushings typically come in either a press-fit (interference fit) or slip-fit style.
If you’re planning a press-fit, you want your OD to be slightly larger than the housing bore.
The exact interference can range from 0.0005 inches to 0.002 inches depending on diameter.
Slip-fits might allow 0.0002 to 0.001 inches of clearance, letting the bushing be inserted by hand.
In practice, I often create a slip-fit for prototypes because it’s easier to swap out bushings during testing.
Once everything’s finalized, I’ll switch to a press-fit design for the production run.
That said, it’s crucial to note that press-fitting compresses the ID of the bushing.
You might machine the ID to your exact target, only to find it shrinks upon insertion.
A friend of mine once forgot to account for that, and we had to re-bore every single bushing after assembly.
That’s a mistake I try never to repeat.
Lubrication Groove Options
Brass bushings sometimes incorporate internal grooves or pockets that store lubricant.
They can be axial grooves, spiral grooves, or a pattern of dimples.
The idea is to retain grease or oil, reducing friction over the bushing’s lifetime.
For low-speed, high-load scenarios, lubrication grooves can be a lifesaver.
I’ve designed bushings with spiral grooves for an automotive part.
The continuous path helped circulate the grease, improving wear life significantly.
Just be mindful that these grooves reduce the effective bearing surface area.
If you go overboard, you might compromise load capacity.
Use of Flanges, Collars, and Anti-Rotation Features
Sometimes you don’t just want a basic sleeve.
You need a flanged brass bushing or one with a locking feature.
A flange prevents the bushing from sliding through a housing, acting like a built-in shoulder.
An anti-rotation tab or notch can keep the bushing from spinning inside the housing, useful for certain applications where you only want rotation on the shaft.
I once added small protrusions on the OD to lock a brass bushing into a casting.
We milled corresponding pockets in the housing.
It was more work, but it made sense for that high-torque, cyclical load scenario.
Always consider whether the bushing should be free to rotate or remain stationary.
Checklist for Custom Quotes
If you’re ordering brass bushings from a CNC supplier, it helps to provide a thorough spec sheet.
I’ve found that a well-detailed drawing avoids confusion.
Key points to include:
- Outer diameter (with tolerance)
- Inner diameter (with tolerance)
- Length / overall height
- Material grade (e.g., C360 brass)
- Surface finish requirements
- Whether you need lubrication grooves (provide details)
- Press-fit or slip-fit details
- Quantity needed
The more info you give, the less likely you’ll face surprises when the parts arrive.
I’ve seen quotes vary widely if the supplier has to guess your tolerances or surface finish needs.
Balancing Cost and Performance
Designers often face budget constraints.
Brass bushings can be cost-effective if you balance the right grade, thickness, and finishing steps.
For low-volume prototypes, you might splurge on top-quality tooling or special grooves.
In large-scale production, though, saving a few cents per bushing can add up.
One approach is to standardize the OD so the bushings fit an off-the-shelf bore dimension.
I’ve also seen engineers opt for a simpler design that can be machined in fewer operations.
For instance, if you don’t truly need that second flange, skip it.
Every extra feature is an extra CNC operation, which translates to higher cost.
Personal Anecdote About Over-Engineering
I once over-engineered a brass bushing for a small robotic arm.
I added three different lubrication channels, a large flange, and a custom notch for alignment.
Yes, it worked beautifully.
But when we scaled the design for production, that bushing became a bottleneck—too many machining steps.
We ended up simplifying it, removing one lubrication channel and reducing the flange size, which cut machining time significantly.
The performance drop was negligible, but we saved a bundle on production costs.
Wrapping Up Design & Selection
If there’s one takeaway, it’s this: a great brass bushing design respects load requirements, usage environment, and cost constraints.
Whether you choose H59, C360, or another alloy, always validate your wall thickness, groove placement, and tolerance targets.
Press-fitting vs. slip-fitting is a critical decision that can alter your final ID.
And if you’re not sure, prototype a few versions before committing to a large batch.
Standard vs. Custom Brass Bushings
There was a time I insisted on custom brass bushings for nearly every project.
I loved the idea of perfect fits and specialized features.
But eventually, I realized that standard sizes can handle a surprising range of needs.
In this chapter, I’ll break down the trade-offs between going with off-the-shelf brass bushings and ordering custom CNC pieces.
Why Standard Brass Bushings?
Manufacturers produce many brass bushings in standard dimensions—both metric and imperial.
You can find them in catalogs or online stores, often at lower prices than fully custom parts.
For common shaft sizes (like 1/2 inch or 20 mm), it’s easy to pop in a standard bushing.
Then you just design the housing around that dimension.
I recall a project where I helped rebuild a small printing press.
We found that a standard 3/4-inch ID bushing with a 1-inch OD fit perfectly in the existing bracket.
All I had to do was ream the bracket slightly.
That saved me from designing and machining a custom bushing from scratch.
When to Opt for Custom CNC Machining
Custom brass bushings shine when your project demands unique dimensions, tighter tolerances, or specialized features.
If you need an unconventional ID/OD ratio or a specific flange geometry, standard options might not exist.
Additionally, if you want integrated lubrication grooves, notches, or alignment features, custom is often the way to go.
I once worked on an industrial slicing machine for a food processing plant.
We needed a bushing with an internal spiral groove to channel food-grade lubricant while resisting heavy washdowns.
No standard bushing met those criteria.
So, we contracted a CNC shop to produce a batch of custom brass bushings with those grooves.
It wasn’t cheap, but it solved the problem exactly.
Cost and Lead Time Considerations
One big factor is lead time.
Standard bushings are often in stock, so you can get them the next day.
Custom CNC might take a week or more.
If you’re in a production crunch, that delay matters.
On the other hand, if your machine design is still in flux, waiting for custom bushings might not be an issue.
Here’s a table comparing standard vs. custom brass bushings at a glance:
| Factor | Standard Brass Bushings | Custom CNC Brass Bushings |
|---|---|---|
| Availability | Typically in stock, fast shipping | Made to order, can have longer lead times |
| Cost (per unit) | Lower for moderate volumes; economy of scale | Higher piece price, but flexible on geometry |
| Tolerances | Generally moderate (e.g., ±0.002 in) | Can be very tight (e.g., ±0.0005 in) |
| Special Features | Rarely included (basic ID/OD, maybe a flange) | Lubrication grooves, notches, custom flanges, etc. |
| Material Options | Often limited (common brass alloys only) | Wide range of brass alloys or even other metals |
| Design Freedom | Constrained by the catalog’s available sizes | Nearly unlimited, subject to machining constraints |
| Example Scenario | Repairing standard equipment with known bushing sizes | Building a new product with unique geometry |
I often lean on standard brass bushings when I’m prototyping quickly.
If it works well, I might keep it that way for the production model.
However, I’ve also seen times when a custom solution reduces the total number of components.
For instance, a flanged bushing plus a retaining ring might be replaced by a single custom bushing with an integrated lip.
Testing and Validation
Whether you go standard or custom, testing is crucial.
In my experience, you can’t just assume a standard bushing is “good enough.”
I always recommend a functional test under real loads or speeds.
Sometimes, an off-the-shelf bushing might show excessive wear if your application is more intense than the bushing’s rated specification.
I worked with a small robotics startup that tried to use a standard brass bushing for a rotating joint that needed near-zero backlash.
They found slight clearance in the bushing’s ID caused wobble at the robot’s end effector.
That ended up costing them more time because they had to pivot to custom bushings anyway.
Design Flexibility
One major perk of custom CNC is design freedom.
I’ve created bushings with pockets for O-rings or seals, which is nearly impossible with standard designs.
I’ve also extended the length of a bushing to provide extra load capacity.
Or I’ve used thicker walls to handle bigger radial loads.
That’s part of what makes custom brass bushings so appealing: you’re not constrained by a catalog’s limitations.
Bulk Ordering vs. One-Offs
If you need only a single brass bushing or a handful, standard might be the simpler path.
But if you’re producing thousands of bushings per month, custom solutions can become cost-effective.
Volume can drive down the per-unit price significantly, even with CNC operations.
I’ve seen quotes drop by 50% or more when we moved from a small lot (100 pieces) to a large run (10,000 pieces).
Of course, you have to weigh the initial setup costs.
There could be programming or tooling fees.
Sometimes you can reduce that by providing your own CAD files or using a shop that specializes in brass bushings.
I’ve dealt with shops that have universal fixtures ready for turning bushings of various diameters, speeding up the process.
Transitioning from Standard to Custom
It’s common for companies to start with standard bushings during R&D.
Once the design is stable and volume ramps up, they switch to custom solutions.
I’ve done that with a personal project, where I used standard bushings in a CNC router.
Eventually, I decided to have a local machine shop produce custom brass bushings with spiral grooves for better lubrication.
It was a fun experiment, and I believe it boosted the router’s longevity.
Practical Tip: Hybrid Approach
Sometimes you can mix standard components with minor custom modifications.
For instance, buy a standard bushing that’s slightly oversized.
Then do a final reaming or boring operation in-house to achieve your exact ID tolerance.
That approach offers a semi-custom solution without the cost of full CNC from scratch.
I tried this hybrid tactic when I needed a slip-fit that was more precise than a stock part provided.
I ordered a batch of standard bushings, re-chucked them, and bored each ID by 0.001 inches.
All I needed was a single finishing pass.
That small tweak saved me time and money, and it didn’t require a complete custom production run.
When Custom Is Mandatory
There are times when you simply must go custom.
One example I recall is a food processing machine that needed both FDA-compliant materials and a very specific geometry to clear certain mechanical arms.
No standard part even came close.
Custom brass bushings with specialized surface treatments were the only choice.
In that scenario, you accept the higher cost as part of the design constraints.
Wrapping Up Standard vs. Custom
To me, it all boils down to application needs.
If your project can live with moderate tolerances and your design fits a common bushing size, standard is a no-brainer.
But if you require unique features, extremely tight tolerances, or specific alloys, custom machining is the way to go.
As you weigh your options, keep in mind factors like lead time, cost per unit, design freedom, and testing outcomes.
And don’t forget that a hybrid approach or simple re-machining of standard parts might offer a sweet spot in certain cases.
Installation & Assembly Tips
When I first began working with brass bushings, I assumed installation was simple.
I’d just press them into a housing, and everything would be fine.
I learned quickly that a poor assembly process can ruin a perfectly machined bushing.
Installation isn’t just about forcing the brass bushing into place.
It’s about preparing the housing, matching tolerances, and safeguarding the bushing’s integrity.
I’ve also found that the method of securing the bushing—be it press-fit, slip-fit, or adhesives—should match the application’s needs.
Basic Press-Fit Techniques
Press-fitting is the most common method I’ve seen.
In a press-fit, the brass bushing has a slightly larger OD than the bore.
You use a mechanical or hydraulic press to insert the bushing.
This interference fit ensures the bushing stays put under normal operating conditions.
I remember messing up my first press-fit job by failing to chamfer the bore.
The bushing caught on a sharp edge, producing a burr and distorting the bushing’s OD.
Ever since that incident, I always recommend lightly chamfering both the bushing’s leading edge and the bore entrance.
If you do a press-fit, watch out for ID shrinkage.
Because the outer wall compresses, the ID can close up more than expected.
I learned to machine the ID slightly oversized if I knew it would be pressed.
This might be an extra 0.0005 to 0.001 inches, depending on the bushing’s size and interference.
Another crucial point: lubrication.
A thin layer of oil or assembly lube reduces friction during the press.
I like to heat the housing slightly and cool the bushing.
This thermal differential can make the press-fit process smoother, minimizing the force needed.
Slip-Fit and Retention Methods
Slip-fit assemblies allow you to slide the brass bushing in by hand.
This style is typical when you need the bushing to be removable for maintenance or replacements.
But then you must secure it with a retaining ring, set screw, or adhesive.
Otherwise, the bushing might spin in the bore, especially under load.
I worked on a small CNC fixture that used slip-fit brass bushings for quick part swaps.
A simple retaining ring on the outside held the bushing in place.
That design avoided the potential ID distortion from press-fitting.
It also let us swap bushings in seconds if they wore out or if we needed a different ID.
Slip-fits are also helpful in prototypes.
If you’re unsure about the final dimension, a slip-fit bushing can be tested and replaced without re-machining the entire housing.
However, you do need to ensure the bushing won’t spin, especially if the application involves significant torque.
Using Adhesives
Some assemblies rely on adhesives—like Loctite or epoxy—to secure brass bushings.
That might sound unconventional, but I’ve seen it work well in lower-load scenarios.
For instance, a friend of mine built a specialized camera gimbal that needed a bushing to guide smooth motion.
He used a thin film of retaining compound around the bushing’s OD.
It saved him from dealing with a precise press-fit tolerance.
However, adhesives aren’t always suitable for heavy loads or high-heat environments.
If your bushing sees extreme temperatures, the adhesive might degrade or lose strength.
I recall a case in a small engine application where the bushing loosened after the adhesive overheated.
We ended up switching to a press-fit approach for reliability.
Assembly Table: Pros & Cons of Each Method
Below is a table summarizing the key assembly methods for brass bushings, along with pros, cons, and typical use cases.
| Method | Typical Interference | Pros | Cons | Common Uses |
|---|---|---|---|---|
| Press-Fit | 0.0005 – 0.002 in | Secure, long-lasting, minimal extra hardware | Can distort ID; requires precise bore & press tooling | Automotive, heavy machinery |
| Slip-Fit + Retaining Ring | 0 | Easy maintenance/removal, no ID distortion | Must prevent rotation; slightly more complex assembly | Prototyping, replaceable bushings |
| Adhesive Bond | 0 – 0.0005 in clearance | Simple to implement, can accommodate minor tolerance errors | Limited load/heat capacity; might be weaker over time | Light-duty, small devices, prototypes |
| Set Screw Clamp | 0 – 0.001 in clearance | Adjustable, can lock bushing in place quickly | May mar outer surface; bushing can shift under heavy load | Hobby projects, quick-change tooling |
I’ve tried all of these approaches at different times.
In many cases, the exact choice depends on the environment, load, and the ease of maintenance required.
Avoiding Deformation
One thing I stress to people is to avoid hammering the bushing into place.
I’ve seen folks take a mallet to a delicate brass bushing, only to ruin its roundness.
If you don’t have access to a proper press, at least use a block of hardwood or a soft-faced hammer.
But even then, pressing with a vise or arbor press is usually safer.
When dealing with thin-walled bushings, the risk of distortion is higher.
I once had a set of 0.5-inch OD bushings with just a 0.04-inch wall.
We had to be extra cautious.
We used a precision arbor press with a custom mandrel that fit inside the bushing.
This mandrel helped maintain the bushing’s shape during installation.
Checking Dimensions After Assembly
After you install the brass bushing, it’s wise to re-check the ID and alignment.
Sometimes, the final assembly can shift the geometry just enough to matter.
If the ID is too tight, you might need to run a reamer or hone through it.
I keep a small set of adjustable reamers on hand for exactly this reason.
I learned the hard way when a customer complained that their new bushings weren’t allowing the shaft to rotate freely.
I hadn’t measured the ID post-installation.
It turned out the press-fit compressed the ID too far.
A quick hone fixed it, but it was a valuable lesson.
Pressing vs. Freezing or Heating
Thermal expansion can make installation easier.
You can place the brass bushing in a freezer for an hour and lightly heat the housing.
Brass contracts when cooled, and the housing expands when warmed.
That creates a temporary clearance, letting you insert the bushing with minimal force.
However, you must work quickly because temperature equalizes fast.
I once tried this method with a series of bushings for a gear assembly.
We cooled the bushings with dry ice and heated the gear housing to about 200°F.
Each bushing practically dropped into place.
As the parts returned to room temperature, the interference took hold.
Still, be cautious with excessive heat.
At very high temperatures, brass can anneal or soften.
I usually keep the housing below 300°F to avoid altering the brass properties.
Dealing with Misalignment
Misalignment happens if the bore isn’t perfectly concentric with the shaft path.
Even a minor tilt can cause binding or uneven wear in your brass bushing.
Some folks add a spherical bushing or a flexible coupling to compensate, but that’s not always an option.
If you suspect misalignment, do a test fit with a known straight rod.
Insert the rod into the bushing and see if it moves freely.
If there’s resistance, you might need to re-machine or adjust the housing.
Practical Example: Machine Restoration
I once helped a friend restore an old metal lathe.
We replaced a few worn brass bushings in the feed mechanism.
We carefully measured the existing bores, turned custom bushings slightly oversized, and press-fit them after lubricating.
Then we reamed the ID so the lead screw fit without binding.
That lathe ended up running smoother than before, and we were proud of how precise it felt.
Final Thoughts on Assembly
In my experience, a good assembly process ensures brass bushings perform as intended.
Rushing the installation can undermine all the effort you put into machining them.
Whether you choose press-fit, slip-fit, adhesives, or a mix, remember to confirm alignment and final ID.
A little extra care at this stage goes a long way.
CNC Manufacturer or Supplier Considerations
When I first sought a supplier for brass bushings, I assumed any machine shop would do.
I learned that not all shops are equal.
Some excel at high-volume production.
Others shine in tight-tolerance, small-batch work.
Choosing the right CNC manufacturer or supplier is key to getting consistent quality in your brass bushings.
In this section, I’ll break down the factors that matter most: lead time, MOQ (minimum order quantity), machining precision, material expertise, and more.
Evaluating Capabilities
Start by checking the shop’s equipment list.
Do they have a CNC lathe capable of holding the tolerances you need?
Are they familiar with brass alloys and the nuances of machining them?
I once used a shop that specialized in stainless steel parts.
They assured me they could handle brass, but the final bushings had excessive burrs.
Turns out they hadn’t dialed in the right speeds and feeds for brass.
Also, ask about secondary processes.
Many brass bushings require deburring, chamfering, or specialized surface treatments.
If the shop can’t do that in-house, they might outsource, adding complexity and potential delays.
Lead Time and Production Flow
I’ve seen lead times range from a few days for small prototype orders to several weeks for larger runs.
If you’re on a tight schedule, confirm whether the shop has open machine time.
Some shops might promise quick turnarounds but end up pushing your job behind bigger clients.
It’s also worth inquiring about their production flow.
Do they batch orders by material type?
If they do, your brass bushings might sit until the shop schedules a “brass week.”
That’s not necessarily a bad thing, but you should know upfront.
Minimum Order Quantity (MOQ)
MOQ can be a deal-breaker.
Some shops won’t touch an order under 500 or 1,000 pieces.
Others specialize in small runs or even single-piece prototypes.
I once needed just 10 custom brass bushings for a research project.
I ended up finding a boutique CNC shop that charged a premium but delivered excellent results in just a week.
For larger-scale production, a higher MOQ might be okay, especially if it drives the per-piece cost down.
I’ve seen situations where going from 100 pieces to 1,000 pieces slashed the unit price by nearly half.
That’s the economy of scale working in your favor.
Quality Control & Inspection
Quality control can vary widely.
Ideally, the supplier should have a proper inspection process, perhaps with a coordinate measuring machine (CMM) or at least high-quality gauges.
I like to ask for first-article inspection (FAI) reports when ordering a big batch of brass bushings.
This means the shop measures critical dimensions on the first completed piece.
They’ll share that data with you to confirm everything’s on spec before continuing.
I recall one instance where an FAI revealed the bushing’s ID was 0.001 inches too tight.
Catching that early allowed the supplier to adjust the boring operation for the rest of the run.
If we hadn’t done an FAI, we’d have ended up with hundreds of unusable bushings.
Material Sourcing
Ask the supplier where they source their brass.
Is it a reputable mill?
Do they provide material certifications if required?
Especially for high-performance or regulated industries (e.g., aerospace, medical), you might need traceability on your brass bushings.
I’ve encountered scenarios where shops used lower-grade brass or a slightly different alloy than I specified.
That caused confusion and potential performance issues.
Make sure the supplier knows exactly which brass alloy you need (C360, H59, etc.), and confirm they can reliably get it.
Communication & Responsiveness
I value a supplier who responds quickly to emails or phone calls.
If they take days to reply, that can be a warning sign.
During the prototyping stage, you might need back-and-forth adjustments or clarifications.
A sluggish supplier can stall your project.
Also, note how they handle design feedback.
A great CNC shop might suggest small changes to reduce cost or improve machinability.
For instance, they might recommend a less complex lubrication groove pattern in your brass bushings.
Or they could propose a standardized OD that matches off-the-shelf tooling.
Sampling & Prototyping
Before committing to a large production order, consider a sample run.
I usually request 5–10 pieces for evaluation.
That lets me test fit, function, and durability without risking a big investment.
Some shops might charge extra for low-volume runs, but it’s worth it to validate the design.
When I tested a new design for flanged brass bushings, I had a local shop produce a small batch first.
We uncovered a few quirks in how the flange dimensions interacted with the housing.
Fixing those issues at prototype stage saved me from scrapping a larger batch.
Table: Key Supplier Factors at a Glance
| Factor | Questions to Ask | Why It Matters |
|---|---|---|
| CNC Equipment | Lathe models, tooling, max diameter capacity | Ensures shop can handle your bushing size & complexity |
| Material Expertise | Experience with brass alloys, leaded vs. lead-free | Minimizes risk of burrs, poor surface finish |
| Quality Control | Inspection methods, FAI availability, gauge calibration | Confirms consistent dimensions, reduces rejects |
| Lead Time | Typical turnaround for small vs. large orders | Affects your project schedule |
| MOQ & Pricing | Do they accept small runs? Volume discounts? | Balances budget, especially for prototypes vs. full production |
| Communication | Response speed, willingness to give design feedback | Important for timely changes & clarifications |
| Additional Services | Deburring, plating, packaging, labeling | Might save you time managing multiple vendors |
Referencing a table like this keeps me focused on the essentials.
I’m less likely to miss a crucial detail when comparing multiple suppliers.
Cultural or Regional Differences
If you’re outsourcing internationally, consider language barriers and time zones.
A supplier on the other side of the globe can still make great brass bushings, but communication might lag.
I also look at shipping and customs fees, which can eat into cost savings.
In one project, I tried using an overseas vendor with extremely low prices.
The bushings turned out okay, but shipping took weeks, and the final cost after import fees wasn’t much lower.
The delays also disrupted our timeline.
We ended up moving to a domestic supplier for faster turnaround.
Building a Long-Term Relationship
In my opinion, the best approach is to form a lasting partnership with a reliable CNC supplier.
They get to know your preferences, your tolerance standards, and your typical designs for brass bushings.
Over time, they might even store custom tooling or jigs for your repeat orders.
That leads to better consistency and potentially lower setup fees.
I have a favorite local shop that I turn to whenever I need quick-turn custom bushings.
They already have my standard specs on file, so we skip the initial back-and-forth.
That continuity is priceless when deadlines are tight.
Dealing with Rejections or Problems
No matter how great a supplier is, mistakes can happen.
Bushings might arrive with the wrong ID, or the surface finish could be rougher than expected.
Establish a clear policy for addressing defects.
Will the supplier remake the parts at no charge?
Do you need to send back the entire batch, or just the rejects?
I experienced a mishap where a shop used the wrong brass alloy.
They owned up to it and replaced the entire lot.
That was inconvenient, but their honesty reinforced my trust.
Closing Thoughts on Choosing a Supplier
Selecting the right CNC manufacturer or supplier for your brass bushings can make or break a project.
Look for proven capability with brass, good communication, and a solid track record.
Don’t just chase the lowest quote.
Sometimes, a slightly higher price from a more responsive, quality-focused supplier is worth it.
Downloadable Resources
When I dove deeper into brass bushings, I found that having the right reference materials can save a ton of time.
I’m talking about charts, parameter sheets, dimensional guidelines, and even example CAD drawings.
In this section, I’ll share the types of resources I believe are invaluable, plus some insights on how to create or find them.
Why Resources Matter
I recall a period when I was juggling multiple bushing designs across different projects.
I kept rummaging through random notes, old textbooks, and forum posts to confirm recommended clearances or cutting speeds.
Eventually, I realized I could condense these details into my own cheat sheets.
If you’re a designer or a machinist who frequently works with brass bushings, having a clear set of references cuts down on guesswork.
Types of Helpful Documents
- Standard Sizes Chart:
A table showing common IDs, ODs, and lengths for off-the-shelf bushings.
It can help you quickly decide if a standard bushing might fit your application.
I’ve often grabbed such charts from bearing manufacturers’ websites or metal supply catalogs. - Material Comparison Guide:
A chart that breaks down different brass alloys, listing properties like tensile strength, corrosion resistance, and machinability ratings.
If you’re unsure which alloy suits your environment, these guides steer you in the right direction.
I’ve made a personal version that highlights which alloys I’ve successfully used in marine vs. automotive scenarios. - CNC Machining Parameter Sheet:
Ideal feeds, speeds, coolant recommendations, and tool geometry suggestions for brass.
We touched on these details earlier, but I like to keep them in a one-page PDF.
Sometimes, I’ll pin that PDF near the CNC machines so nobody has to guess. - Tolerance & Fit Tables:
If you’re designing for a press-fit or slip-fit, you might consult an engineering reference like ISO or ANSI standards.
But I prefer quick-glance tables that show, for example, “For a 1-inch shaft, recommended slip-fit clearance range is X.”
That eliminates the need to flip through big reference books every time. - CAD Templates:
Basic 2D or 3D models of typical brass bushings (with or without flanges) can jumpstart your design process.
I’ve saved standard step files in a shared drive, so when colleagues or clients ask for a bushing design, I can send them a template.
Then they modify dimensions or add features like grooves. - Lubrication Groove Patterns:
A small library of standard groove designs—spiral, axial, radial, or pockets—helps you see how to lay them out.
Each pattern has pros and cons, and a reference guide clarifies which pattern might be best for your load or speed.
Creating Your Own Resources
If you can’t find existing documents that perfectly match your usage of brass bushings, creating your own might be beneficial.
I started by compiling all the data I frequently referenced: recommended clearances, typical hardness values, surface finish targets, and so on.
Then I formatted them into a spreadsheet.
I color-coded the cells to highlight safe operating ranges, borderline ranges, and do-not-exceed values.
Over time, I shared that spreadsheet with co-workers.
They added new notes—like actual test results for certain feed rates—and it grew into a living document.
Now, whenever we face a bushing design challenge, we consult the doc.
It’s not an official standard, but it’s grounded in real-world experience.
Publishing Resources for Others
If you’re running a website, blog, or you’re part of a manufacturing community, sharing these resources can position you as an expert on brass bushings.
I’ve seen shops publish free PDF guides, which then drive potential customers to request quotes.
They might include a quick link: “Download our free CNC Machining Guide for Brass Bushings.”
That draws in both hobbyists and professionals looking for quick references.
You might also offer more advanced resources, like a materials cost calculator or an interactive “bushing fit” tool.
Such a tool could ask for your shaft diameter, load conditions, and environment, then recommend a suitable fit range or brass alloy.
Table: Potential Downloadable Resources
Below is an example table outlining possible resource formats and their benefits.
| Resource Type | Format | Key Benefits |
|---|---|---|
| Standard Sizes & Dimensions Chart | PDF / Spreadsheet | Quickly check off-the-shelf bushing parameters |
| Material Properties Comparison | PDF / Online Tool | Helps select the right brass alloy for environment & load |
| Machining Parameter Cheat Sheet | PDF / Poster | Reduces trial-and-error on feeds & speeds |
| Tolerance & Fit Reference | PDF / Spreadsheet | Speeds up the design process for press-fit vs. slip-fit |
| CAD Templates (Basic Bushing Shapes) | STEP / DWG | Allows engineers to adapt quickly in their own CAD software |
| Lubrication Groove Pattern Library | PDF / Image Pack | Guides designers on groove geometry & spacing |
| Cost Estimation Calculator | Online Tool | Offers quick budgeting for custom or standard brass bushings |
I find that once you create even a couple of these resources, you can reuse them across different projects or share them with clients.
Where to Host or Access Them
You can keep these resources on:
- Company Website: In a “Downloads” or “Resources” section.
- Engineering Forums: Places like GrabCAD or specialized machinist forums.
- Cloud Folders: Google Drive, Dropbox, or your internal server.
- Trade Shows: Physical handouts or USB drives with digital copies.
I used to pass around printed parameter sheets at local maker meetups.
People loved having a tangible reference for brass bushings.
But most nowadays prefer a quick PDF link, so I keep a short URL in my pocket.
Additional Tips
If you’re expecting a wide audience—like a global user base—consider providing metric and imperial units.
I know the frustration of seeing a spec sheet in just metric when my lathe is set up for inches, or vice versa.
Dual-unit charts can help you reach more people with minimal extra work.
Also, think about version control.
If you update your resource, it’s nice to label it as “v1.1” or similar, so users know they have the latest info.
I once had a scenario where a coworker was using an old feed-and-speed chart.
He ended up with subpar surface finishes until he discovered we had a newer revision.
Real-World Example: My Lubrication Groove PDF
A while ago, I compiled a short PDF about lubrication groove patterns for brass bushings.
I illustrated the differences among spiral grooves, axial channels, radial slots, and various pocket shapes.
I explained typical widths, depths, and recommended spacing for each pattern.
I also included notes on pros (like better grease retention) and cons (like reduced bearing area).
Over time, I refined it based on feedback from folks who used the patterns in real machines.
That PDF became one of my most shared resources.
Friends in the manufacturing world still email me occasionally to say how it saved them from guesswork.
Stay Updated
Technology and best practices evolve, even for something as timeless as brass bushings.
As new coatings, lubricants, or CNC techniques emerge, your resource might need updates.
For instance, if a new lead-free brass alloy becomes popular, you’ll want to include its properties in your comparison chart.
I try to review my cheat sheets every six months or so.
If I learned a new trick—like a better chamfer angle that reduces burrs—I add it in.
I believe that continuous improvement is key, especially in a competitive manufacturing landscape.
Wrapping Up Part 8
Gathering (and sharing) the right references can significantly improve your experience with brass bushings.
Whether you’re new to designing bushings or you’re a veteran machinist, these resources will streamline your workflow, reduce errors, and encourage consistent results.
Call to Action (CTA)
I’ve shared a lot of information about brass bushings so far.
From my personal experiences to curated data tables, we’ve covered everything from design to installation.
Now, I’d like to bring it all together with a set of actions you can take.
1. Download Our Free Resources
If you’re serious about incorporating brass bushings into your machines or products, I encourage you to find or create a digital resource pack.
That might include standard dimension charts, CNC machining parameter sheets, and lubrication groove libraries.
I personally keep a link on my site where readers can grab these PDFs.
Feel free to adapt them to your own environment.
2. Request a Custom Quote
If you’ve realized that off-the-shelf bushings won’t cut it, consider reaching out to a reputable CNC supplier for a custom quote.
Provide them with your ID, OD, length, tolerance, alloy preference, and any special features like flanges or lubrication grooves.
I’ve found that the more detailed you are upfront, the fewer surprises you’ll face when the parts arrive.
Some suppliers even have online quote forms.
You upload a 3D model of your brass bushings, specify the quantity, and they get back to you with pricing.
When I first used an online quote service, I was amazed by the convenience—no emailing back and forth.
3. Validate with Samples
Before committing to a massive production run, I suggest ordering a small batch of prototype bushings.
That way, you can test the fit, measure friction under load, and check for alignment issues.
This test run can confirm if your design or chosen brass alloy meets your performance requirements.
Remember, brass bushings might need slight ID modifications if you plan on press-fitting.
A sample batch often uncovers these nuances, saving you from scrapping a large batch later.
4. Join an Online Community
We live in an era where knowledge is shared globally.
If you’re facing a unique challenge with your brass bushings, consider posting questions on specialized machining forums or engineering subreddits.
I’ve resolved many tricky problems by tapping into the collective wisdom of experienced machinists.
You might even stumble upon people who’ve tackled similar projects.
They can share insights on tool selection, part fixturing, or finishing methods.
In some cases, they might point you to a specialized coating that drastically increases your bushing’s lifespan.
5. Explore Upgrades or Alternatives
While brass bushings are fantastic for a wide range of applications, you might have specific needs that warrant an upgrade.
For instance, if you’re dealing with extremely high loads or temperatures, you could compare brass to bronze or advanced composites.
Conversely, if you need medical-grade cleanliness or a lead-free environment, you might look into specialized lead-free brass alloys.
I’ve seen some shops experiment with polymer-lined bushings where friction is ultra-low.
But brass remains a classic choice for its balance of strength, corrosion resistance, and machinability.
If you do explore alternatives, keep brass in mind as a baseline for cost and performance.
6. Implement Regular Maintenance Schedules
If you’re the end-user or an equipment manager, plan regular checkups for your brass bushings.
Set a maintenance schedule based on operating hours or usage cycles.
Inspect for signs of wear, galling, or dryness.
Add lubrication if you notice metal-on-metal contact or friction hotspots.
In my experience, a well-lubricated bushing can outlast a neglected one by a significant margin.
This might seem obvious, but many facilities skip or delay routine checks, leading to premature failures.
7. Consider Coatings or Surface Treatments
Sometimes, applying a light coating (like a PTFE-based film) can reduce friction and extend the life of your brass bushings.
While brass is already quite good at resisting corrosion, certain coatings can further enhance performance in harsh environments.
I once partnered with a company that tested a special electroless nickel plating on the inside of a brass bushing.
They reported lower friction under high loads, although the process added cost.
Deciding whether a coating is worth it depends on how critical your application is and your budget constraints.
8. Stay Curious and Keep Learning
Engineering and machining evolve.
If you keep an eye on new tools, lubrication techniques, or advanced brass alloys, you’ll maintain a competitive edge.
I personally like to attend local manufacturing expos, check out new developments in CNC tooling, and watch for any breakthroughs in metal science.
You never know when a seemingly small innovation could revolutionize your brass bushings usage.
9. Share Your Success Stories
If you’ve implemented brass bushings in a project—be it a large industrial installation or a small DIY build—consider documenting it.
Take photos, record performance metrics, and note any challenges you overcame.
Sharing these stories on your site or with colleagues can inspire others and also serve as a portfolio piece for your skills.
I once read about a guy who built a custom 3D printer with brass bushings on the Z-axis.
He gained attention in maker communities, got asked to speak at events, and ended up opening a small engineering firm.
All because he shared his bushing-based success story with the world.
10. Final Personal Take
I’ve spent countless hours experimenting with brass bushings, from my early garage-based projects to professional consulting gigs.
Despite new materials and bearing technologies, brass remains a reliable, versatile option.
I appreciate the simplicity: a well-machined brass bushing, installed properly, can last for years with minimal fuss.
Whether you’re a mechanical engineer, a CNC machinist, or just curious about these gleaming cylinders, I hope you found this guide helpful.
If you’re unsure where to start, grab a standard size bushing, test it, and see how it performs.
You might be pleasantly surprised by how robust and adaptable brass really is.
Thank you for joining me on this journey through brass bushings.
We’ve covered a lot of ground: application insights, machining tips, design guidance, supplier selection, assembly advice, and now a final set of actions you can take.
All that’s left is our dedicated FAQ, where I’ll answer the most common questions I’ve encountered.
FAQ
- What is a brass bushing, and how does it differ from a bearing?
A brass bushing is a cylindrical sleeve made of brass that supports a rotating shaft or pin.
Unlike roller or ball bearings, it doesn’t have rolling elements.
Instead, it relies on direct contact to reduce friction. - Which brass alloy is best for CNC machining?
Many machinists favor C360 (free-cutting brass) because it produces cleaner chips and has excellent machinability.
However, H59 or H62 can also work if you only need moderate precision. - How do I choose between standard and custom brass bushings?
Standard options are cheaper and quicker if they fit your dimensions and tolerances.
Go custom if you need unique IDs, ODs, flanges, or specialized features like lubrication grooves. - Do brass bushings require lubrication?
Most do benefit from lubrication, especially in high-speed or heavy-load conditions.
Some low-load applications might get by without it, but adding even light lubrication extends bushing life. - Can brass bushings withstand high temperatures?
Brass can typically handle temperatures up to a few hundred degrees Fahrenheit without major issues.
For extreme heat, consider bronze or a high-temperature alloy to ensure stability. - Are brass bushings corrosion-resistant?
Brass is reasonably corrosion-resistant, especially in mild environments.
For saltwater or extreme chemical exposure, consider naval brass or specialized coatings. - What tolerances should I use for a press-fit vs. slip-fit?
Press-fits might have 0.0005 to 0.002 inches of interference depending on size.
Slip-fits often have a small clearance, around 0.0002 to 0.001 inches.
Exact numbers depend on load and diameter. - Is it hard to CNC-machine lubrication grooves in brass bushings?
Not usually, but it requires the right tooling.
Spiral grooves might need a 4-axis or a carefully timed lathe operation.
Axial grooves can often be milled in a secondary step. - How do I prevent the bushing from rotating in its housing?
You can use a press-fit, adhesive, set screw, or design a bushing with an anti-rotation notch.
The choice depends on load, environment, and serviceability needs. - Are flanged brass bushings harder to machine?
Slightly, because you need an additional step to form the flange.
But with CNC, it’s straightforward if you plan your operations. - Can brass bushings handle heavy loads?
They can, within reason.
Proper wall thickness, lubrication, and tolerance design help.
For very high loads, some engineers opt for bronze or steel-backed bushings. - What is the typical lifespan of a brass bushing?
It varies by load, speed, and lubrication, but brass bushings can last thousands of hours in moderate conditions.
Regular maintenance helps extend that lifespan. - Do I need to ream or hone the ID after press-fitting?
Sometimes, yes.
The press-fit can shrink the ID.
Measuring and then honing or reaming ensures the correct final dimension. - What if I need a lead-free brass bushing?
There are lead-free alloys like ECO BRASS (C693) or others.
Machinability might differ, so confirm your CNC shop can handle it. - Why do some bushings have small holes or pockets?
Those are lubrication reservoirs.
They trap grease or oil, reducing friction over longer intervals. - Can brass bushings be plated or coated?
Yes, you can plate them with nickel or apply a PTFE-based dry film.
These coatings can improve lubricity or corrosion resistance in specialized environments. - What surface finish should I aim for?
Many designs aim for Ra 16–32 µin on the ID.
For high-precision or high-speed applications, you might target even finer finishes like Ra 8–16 µin.
Other Articles You Might Enjoy
- Unlocking the Potential of Bronze Bushings with CNC Machining
I. Introduction Bronze bushings are an indispensable component in the world of mechanical engineering. They provide critical support for rotating parts, reduce friction, and enhance the efficiency of countless machines.…
- Brass vs Copper: The Ultimate Guide for Manufacturers and Machinists
Chapter 1: Introduction I’m excited to share my ultimate comparison of brass vs copper for manufacturers and machinists. Having worked with both materials in various machining and manufacturing environments, I know how…
- Brass Punch Machining Guide: Materials, Techniques, and Best Practices
I’m excited to share my comprehensive guide on brass punch machining. I’ve spent years working with different CNC setups, trying various alloys, and optimizing cutting parameters. In this guide, I’ll…
- Custom Brass Fasteners: How CNC Machining Enhances Strength, Precision, and Durability
Hello, and welcome to this comprehensive guide on Brass Fasteners and the pivotal role that CNC machining plays in crafting custom solutions. I’ve spent years working alongside design engineers, procurement managers, and…
- Brass Tacks Demystified: A Deep Dive into Machining Techniques and Innovations
I’ve spent a fair bit of time learning about different metal fasteners, and brass tacks are one of those intriguing items that bridge function and design. When you look at…
- Is Brass Magnetic? How to Test, Use, and Identify Brass in Practical Scenarios
Introduction: Why People Ask “Is Brass Magnetic?” “Is brass magnetic?” is a question that seems simple on the surface. I recall the first time I asked myself this question when…
- How CNC Machining Enhances Brass Color for Perfect Finishes
Chapter 1: Understanding Brass Color and Its Unique Characteristics I’ve always found the natural appeal of brass color to be something that sparks an immediate sense of warmth and sophistication.…
- Why Annealing Brass Matters in CNC Machining
Introduction Annealing brass is a key process in CNC machining, as it enhances machinability and improves the final quality of parts. Brass, an alloy primarily of copper and zinc, is…
- Brass Tap Manufacturing with CNC Technology: Efficiency and Precision
Introduction to Brass Tap Manufacturing with CNC Technology The world of manufacturing is constantly evolving, and one of the most significant advancements has been the use of CNC (Computer Numerical…