Introduction to HDPE and CNC Machining
I remember the first time I encountered HDPE. I was working on a small project that required a lightweight, food-safe, and chemically resistant plastic. A friend mentioned HDPE (High-Density Polyethylene), and I was intrigued. I did some research and realized that HDPE offers a pretty interesting balance of strength, durability, and ease of machining. At first, I wondered whether it could be processed on a standard CNC machine. Later, I discovered that many professionals and hobbyists rely on CNC techniques to shape HDPE into functional parts across various industries.
HDPE is a thermoplastic polymer known for its high strength-to-density ratio. It’s often used in applications like pipes, food containers, cutting boards, and plenty of industrial parts. When people hear “CNC machining,” they usually think of metals like aluminum or steel. However, over the years, HDPE has become a strong contender in CNC workshops. With the right spindle speeds, feed rates, and tooling, HDPE can be milled, turned, or routed into precise shapes.
I’ve seen plenty of businesses take advantage of HDPE for prototyping and low-volume production runs. It’s relatively inexpensive, it machines well, and it doesn’t usually require exotic tooling. I know that some folks are concerned about HDPE melting during cutting or producing stringy chips that wrap around the bit. Those concerns are valid, but with the proper setup, HDPE can be one of the easiest plastics to work with. One reason I decided to write this guide is that I kept hearing from friends: “Is HDPE even machinable?” and “Won’t it just melt and make a mess?” The truth is, you can absolutely machine HDPE on a CNC. You just need to know its properties, use the right techniques, and apply best practices to prevent warping or poor surface finishes.
In the rest of this guide, I’ll share everything I’ve learned, plus insights from professionals who machine HDPE day in and day out. We’ll cover the key properties that make HDPE unique, check out the types of CNC machines you can use, and walk through specific machining strategies to get the best possible outcome. I’ll also share a bit about common pitfalls, advanced tips, and real-world applications. By the end, you’ll know how to optimize your CNC workflows, select the right tools, and confidently produce HDPE parts that perform well. Whether you’re a small-shop hobbyist or a larger manufacturer, there’s something here for you.
So let’s dive in. HDPE might be the perfect material for your next project, especially if you’re seeking a combination of durability, machinability, and cost-effectiveness. I’ve personally seen projects ranging from medical prototypes to large industrial assemblies come to life with CNC-machined HDPE. If you’ve ever wondered how to handle HDPE in a milling or turning scenario, you’re in the right place. Let’s explore what makes HDPE tick, why it’s become a go-to polymer for so many CNC applications, and how you can use HDPE in your own projects.
Material Properties of HDPE Relevant to Machining
When I first experimented with HDPE, I was pleasantly surprised by how easy it was to cut and shape. However, before we jump into the specifics of HDPE machining, let’s talk about the material properties that make HDPE such a strong contender in the world of plastics.
2.1 Mechanical Strength and Flexibility
One of the first things people notice about HDPE is its excellent strength-to-density ratio. That means HDPE is strong, but it’s also relatively lightweight. In practical terms, an HDPE part can withstand significant impacts or loads for its weight. I’ve dropped HDPE components countless times, and they rarely sustain any cracks or serious damage. This makes HDPE suitable for applications like gears or guides where moderate mechanical stress is expected.
At the same time, HDPE retains some degree of flexibility. It’s not as rigid as, say, polycarbonate or certain engineering plastics like PEEK. If you bend HDPE slightly, it typically won’t shatter. Instead, it can flex a little and then return to its original shape. This blend of toughness and ductility is part of why HDPE is so attractive for industrial usage.
2.2 Thermal Behavior and Melting Point
HDPE typically melts in the range of about 120–130°C (248–266°F). In CNC machining, that matters because you don’t want to overheat the plastic while cutting, or else you could end up with melted edges, excessive burrs, or even deformed parts. During my earliest attempts at milling HDPE, I set the spindle speed way too high and tried to cut too aggressively. The material got gummy and started sticking to the tooling. That experience taught me the importance of fine-tuning my feed rate and spindle speed.
Also, HDPE has a relatively high coefficient of thermal expansion compared to metals. That means if you’re machining parts that will be used in high-temperature settings, dimensional changes can occur. Fortunately, for most ambient-temperature applications, HDPE stays stable enough to hold the tolerances you need.
2.3 Surface Hardness and Wear Resistance
When folks talk about plastics, a common concern is whether the surface will scratch or wear easily. In my experience, HDPE has pretty decent wear resistance for a plastic. It’s not going to be as robust as steel, obviously, but it performs better than many other polymers in sliding or moderate-load applications. For instance, I’ve seen HDPE used for conveyor system components where parts repeatedly rub against each other. Those parts usually hold up for a good while before replacement.
Surface hardness, however, is lower than metals, which means it’s quite feasible to machine, drill, and mill. That can be a double-edged sword. On one hand, it’s easy to remove material. On the other, you can inadvertently gouge the surface if your tool is dull or if you push the feed rate too high. Fortunately, with the right feeds, speeds, and a sharp cutter, HDPE surfaces can come out smooth and consistent.
2.4 Dimensional Stability and Thermal Expansion
I’ve learned that HDPE can undergo noticeable changes in dimension if exposed to heat or if the cutting process generates too much friction. During CNC machining, controlling heat buildup is crucial. If the material overheats in one spot, you could see warping or inconsistent tolerances. I usually mitigate this by reducing spindle RPM and making sure I get decent chip evacuation. Sometimes, using compressed air helps, although flood coolant is also an option—though typically not as common for plastics as it is for metals.
Once HDPE cools back down to room temperature, it’s usually stable, especially if you haven’t over-stressed it. That stability is one reason I like to use HDPE for parts that need decent dimensional accuracy but don’t require the full rigidity of aluminum or steel. In short, HDPE won’t stay dimensionally perfect in extremes of heat or cold, but for a wide range of room-temperature environments, it’s predictable enough for many uses.
2.5 Chemical Resistance
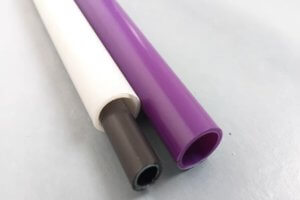
HDPE offers impressive resistance to a variety of chemicals, including many acids, alcohols, and bases. I’ve personally tested HDPE in workshops where it’s exposed to solvents or cleaning solutions, and it usually doesn’t degrade quickly. This makes HDPE an excellent choice for containers or protective housings. It also contributes to HDPE’s suitability for food-grade applications since it doesn’t corrode or leach dangerous substances under normal use conditions.
2.6 Comparison with Similar Engineering Plastics
A lot of times, people want to compare HDPE with other plastics they might be familiar with, like POM (Delrin), PVC, or Acrylic. Each material has its own sweet spot:
- POM (Delrin): More rigid, machines well, but can be pricier.
- PVC: Good chemical resistance, but releases harmful fumes if overheated.
- Acrylic (PMMA): Known for optical clarity, but can be brittle and crack if not machined correctly.
For me, HDPE sits in a comfortable niche: cost-effective, tough, and not overly fussy to machine. Below is a table comparing some typical properties of HDPE with a few other common plastics.
| Property | HDPE | POM (Delrin) | PVC | Acrylic (PMMA) |
|---|---|---|---|---|
| Density (g/cm³) | ~0.94-0.97 | ~1.41 | ~1.30-1.45 | ~1.18 |
| Tensile Strength | 20-37 MPa | 60-70 MPa | 40-55 MPa | 50-70 MPa |
| Melting Point | 120-130°C | ~175°C | Decomposes ~160°C (no clear melt) | ~160°C (softens before melting) |
| Machinability | Easy with correct feeds/speeds | Easy, known for good machinability | Moderate, risk of toxic fumes | Easy if using correct tooling |
| Chemical Resistance | Excellent | Good | Good | Moderate |
| Cost (relative) | Low to moderate | Moderate to high | Low to moderate | Moderate |
2.7 Why These Properties Matter for CNC Machining
When you machine HDPE, each of these properties plays a role:
- Density and Tensile Strength: Affect how easily chips are formed and how the part stands up to mechanical loads.
- Melting Point: Dictates cutting parameters and caution around heat buildup.
- Chemical Resistance: Makes HDPE suitable for many end-use scenarios, from industrial to consumer products.
- Cost-Effectiveness: You can experiment with HDPE without worrying too much about breaking the bank.
2.8 Personal Observations and Insights
I’ve had the chance to watch skilled operators work with HDPE for production parts. One machinist told me he loves HDPE because it’s more forgiving than metals when it comes to tool wear, yet it can still produce fairly tight tolerances with minimal fuss. Another friend said he found it easier to get a polished surface finish on HDPE compared to something like polypropylene.
At the same time, HDPE isn’t a magic bullet. If you need extremely high rigidity, you might opt for aluminum or certain high-performance plastics. Also, HDPE can show visible tool marks if your feed rate is off or your tool is dull. But if you treat it right, HDPE can yield a great blend of strength, dimensional accuracy, and smooth surface finishes.
Can HDPE Be Machined with CNC?
By now, you might be wondering about the actual feasibility of using standard CNC equipment to shape HDPE. From my own experience, the short answer is: absolutely, HDPE can be machined with CNC. But let’s dig into some details to help you determine the right approach.
3.1 Types of CNC Machines Suitable for HDPE
- CNC Milling Machines:
Milling is a common method for producing 2D and 3D shapes in HDPE. I’ve used vertical CNC mills with typical metalworking setups to cut HDPE. As long as I dial down the spindle speed and match my feed rate, HDPE cuts cleanly and quickly. - CNC Routers:
If you’re working with sheets of HDPE and you need to do profiling or pocketing operations, a CNC router is often the go-to. I have a small hobby router in my garage, and it performs surprisingly well with HDPE. The key is ensuring your router is rigid enough and that you use proper chip evacuation methods. - CNC Lathes (Turning):
For cylindrical or rotationally symmetric parts, CNC lathes do a great job with HDPE. Because HDPE is softer than metals, there’s usually less wear on the tooling. However, you need to watch out for excessive heat buildup, which can melt or deform the part. - Other CNC Technologies (Laser, Waterjet):
Technically, HDPE can also be cut using waterjets. Laser cutting is possible in some contexts, but it often leads to melted or charred edges if not carefully managed. I’d generally recommend traditional milling or routing for best results.
3.2 Feasibility Factors: What Makes HDPE Machining-Friendly
3.2.1 Low to Moderate Hardness
In many ways, it’s easier to cut through HDPE than aluminum or steel. That means your machine doesn’t need as much horsepower to achieve good results. However, I do find that machine rigidity is still important. A flimsy setup can cause chatter or poor surface finishes. If your machine is well-tuned, HDPE will reward you with quick machining times.
3.2.2 Chip Formation and Evacuation
HDPE tends to create long, stringy chips if your feeds and speeds aren’t optimized. But if you dial in the right parameters, those chips can be more manageable. I once had a production run of HDPE parts on a CNC mill that generated very clean, ribbon-like chips that were easy to vacuum away. Good chip evacuation is critical to prevent the material from recutting or clogging the tool.
3.2.3 Tool Wear and Cost
Because HDPE is not overly abrasive, tool wear is typically lower compared to machining metals. That reduces tooling costs over time. I find that even high-speed steel (HSS) tooling can last a decent while, though I prefer carbide for higher production runs or for super-clean finishing.
3.2.4 Machining Speed
HDPE usually allows higher feed rates compared to metals, which speeds up production. Combined with lower tool wear, this can make HDPE an attractive choice for prototypes or even small-to-medium batch runs.
3.3 Equipment Requirements: Spindle Speeds, Controller, and Workholding
In theory, if your CNC machine can handle a wide range of spindle speeds (from a few thousand RPM up to 24,000 RPM or more in a router), you can find the sweet spot for HDPE. Many shops run spindles in the 8,000 to 12,000 RPM range for HDPE, but that’s not a hard rule—plenty of folks go higher or lower depending on the tool diameter and the feed rate.
3.3.1 Workholding
One challenge I’ve faced is how to secure HDPE without distorting it. Because HDPE can warp under clamping pressure, it’s helpful to distribute the load across a larger area. Vacuum tables are popular in router setups, while in milling machines, you might use soft jaws or specialized fixtures to hold the material gently but securely.
3.3.2 Controller and Software
Any decent CNC controller and CAM software that supports standard G-code or relevant CNC operations should be fine for HDPE. I like to experiment with multiple finishing passes and trochoidal milling strategies when I want smooth edges. The software approach you choose can have a significant impact on surface finish, especially for plastics.
3.4 Machining Limitations and Possible Workarounds
No material is perfect, and HDPE has its quirks:
- Heat Buildup:
If you overheat the part, you can end up with melting or burrs. I usually keep an eye on the temperature by adjusting my feeds and speeds. If necessary, I’ll apply a light air blast to help clear chips. - Surface Marks:
Softer plastics like HDPE can show tool marks more easily than metals if your feed per tooth is too high or your tool is dull. A fresh, sharp end mill or router bit and an appropriate finishing pass often solves that. - Dimensional Changes:
HDPE can expand or contract a bit more than metals with temperature shifts. If your parts need tight tolerances in hot conditions, plan accordingly. - Thin-Walled Parts:
Machining very thin HDPE walls can be tricky, as the material can flex or melt. Sometimes, I leave extra stock and come back with a finishing pass once the part has cooled or stabilized. - Tapping and Threading:
You can thread HDPE, but the threads might not be as robust as in metals. Some shops use threaded inserts or heat-set inserts for better holding power. In my experience, a coarse thread works better with HDPE than a fine thread.
3.5 Personal Experience and Feasibility Insights
I’ve used a range of CNC machines to cut HDPE—from hobby-level routers to industrial VMCs (Vertical Machining Centers). Every single time, the biggest determining factor was correct feeds and speeds, along with good fixturing. If you handle those variables, HDPE is fairly forgiving. It doesn’t require top-of-the-line equipment, so even smaller shops or DIY enthusiasts can get started.
In terms of cost, HDPE is budget-friendly enough to allow trial and error. When I had to learn new toolpath strategies, I’d practice on scrap HDPE. Mistakes didn’t hurt my wallet as much as mistakes with aluminum or carbon fiber composites would.
3.6 “Is HDPE Right for Me?” Decision Factors
- End-Use Environment: Will the part face high temperatures or harsh chemicals? HDPE is great for moderate temperatures and is chemically resistant, but not for extreme heat.
- Mechanical Loads: HDPE handles moderate stress well, but if you need extra rigidity or extremely high strength, consider other plastics or metals.
- Budget and Scale: HDPE is relatively inexpensive, making it a good fit for prototyping or moderate-volume production. For massive scales, you might want to compare costs with injection molding or alternate processes.
- Equipment Availability: If you have a standard CNC mill or router, you likely have what you need to machine HDPE. No major upgrades are necessary.
3.7 Summary of Feasibility
HDPE is one of the most CNC-friendly plastics around. It machines fast, tools last a long time, and the material cost is modest. The main watch-outs are heat management, tool sharpness, and workholding. If you manage those, you’ll find HDPE a breeze to work with. I’ve grown to love how quickly I can knock out prototypes or short production runs in HDPE without worrying about expensive tools or complicated setups.
In the next section, we’ll explore the nitty-gritty of CNC machining techniques for HDPE. I’m excited to share specifics about feeds, speeds, tool choices, and strategies that have worked for me and others in the industry.
CNC Machining Techniques for HDPE
When I started machining HDPE, I made a few rookie mistakes with my spindle speed and feed rates. After some trial and error—and a little melted plastic—I realized that HDPE thrives on proper chip load, tool geometry, and consistent chip evacuation. In this chapter, I’ll break down the essential techniques I’ve learned along the way.
4.1 Tool Types and Materials
HDPE doesn’t require exotic cutting tools. In many cases, high-speed steel (HSS) end mills or router bits work fine, but carbide tools can provide better wear resistance and sharper cutting edges.
- End Mills:
Standard 2-flute or 3-flute end mills are typically good for HDPE. The extra flute helps with chip clearing, but you don’t want so many flutes that chips get stuck. I once tried a 4-flute end mill out of habit (from aluminum cutting), and I noticed more heat buildup. - Router Bits:
If you’re using a CNC router, a single- or double-flute upcut bit can be effective. Some specialists swear by compression bits that help reduce top and bottom burrs. I’ve tested compression bits on HDPE when I needed a super-clean edge on both sides of a sheet. - Drill Bits:
Standard drill bits for metal will generally work for HDPE. Just mind the heat. Peck drilling or slower speeds can help clear chips. - Specialized Plastic Cutters:
Certain manufacturers offer plastic-specific cutters with polished flutes and specialized geometries. They can help reduce friction and improve chip flow. If you’re doing large production runs, these might be worth the investment.
4.2 Recommended Cutting Parameters (Spindle Speed and Feed Rate)
The sweet spot for HDPE depends on tool diameter, number of flutes, and machine rigidity. But here’s a reference table that I’ve found useful as a starting point. Adjust based on your specific setup:
| Tool Diameter | Spindle Speed Range (RPM) | Feed Rate (in/min) | Depth of Cut (in) | Notes |
|---|---|---|---|---|
| 1/8″ (3.175mm) | 14,000 – 18,000 | 40 – 70 | 0.03 – 0.06 | Great for smaller contours, watch for heat buildup |
| 1/4″ (6.35mm) | 12,000 – 16,000 | 60 – 100 | 0.06 – 0.10 | Versatile size, common in CNC router setups |
| 3/8″ (9.525mm) | 10,000 – 14,000 | 70 – 120 | 0.08 – 0.12 | Good for heavier cuts, ensure robust fixturing |
| 1/2″ (12.7mm) | 8,000 – 12,000 | 80 – 150 | 0.10 – 0.15 | Larger parts, can remove material more quickly |
| Drilling | 1,000 – 3,000 | N/A | – | Use peck drilling, watch chip evacuation |
| Lathe Turning | 2,000 – 4,000 | Varies by style | – | Keep depth-of-cut moderate, be mindful of melting |
Keep in mind, these ranges are just a starting point. You might have to tweak them to dial in the perfect cut for HDPE. If you see melting or stringy burrs, lower the spindle speed or increase feed rate. If you get rough edges, try slightly increasing spindle speed or use a finishing pass at a lighter depth of cut.
4.3 Depth of Cut and Stepover Strategies
HDPE is softer than metals, so you can often be more aggressive with depth of cut. However, going too deep in a single pass can increase heat buildup. I like to take roughing passes to quickly remove material, then finish with a shallower pass to clean up the edges. For 2D pocketing, a conventional or climb milling approach works, but I often prefer climb milling for a cleaner surface.
- Roughing: 60–80% of cutter diameter in depth, with a 40–50% step over.
- Finishing: 10–20% of cutter diameter in depth, with minimal step over for a smooth surface.
4.4 Chip Evacuation and Cooling
Unlike metals, HDPE chips can melt quickly if they stay in contact with the cutter. Good chip evacuation is critical. Some machinists use compressed air blasts to clear away the chips. Flood coolant is also an option, but you don’t want to submerge the part to the point where it floats or shifts.
In my own shop, I usually rely on a strong dust collector or vacuum system combined with an air blast. That keeps the workspace tidy and prevents recutting chips. If your chips are collecting on the cutting path, you’ll definitely see increased heat and potential melting.
4.5 Toolpath Considerations
CAM software offers multiple strategies, and HDPE can respond well to almost all of them if you adjust parameters appropriately:
- Profile Cuts:
Common for 2D shapes. I like to leave a small skin of material (about 0.01 inches) for a finish pass, which I do at a slightly higher feed rate for a clean edge. - Pocketing:
Trochoidal milling or adaptive clearing can be helpful in HDPE, especially if you want to maintain a constant chip load. I’ve gotten clean results with adaptive clearing, which helps distribute the load evenly. - Slotting:
Straight slots in HDPE are easy to create, but be mindful that chips can accumulate in narrow slots. Sometimes I use a ramp or helix entry to reduce plunging into solid material. - Contour vs. Ramp:
Ramping into the material can generate less heat than plunging directly. For HDPE, I find it beneficial if the material is thick.
4.6 Dry Machining vs. Coolant
Some shops machine HDPE completely dry to avoid any potential chemical reactions with coolants or to keep the work area simpler. Others use a light mist or flood coolant. The advantage of coolant is it reduces temperature, but the downside is that it can make the part slippery and more prone to shifting if not clamped well. I’ve had success both ways. Typically, I go with an air blast and minimal coolant to keep heat down.
4.7 Drilling and Tapping in HDPE
- Drilling: Start with a center drill or pilot hole if you need high accuracy. Peck drilling helps break chips. If I try to drill too fast, the hole walls can melt.
- Tapping: I prefer to use form taps or coarse thread taps for HDPE, but you can also cut threads conventionally. However, they won’t be as strong as metal threads. If you need robust fastening points, consider inserts.
4.8 Multi-Pass Machining and Finishing Passes
One technique I love is multi-pass machining. I’ll do one or two roughing passes to hog out material, leaving a small amount of stock. Then I’ll do a final finishing pass that’s only 0.01 to 0.02 inches thick. That final pass is where I slow the feed rate a bit to get a polished look. HDPE can yield a surprisingly smooth finish if you follow this approach.
4.9 Personal Observations: Heat is the Enemy
Early in my HDPE journey, I underestimated how quickly friction can build up. More than once, I ended up with wads of molten HDPE stuck to my end mill. That’s not fun to clean off. Over time, I learned to keep a close eye on my spindle speed. Sometimes, going slower on the spindle and a bit faster on the feed helps. The goal is to remove material efficiently while transferring heat into the chips rather than the workpiece.
If your chips look like they’re melting or fusing, that’s a sign to adjust your parameters. Don’t be afraid to experiment—HDPE is affordable, so a bit of trial and error won’t break the bank.
4.10 Example Workflow
Let’s say I’m cutting a rectangular bracket from a sheet of HDPE. My typical approach might be:
- Secure the sheet to a vacuum table or clamp it with a sacrificial backing.
- Zero the tool at the corner.
- Load the CAM file with an adaptive clearing pocket strategy to remove the central area if needed.
- Roughing pass with a 1/4″ 2-flute end mill at around 12,000 RPM, feed of ~80 in/min, depth of 0.08 inches.
- Finishing pass with the same tool but only removing 0.01 inches at ~14,000 RPM, feed of ~50 in/min.
- Air blast throughout, ensuring the chips don’t build up.
- Final check of edge quality. Possibly do a quick deburr pass if needed.
4.11 Conclusion of Techniques
When machining HDPE, always remember the trifecta: tooling, feeds/speeds, and chip evacuation. By focusing on those, you’ll reduce heat, avoid melted edges, and achieve a clean finish. I find HDPE quite satisfying to machine because it’s forgiving enough to accommodate different toolpaths and speeds. If you’ve got a decent CNC setup, you can produce professional-grade HDPE parts without a huge learning curve.
Next, let’s talk about finishing and quality control—two areas that can make or break your final HDPE part.
Finishing and Quality Control
Some folks think that once you’ve cut HDPE on a CNC machine, you’re done. In reality, finishing processes and consistent quality control can make a big difference in how your HDPE part performs and looks. I’ve seen parts that come straight off the CNC with ragged edges, requiring additional cleanup. On the flip side, I’ve also seen parts that need almost no post-processing because the operator nailed the finishing pass. Here’s what I’ve learned about finishing HDPE and ensuring every piece meets the desired specs.
5.1 Surface Finishing Options
HDPE is not known for having a high-gloss finish like acrylic might. Still, you can achieve a smooth, functional surface with the right approach:
- Straight Off the Machine:
If you dial in your feeds and speeds properly, HDPE can come off with minimal tool marks. A well-executed finishing pass can produce a uniform matte finish. - Light Sanding:
In some cases, a quick hand sanding or light buffing can remove minor tool marks or burrs. For instance, I’ve used 220- to 400-grit sandpaper in a circular motion to even out the surface. - Edge Polishing:
Unlike acrylic, HDPE doesn’t polish to a glass-like transparency. However, you can soften and clean up edges with a buffing wheel if you need a safer, smoother edge.
5.2 Deburring and Edge Cleanup
Because HDPE is somewhat soft, burrs along the edges can form, especially if your tool is dull or your feed rate is too low.
- Manual Deburring: I often use a simple deburring tool or a small knife to gently scrape away the extra material.
- Automated Methods: In a production setting, a quick tumble in a vibratory finisher might work, though you should test how much abrasion HDPE can handle. Some shops also use specialized burr-removal brushes in a secondary CNC operation.
5.3 Tolerances and Dimensional Inspection
One of the biggest concerns in professional CNC work is whether your final part meets its specified tolerances. HDPEcan hold respectable tolerances if you manage heat properly. However, it’s still a thermoplastic. Factors like tool deflection, fixture rigidity, and leftover stress can all affect accuracy.
Common Tolerances for HDPE:
- For most general-purpose parts, ±0.005″ to ±0.010″ is achievable.
- In well-controlled environments, you might push closer to ±0.002″ or ±0.003″.
I’ve used digital calipers and micrometers to check critical dimensions right on the machine. However, for parts that need very tight tolerances, I’ll sometimes let them cool to room temperature away from the machine, then measure again to be certain.
5.4 Avoiding Warping
Warping can be a headache with HDPE, especially in large, thin, flat parts. I remember making some large HDPEpanels for a prototype. After machining, the corners started curling up slightly. This is mainly due to internal stresses and uneven heat distribution.
Tips to Mitigate Warping:
- Uniform Clamping: Vacuum tables or ensure even clamping pressure.
- Avoid Excess Heat: Keep spindle speeds in check, apply air or minimal coolant.
- Multiple Finishing Passes: Distribute material removal evenly, flipping the part if possible.
- Annealing (if feasible): In rare cases, mild annealing can relieve internal stresses, though it’s not always practical.
5.5 Quality Control Methods
Whether you’re making one-off parts or running a small production batch, consistent quality control ensures your HDPE parts meet functional requirements:
- Visual Inspection: Check for surface defects, burns, or discoloration.
- Dimensional Inspection: Use calipers, micrometers, or a coordinate measuring machine (CMM) if needed.
- Functional Testing: If the part is meant to fit with another component, test the fit.
- Statistical Process Control (SPC): For higher volumes, measure key dimensions across multiple parts to see if your process is stable.
5.6 My Personal Take on Finishing
I’ve had parts that came out of the CNC with edges so clean that you’d think they were injection-molded. Other times, I got rough edges because I tried to cut corners on the finishing pass. In my opinion, finishing HDPE well is about attention to detail in the machining stage.
If you rely on a single, heavy pass, you might see more edge chipping or burrs. But if you approach finishing with a multi-pass strategy, the edges often come out crisp with minimal post-processing. I sometimes do a 2D contour pass at the end, just skimming 0.01″ off the perimeter at a slower feed rate. That usually leaves me with near-perfect edges.
5.7 Handling Large Parts vs. Small Parts
- Small Parts: For small components, it’s easier to keep everything stable. The main challenge is ensuring your feed rates are dialed in so you don’t melt or deform the piece.
- Large Parts: Warping and maintaining dimensional accuracy become bigger concerns. I’ve made large machine covers out of HDPE, and I had to plan the machining in sections, using dowel pins to align multiple pieces.
5.8 Surface Textures and Markings
If you want to add surface textures or markings for identification (like part numbers or logos), HDPE can be engraved with a V-bit or small end mill. Just watch your depth so you don’t cut too deep and compromise the part. Some folks also do light laser marking on HDPE, but you risk discoloration or slight melting.
In my experience, CNC engraving is the more controlled approach. If you want a specific texture—like a knurled or patterned surface—your best bet is to design it in CAD and then use an appropriate toolpath to generate that pattern during machining.
5.9 Post-Finishing Treatments (Painting, Bonding, and More)
HDPE has a low surface energy, which makes it tricky to paint or bond with standard adhesives. Paint tends to flake off unless you use specialized primers. Similarly, if you need to bond HDPE pieces together, typical glues won’t adhere strongly. Some shops use plastic welding techniques or specialized adhesives designed for polyethylene.
For marketing or branding purposes, people sometimes prefer to keep HDPE in its natural color or purchase colored HDPE sheets from suppliers. That way, you don’t have to worry about painting or coating after machining.
5.10 Maintaining Consistency in Production
If you plan on producing multiple HDPE parts, you’ll want to ensure each batch is consistent. I usually keep a log of my CNC parameters, tooling used, and any notes on finishing. That makes it easier to replicate results down the line. I’ve had situations where I forgot the feed rate I used for a successful project, and I had to experiment all over again. Documentation saves time and material.
5.11 Real-World Finishing Scenarios
- Food Cutting Boards: After machining, these usually just need a quick deburr. The surface is already smooth enough for food contact.
- Machine Guards: Sometimes, the edges need a bit more rounding or buffing so people don’t get scratched during use.
- Medical Prototypes: These often require closer tolerances, so I’ll measure them carefully and might even do a second finishing pass if I see any dimensional drift.
5.12 Wrapping Up Finishing and Quality Control
Finishing HDPE doesn’t have to be complicated. Most of the heavy lifting happens in the machining stage through correct feeds, speeds, and multi-pass strategies. However, paying attention to deburring, warping, and dimensional checks can elevate your HDPE parts from “okay” to “excellent.” For me, the finishing process is a chance to fine-tune the details that really matter—like how edges feel to the touch or whether parts fit together seamlessly.
With quality control, it’s all about consistency and verification. If you approach HDPE like any other material—test, measure, refine—you’ll find that it behaves predictably. The next chapter delves deeper into common challenges and how to solve them, which will also reinforce some of these finishing and QC points.
Common Challenges and How to Solve Them
No matter how much I prepare or how many times I’ve machined HDPE, I still run into occasional hiccups. Over the years, I’ve documented the most frequent challenges I see with HDPE machining and compiled a list of solutions. If you’re just starting out, hopefully my stumbles can save you some trouble.
6.1 Melting and Gumming
Challenge:
Melted plastic around the cutter is probably the number-one frustration for machinists new to HDPE. The material can fuse onto the tool, causing poor surface finish, dimensional errors, or even tool breakage.
Solutions:
- Reduce Spindle Speed: Slowing down the RPM reduces friction and heat.
- Increase Feed Rate: A higher feed rate can help remove material before it melts.
- Optimize Tool Geometry: Sharp tools designed for plastics help slice through HDPE cleanly.
- Air Blast or Mist Coolant: Use air to clear chips or a light coolant to keep temperatures down.
6.2 Burrs and Ragged Edges
Challenge:
Ragged edges or stringy burrs on HDPE parts can make them look unprofessional. Burrs can also interfere with assembly if the part is meant to fit into a tight space.
Solutions:
- Use a Finishing Pass: Leave a small amount of stock, then come back with a lighter pass.
- Consider a Compression Bit (for Routers): This can help avoid top and bottom burrs in sheet work.
- Deburr Tool or Knife: A quick manual pass can clean up leftover burrs.
- Check Tool Sharpness: Dull tools create more friction, leading to melted or frayed edges.
6.3 Warping and Dimensional Inconsistency
Challenge:
HDPE can warp, especially in thin parts, if internal stresses aren’t balanced or if heat builds up in certain areas. In my experience, large flat panels are the most prone to this issue.
Solutions:
- Even Clamping Pressure: Vacuum tables help, or use multiple clamps. Avoid overtightening.
- Balanced Toolpaths: Remove material from both sides where possible to reduce stress.
- Minimize Heat: Adjust feeds and speeds to limit heat buildup.
- Cooling Time: Let the part rest and cool before measuring or secondary operations.
6.4 Tool Wear or Breakage
Challenge:
While HDPE is less abrasive than metals, it can still wear down tools if you run at improper settings. In extreme cases, the friction can generate enough heat to damage the cutting edge.
Solutions:
- Select Appropriate Tool Material: Carbide tools tend to last longer than HSS.
- Optimize Parameters: If your feeds/speeds are off, you could cause excessive friction.
- Regular Inspection: Check tool edges before and after a machining session.
- Dedicated Plastic Tooling: Some manufacturers design end mills specifically for plastics.
6.5 Fixturing and Slippage
Challenge:
Because HDPE is somewhat slippery, parts can move during machining if not clamped securely. I once had a small HDPE blank shift in the vise, ruining the piece.
Solutions:
- Vacuum Fixtures: Especially useful for sheet material.
- Custom Soft Jaws: Conform to the shape of your HDPE piece.
- Double-Sided Tape: Not ideal for heavy cutting, but can help with small or thin parts.
- Use Tabs or Bridges: In sheet cutting, leave small tabs that connect the part to the stock until the final operation.
6.6 Stringy Chips Clogging the Tool
Challenge:
HDPE chips can become long strands that wrap around the spindle or tool holder, leading to poor surface quality or even jamming.
Solutions:
- Chip Breakers: Tools with chip breaker geometry can help reduce chip size.
- Air or Vacuum Extraction: Blow or suck those chips away.
- Adjust Feed and Speed: Aim for chips that are neither dust-like nor excessively long.
- Pause and Clear: For complex jobs, I occasionally pause the machine, remove chips, and resume.
6.7 Overheating During Drilling
Challenge:
When drilling small or deep holes in HDPE, heat can accumulate in the hole, causing melted plastic to jam the drill bit.
Solutions:
- Peck Drilling: Retract the drill every so often to clear chips and let the material cool.
- Slower Spindle Speed: Drilling doesn’t need super high RPM for plastics.
- Coolant or Air Blast: Flush out chips and cool the bit.
- Drill Geometry: Consider a drill bit with a sharper point angle and large flutes designed for plastic.
6.8 Thin-Walled Parts Flexing
Challenge:
If you’re cutting parts with thin walls, the HDPE can flex under tool pressure, resulting in chatter or dimensional errors.
Solutions:
- Minimal Depth of Cut per Pass: Reduces deflection forces.
- Support the Walls: Sometimes, adding sacrificial support or designing temporary ribs can help.
- Use Sharp Tools: A dull tool exerts more force on the material.
- Avoid Excessive Tool Engagement: Use adaptive clearing or step in from the outside to reduce stress on thin walls.
6.9 Personal Observations About Overcoming Challenges
I’ve noticed that many of these issues tie back to a few core principles: controlling heat, maintaining sharp tooling, and stabilizing the workpiece. By carefully balancing feeds and speeds to produce proper chip loads, I can often eliminate melting, burrs, and stringy chips in one go. Good fixturing also plays a huge role. If a part shifts even a fraction of an inch, you can end up with out-of-tolerance features or rough edges.
In the early days, I ruined some HDPE sheets by letting them warp off the table. Now, I make sure to secure them fully, sometimes using custom spoilboards and enough vacuum hold-down force to keep everything flat.
6.10 Tips from Other Machinists
I’ve spent time chatting with colleagues who regularly machine HDPE for large companies. A few tips they’ve shared with me:
- Coolant vs. Mist: Some prefer a light mist coolant rather than a flood, so the material doesn’t get soggy or slip.
- Stepped Clamps: For large blocks, using stepped clamps that apply pressure evenly around the perimeter is key.
- Slow Plunge, Fast Feed: Start the cut slowly to reduce friction at the entry, then speed up the feed once you’re fully engaged in the material.
6.11 How to Systematically Solve Problems
If you keep encountering a particular issue, try a systematic approach:
- Adjust One Parameter at a Time: For example, lower your spindle speed, but keep other settings consistent.
- Take Notes: I keep a small notebook (some folks use spreadsheets) to track what works for each job.
- Check for Tool Wear: If your surface finish degrades, it might be time for a new end mill.
- Gather Data: Use a thermometer or a thermal imaging device to see if there are hotspots on your part.
- Ask for Feedback: If you’re in a professional environment, see what your colleagues are doing differently.
6.12 Conclusion: Overcoming the Learning Curve
While HDPE may seem challenging at first, it actually becomes quite intuitive once you understand how to handle heat and fixturing. Each of these common challenges has a clear set of solutions. I personally think HDPE is one of the more forgiving plastics when you get the basics down. The key is awareness—knowing that melting, burrs, and warping can happen, and being ready to tweak your process to prevent them.
Advanced Tips and Best Practices
Once you’ve got a handle on the basics of HDPE machining—like feeds, speeds, and fixturing—it’s time to explore some advanced techniques that can take your parts from good to great. Over the years, I’ve picked up a few pro-level tricks from machinists who handle HDPE daily, and I’ll share my personal experiences with each.
7.1 Multi-Pass Strategy for Best Surface Finish
I’ve mentioned multi-pass machining in earlier sections, but it’s worth reiterating in more detail:
- Roughing Pass
In the roughing pass, you remove the bulk of the material quickly. It’s okay if the part looks a bit messy at this stage; the goal is just to hog out material efficiently. A larger stepdown (or depth of cut) and a higher feed rate is common here, which speeds up the process. You might see heavier tool marks or a rougher surface finish, but that’s normal. - Semi-Finish Pass
After roughing, you can run a semi-finish pass to refine the shape. This pass removes less material than roughing—enough to get closer to the final dimensions. It also corrects any slight inaccuracies from the roughing pass. Tool marks become less pronounced, and you’ll start to see the final geometry taking shape. - Finish Pass
The finishing pass is where you go light and precise. You might only remove 0.01–0.02 inches of stock. The feed rate is often reduced, and your spindle speed might be adjusted to ensure minimal heat buildup. This is where you achieve that smoother surface finish and tight tolerances.
With HDPE, this three-step approach can be particularly effective at preventing edge burrs and melting. I’ve found that splitting up the machining process into multiple passes also helps distribute any heat buildup more evenly, which reduces the chance of warping.
7.2 Using Dedicated Plastic Tooling
While standard end mills can definitely cut HDPE, I’ve had outstanding results with end mills specifically designed for plastics. They often have:
- Polished Flutes
Polished flutes help reduce friction, so chips slide right out of the cutting zone. Less friction means less heat, which is crucial when dealing with thermoplastics like HDPE. - Optimized Chip Breakers
These reduce stringy chips by breaking them into smaller, more manageable pieces. That helps prevent chip clogging and tool wrap. - High Helix Angles
A higher helix angle can “pull” the chips out effectively, which is especially useful if you’re using a CNC router where chip clearance might be an issue.
Such specialized tools might cost a bit more, but if you’re running production batches of HDPE parts, the improved quality and reduced cycle times can easily pay for themselves. In my workshop, I keep a “plastics-only” set of end mills to avoid dulling them on metals.
7.3 Compression Cutters for Sheet Work
If you often profile or contour HDPE sheets, consider using compression cutters. These cutters have both upcut and downcut flutes:
- Upcut Flutes near the tip pull the chips upward from the bottom side of the sheet.
- Downcut Flutes near the shank push the chips downward on the top side of the sheet.
This opposing cutting action effectively “compresses” the material in the middle, which can drastically reduce or even eliminate burrs on both the top and bottom edges. Compression bits are widely used in woodworking (for plywood or laminates), but they work wonders on HDPE sheets as well.
7.4 Trochoidal Milling and High-Efficiency Toolpaths
Modern CAM software often includes advanced toolpath strategies like trochoidal milling or adaptive clearing. These approaches keep a consistent radial engagement of the cutter, which helps:
- Maintain Chip Load
With a consistent chip load, you minimize heat spikes. - Improve Tool Life
The tool sees less sudden stress. - Potentially Increase Feed Rate
Because you’re not burying the cutter in heavy cuts, you can often crank up the feed rate without risking melting or chatter.
I remember the first time I tried an “adaptive” clearing strategy on HDPE. Not only did I get a better surface finish, but my total cycle time dropped since I could safely run the cutter faster. It felt like a win-win situation, especially when I was making a batch of identical parts.
7.5 Avoiding Vibration and Chatter
Chatter occurs when the cutting forces cause the tool or workpiece to vibrate uncontrollably. HDPE is relatively soft, so heavy chatter isn’t super common, but it can happen if:
- Your machine lacks rigidity.
- The tool overhang (stickout) is too long.
- Feeds and speeds are poorly matched.
Tips to Reduce Chatter
- Shorter Tools
Use the shortest tool that can safely reach the cutting area. The less the tool sticks out, the less it flexes. - Stable Fixturing
Double-check that your HDPE blank is secured firmly. Vacuum fixtures or custom clamps help a lot. - Experiment with Speeds
Sometimes just a small tweak—like lowering RPM by 10%—makes chatter disappear.
7.6 CNC Lathe Techniques for HDPE
If you do any turning work, HDPE can behave quite nicely on a lathe, with a few considerations:
- Positive Rake Inserts
A positive rake angle reduces cutting forces, which is helpful for softer plastics. - Polished Inserts
Similar to milling cutters, polished inserts help minimize friction and heat. - Balanced Roughing & Finishing
You can apply the same multi-pass principle: one pass to remove bulk material, and a final pass to dial in the dimensions and finish.
One lathe operator I spoke to recommended using a coolant mist rather than a flood, arguing that HDPE can sometimes “float” if there’s too much liquid. If you’re turning smaller parts, that might be worth considering.
7.7 Ensuring Repeatability for Batch Production
When producing multiple copies of the same HDPE part, consistency matters. I typically:
- Create a Dedicated Fixture
If you make a fixture or jig that precisely locates and clamps each HDPE blank in the same position, you’ll save huge amounts of setup time and avoid minor variations between parts. - Use Probing Routines
If your CNC machine supports probing, you can automatically detect work offsets or measure tool lengths. This reduces human error in setups. - Track Tool Wear
Even though HDPE is gentle on tooling, it’s wise to replace or resharpen cutters at predictable intervals, especially if surface finish is critical.
7.8 Managing Large Sheets: Sectional Machining
If your router bed is smaller than the HDPE sheet you need to cut, or if you’re simply dealing with a huge sheet, consider “sectional machining”:
- Divide the CAM Program
Split your toolpaths into multiple zones (quadrants or strips). - Reposition the Sheet
After you finish one zone, loosen the clamps or vacuum hold, shift the sheet, then re-clamp. - Establish a Repeatable Datum
Use dowel pins or alignment edges so the sheet can be repositioned accurately without guesswork. - Overlap Passes
If your design crosses from one zone to another, overlap the toolpaths slightly to avoid visible seams.
I did something similar once for a 4×8 sheet of HDPE on a smaller 2×3 CNC router. It was tedious repositioning everything, but it worked out well after I pinned the sheet edges for alignment.
7.9 Personal Experience with Specialty Projects
I recall a project making protective brackets for a marina’s boat lifts. The environment was salty, wet, and exposed to sunlight—basically the perfect scenario for HDPE. We used marine-grade HDPE sheets, programmed compression cuts on a CNC router, and ended up with parts that were dimensionally accurate, burr-free, and held up perfectly in that harsh environment. The marina staff loved them because they didn’t rust or corrode like the old metal brackets.
7.10 Pro-Level CAM Techniques
If you have access to advanced CAM software, you might experiment with:
- Rest Machining
The software automatically identifies leftover material from a previous larger tool, then cleans it up with a smaller tool. This can speed up your cycles while preserving fine detail. - Automatic Feeds & Speeds Calculators
Some CAM packages offer built-in optimization for plastic milling. Just be sure to treat them as starting points—always test and adjust in real life. - Smoothing & Arc Fitting
For curved surfaces or arcs, smoothing algorithms can eliminate tiny facets that might otherwise appear, giving you near-perfect arcs without extra manual polishing.
7.11 Best Practices for Operator Safet
HDPE chips aren’t usually hazardous like some materials (e.g., fiberglass, which creates itchy dust). Still, general shop safety applies:
- Dust Collection
Fine plastic dust or chips can still get airborne. A vacuum or dust collector helps. - Eye Protection
Chips may eject at high velocity, especially on routers or high-RPM spindles. - Clean Floors
Plastic chips on the ground can be slippery—make sure to sweep or vacuum frequently.
7.12 Data Logging and Continuous Improvement
One habit I strongly recommend is data logging. I keep spreadsheets or note cards for each project, recording:
- Material thickness
- Tool type and diameter
- Spindle speed used
- Feed rate, stepdown, stepovers
- Observed temperature or chip colors
- Final part quality
- Any special finishing passes
These records become gold when you revisit a job months later. They also help me refine my strategies and share knowledge with coworkers. If I notice that a certain combination of speed and feed yields the best surface finish for 1/4″ HDPE, I’ll make that a baseline for similar parts.
7.13 Handling Complex 3D Contour
Most HDPE projects tend to be 2D or 2.5D (pockets, profiles, slots). But if you tackle a full 3D contour, HDPE can still deliver:
- Ball-Nose End Mills
Perfect for smoothing out curved surfaces, but watch your stepdown to avoid leaving ridges. - Z-Level / Waterline Toolpaths
Great for sculpting complex shapes in layers. - Finishing Passes
Just like in 2D, leaving a tiny bit of stock for a finishing pass can help you avoid heat buildup and achieve a smoother result.
7.14 Summary: Taking Your HDPE Machining to the Next Level
By incorporating advanced toolpaths, specialized tooling, and thorough data tracking, you can push HDPE machining well beyond the basics. My experience is that once you master these advanced techniques, your cycle times drop, your surface finish improves, and your overall process becomes more predictable.
I love that HDPE is so flexible—both figuratively and literally. You can tackle everything from quick prototypes to production-level parts without needing specialized, high-cost tools. The quirks (like melting or warping) become manageable once you’ve got a robust setup and some proven parameters in your notebook.
With these tips in mind, let’s move on to specific HDPE applications. After all, knowing how to cut HDPE is one thing—knowing where and why to use it is another story altogether.
Applications of CNC-Machined HDPE
When I chat with folks who’ve never worked with HDPE, the first question they ask is usually, “What can I actually make with it?” It’s a fair question, and the short answer is: quite a lot. HDPE has found its way into everything from lightweight consumer goods to heavy-duty industrial components. In this chapter, I’ll give you a deep dive into how HDPE is used across various industries. I’ll also throw in my personal experiences and observations along the way.
8.1 Industrial Parts (Gears, Guides, Bushings)
HDPE can handle moderate mechanical loads, making it a popular choice for moving parts that don’t require the immense strength of steel or aluminum. For instance, I’ve seen HDPE used for:
- Gears or Sprockets: In conveyor systems where the load isn’t extreme, HDPE gears can be quieter and more forgiving than metal gears.
- Slides and Guides: Anywhere there’s a need for a low-friction interface (like linear rails or guide blocks), HDPE can reduce wear and eliminate the need for constant lubrication.
- Bushings: Certain designs call for self-lubricating bushings, and although HDPE isn’t always considered a “self-lubricating” plastic like UHMW, it’s still slick enough for many applications.
I was once part of a team retrofitting an older packaging line, and we replaced some metal guide rails with HDPE rails. The results: quieter operation and less downtime for lubrication. Plus, if anything jammed, it was simpler to swap out a damaged HDPE rail than to repair a bent metal one.
8.2 Food-Grade Components
One of HDPE’s biggest selling points is its suitability for food-related applications. If you’ve ever used a typical plastic cutting board, there’s a high chance it was made of HDPE. Commercial kitchens often utilize HDPE for countertops, cutting surfaces, and even specialized storage containers because:
- FDA Compliance: Many HDPE formulations are certified food-safe.
- Chemical Resistance: HDPE doesn’t degrade when exposed to standard cleaning chemicals.
- Moisture Resistance: It won’t absorb water like certain woods do, reducing bacterial growth.
I personally made a custom cutting board insert for my home kitchen using a CNC router and a sheet of food-grade HDPE. I designed it to fit neatly into the sink area, complete with a slot for scraps to drop directly into the trash below. It’s been a game-changer for food prep—easy to clean, durable, and it didn’t cost a fortune.
8.3 Medical and Laboratory Tools
HDPE also sees use in medical and laboratory environments, particularly for prototypes or short-run products such as:
- Instrument Trays and Holders: HDPE can withstand mild sterilization processes and is impervious to many common lab chemicals.
- Disposable Lab Containers: Because it’s relatively inexpensive, HDPE can be used for single-use containers or prototypes that mimic final injection-molded products.
I recall a small medical startup that needed quick-turn prototypes for a new instrument tray. They used a local CNC shop to cut HDPE because they could tweak the design after each test run. The ability to rapidly iterate on designs was crucial, and HDPE was the right balance of cost, machinability, and chemical resistance.
8.4 Custom Enclosures and Housings
If you’re looking for a lightweight enclosure with decent durability, HDPE is a solid bet. I’ve seen enclosures built for:
- Electronics: When you need basic protection from dust or moderate moisture.
- Outdoor Utility Boxes: HDPE doesn’t rust or rot, making it a good option for weather-exposed housings.
- Machine Guards: Shrouds around moving parts in a factory, offering protection from debris.
A friend of mine designed a modular electronics enclosure system out of HDPE sheets. He CNC-routed interlocking tabs and slots so the boxes could be snapped together or taken apart easily. This approach allowed for a fully customizable enclosure without resorting to expensive molds or complex assembly steps.
8.5 Marine and Outdoor Applications
HDPE is water-resistant and does not corrode, which is why you often see it in marine settings. “Marine board” is a term you might come across—it’s usually a specialized HDPE blend formulated for extended UV and saltwater exposure. Examples include:
- Boat Parts: Seat components, instrument panels, or tackle storage.
- Dock Accessories: Cleats, bumpers, or edging that contact the water constantly.
- Outdoor Furniture: Benches, picnic tables, and playground equipment where weather resistance is key.
In one of my personal projects, I machined a set of brackets for a small fishing boat. The objective was to create rod holders that would withstand splashing, salt, and constant movement. HDPE turned out to be perfect—sturdy enough to handle the rods without warping from UV exposure or saltwater.
8.6 Signage and Displays
From retail displays to outdoor signage, HDPE is popular because it’s easy to carve, route, or engrave. While acrylic is often chosen for its clarity and gloss, HDPE is used for:
- Durable Outdoor Signs: It can handle rain, wind, and sun better than many other materials.
- Engraved Panels: Logos or lettering cut directly into the surface.
- Trade Show Booth Components: Lightweight walls or sections that need quick setup and tear-down.
I’ve come across a few sign shops that stock multiple colors of HDPE just for this purpose. They can route out shapes or text, paint them if necessary, and rely on the plastic’s inherent durability.
8.7 Construction and Landscaping Elements
Since HDPE resists moisture and chemical degradation, it’s found a home in various landscaping or construction applications. These might include:
- Retaining Wall Panels: Lightweight barriers for garden beds or landscaping features.
- Fencing or Deck Boards: Replacing wood with plastic boards that won’t rot or require painting.
- Equipment Partitions: Segments or panels that need to endure outdoor conditions.
I once helped a friend construct a raised garden bed using HDPE boards. They didn’t warp or rot over time, even in a humid climate. It was more expensive upfront than using wood, but the long-term durability made it worthwhile.
8.8 Automotive and RV Components
In vehicles, weight reduction is often crucial. HDPE can replace heavier metals or wood panels in certain non-critical parts:
- Interior Linings: Cargo liners or trunk organizers.
- RV Storage Solutions: Bins, racks, or paneling that’s easy to wipe down.
- Mud Flaps and Small Body Panels: Particularly on custom or hobbyist vehicles.
I remember an off-road enthusiast who built custom fender flares for his Jeep using HDPE. It was flexible enough to handle minor impacts from rocks or debris without cracking, and it was lighter than steel alternatives.
8.9 Hobbyist and Maker Projects
Makers and hobbyists love HDPE because it’s inexpensive, forgiving to machine, and available in small, convenient sizes:
- DIY CNC Parts: Spoilboards, clamps, or custom tool holders.
- Robot Frames: Especially for competition or educational robotics.
- Cosplay and Props: It can be shaped into lightweight armor or accessories.
I’ve used HDPE for quick prototypes at home because it’s far more tolerant of mistakes than materials like aluminum. If I break a small piece, I’m only out a few dollars.
8.10 Promotional Items and Short-Run Prototypes
For short-run items like branded coasters, custom nameplates, or one-off prototypes, HDPE excels. CNC machining can handle intricate shapes or logos, and you don’t have to invest in an expensive mold. That’s especially handy if you’re testing a product concept or creating a limited batch for a special event.
8.11 Environmental and Recycling Considerations
HDPE is often designated as recycling code #2. Many municipal programs accept HDPE containers (like milk jugs), though not all can handle industrial sheets or chips. However, the fact that it’s widely recognized and in demand by recyclers is a plus. Some shops collect HDPE scrap and sell or donate it to recyclers, reducing landfill waste. This is appealing to companies aiming for greener manufacturing practices.
8.12 My Favorite Projects with HDPE
Personally, I’ve had the most fun with two major uses of HDPE:
- Vacuum Fixtures: I milled a custom vacuum bed entirely out of HDPE for my CNC router. It’s dimensionally stable enough to hold suction channels, and it doesn’t leak if sealed properly.
- Shop Accessories: Jigs, clamps, and tool holders. The plastic’s toughness and easy machinability make it a go-to for me when I need a quick, reliable solution.
8.13 Why HDPE Stands Out
The overarching reason HDPE finds itself in so many different applications is that it balances cost, machinability, and performance. It’s not the absolute best plastic for extreme heat or super high loads, but for a huge swath of projects—particularly in moderate conditions—HDPE is a champion.
8.14 Key Application Takeaways
- Versatility: From food service to marine environments, HDPE can do the job.
- Durability: Resistant to moisture, chemicals, and impact.
- Machinability: Flexible with CNC or even manual tools.
- Cost-Effective: Competitive pricing makes it ideal for both prototypes and production.
8.15 Bridging to Case Studies
Next, we’ll dive into two real-world case studies that spotlight HDPE in action. These case studies will show how HDPE overcame specific challenges, saved time, and delivered tangible results in industrial and medical settings. So if you’re still on the fence about whether HDPE suits your project, these stories might help you decide.
Case Studies: Real-World HDPE Machining Projects
It’s one thing to read about properties and best practices. It’s another to see how HDPE performs under real shop conditions. In this chapter, I’ll share two case studies that demonstrate HDPE’s capabilities in very different scenarios—a packaging facility and a medical device startup. I’ve also sprinkled in some lessons learned that you can apply to your own projects.
9.1 Case Study 1: HDPE Components for a Conveyor System
Project Overview:
A mid-sized manufacturing plant specialized in packaging consumer goods. Their existing conveyor setup used metal guides and rails, which were prone to rust and required frequent lubrication. The noise level was also higher than desired, causing worker discomfort.
Objective:
Replace select metal rails with HDPE equivalents to reduce maintenance, minimize noise, and improve overall conveyor longevity.
9.1.1 Challenges
- Material Compatibility: The rails needed to fit existing conveyor brackets and align with the chain links.
- Wear and Friction: The plant runs two shifts almost daily, so the guides experience significant friction.
- Wet Environment: The packaging line occasionally deals with liquids (like spilled drinks), so corrosion had been an issue.
9.1.2 Approach
- Material Selection: Engineers chose a high-grade HDPE known for its higher molecular weight (HDPE-HMW). This variant offers improved abrasion resistance.
- Design Adjustments: CAD models were created to match the exact dimensions of the old metal rails. Slight chamfers were added on edges to prevent hang-ups.
- CNC Machining Strategy: A local plastics shop used a large CNC router with compression bits to reduce top and bottom burrs. They also factored in a small finishing pass to ensure a consistent, smooth edge where the conveyor chain would ride.
- Installation: The new HDPE rails were installed using the same mounting hardware, though the design team used slightly oversized holes to allow for thermal expansion.
9.1.3 Results
- Lower Noise: Workers reported a noticeable drop in operational noise. The plant manager measured around a 5–7 dB reduction near the conveyor line.
- Reduced Lubrication: HDPE rails eliminated the need for constant grease, lowering maintenance costs.
- Corrosion-Free: Rust issues disappeared since HDPE does not corrode.
- Ease of Replacement: In the event of damage, ordering new HDPE rails was straightforward. The CNC shop already had the files on hand.
9.1.4 Lessons Learned
- Undersize or Oversize Holes: Allow for plastic’s thermal movement.
- Smooth Finishing Pass: Reduces friction and prolongs rail life.
- Document Everything: Having CAD and CAM files ready speeds up reorders.
9.1.5 My Observations
I visited the facility a few months after the upgrade. Employees said they appreciated the quieter environment, and the plant manager was happy about the lower maintenance overhead. They even expanded the use of HDPE to other parts of the conveyor system, creating small brackets and guards.
9.2 Case Study 2: Medical Tray Prototypes from HDPE
Project Overview:
A small startup developing surgical instrument trays needed a rapid prototyping solution. They wanted to test different compartment layouts and handle designs before committing to an expensive injection mold.
Objective:
CNC machine HDPE trays to validate ergonomics and instrument placement, with the option to quickly iterate on design changes.
9.2.1 Challenges
- Sterilization Compatibility: While HDPE can handle some sterilization processes, repeated autoclaving at high temperatures might cause deformation. They needed to confirm if short-term tests were feasible.
- Precise Fit: Surgical instruments must fit snugly, so the trays required accurate pocket dimensions.
- Turnaround Time: The startup had only a few weeks before a major investor presentation.
9.2.2 Approach
- Material Selection: A standard food-grade HDPE was chosen. It wasn’t guaranteed to handle repeated autoclave cycles, but it was suitable for short-term tests and basic chemical resistance.
- CAD Modeling: The design team created a parametric model in SolidWorks, allowing quick resizing of pockets as needed.
- CNC Machining:
- Tooling: A 3-flute end mill for roughing, plus a 2-flute finishing end mill for final passes on critical pockets.
- Feeds and Speeds: They started around 10,000 RPM with a moderate feed to avoid melting.
- Workholding: A custom vacuum fixture to hold the HDPE sheet in place.
- Iteration Cycle: Once the first tray was tested, design changes were made, and a new tray was machined the same week.
9.2.3 Results
- Rapid Prototyping: They produced multiple iterations of trays in under three weeks, each time refining pocket shapes and handle grips.
- Functional Testing: The trays withstood typical cleaning solutions. Autoclave testing was limited, but they could see how the design felt in a real surgical environment.
- Low Cost: Since HDPE is cheaper than engineering plastics like PEEK or Ultem, the budget for prototyping remained manageable.
9.2.4 Lessons Learned
- Parametric Design: Allowed quick dimension changes between iterations.
- Consider Final-Use Conditions: If they needed full autoclave compliance, a different plastic might have been necessary.
- Vacuum Fixturing Rocks: The startup’s CNC vendor said it minimized warping and freed them from clamping issues.
9.2.5 My Observations
I briefly consulted on this project. The biggest takeaway was how flexible HDPE prototyping can be for medical device teams. They didn’t need a fancy resin or exotic polymer just to validate form, fit, and basic function. HDPE provided an ideal balance of machinability and durability at a price that kept the startup’s finances healthy.
9.3 Common Themes and Insights
Looking at both case studies—one industrial, one medical—HDPE proved itself as:
- Cost-Effective: Whether you’re making dozens of rails or a handful of trays, HDPE is competitively priced.
- Machining-Friendly: Both projects leveraged standard CNC tools and moderate feed/speed settings.
- Dimensionally Stable Enough: Neither project struggled with catastrophic warping, thanks to careful fixturing and finishing passes.
- Easily Iterated: CAD files are easy to update, and CNC shops can replicate or modify parts swiftly.
9.4 Additional Possible Scenarios
- Prototype to Production Transition: Companies sometimes refine designs in HDPE, then later shift to injection molding if volumes skyrocket.
- Temporary Fixtures: I’ve seen machinists create short-term fixtures out of HDPE to hold other parts during a secondary process.
- One-Off Custom Work: Artists or designers who need a single sculptural piece often choose HDPE for its ease of carving.
9.5 Wrapping Up the Case Studies
I’ve learned that real-world success with HDPE hinges on acknowledging its thermal properties, properly securing it during machining, and choosing the right cutting parameters to avoid melt or burrs. These case studies offer just a taste of how flexible HDPE can be, whether you’re optimizing conveyor systems or prototyping next-gen medical equipment.
Sourcing HDPE Material and CNC Services
One of the most frequent questions I get is: “Where do I actually get HDPE sheets, rods, or blocks for machining?” And if you don’t own a CNC machine, how do you find a service that can do it for you? In this chapter, I’ll share tips on finding reliable HDPE suppliers and selecting the right CNC service partner.
10.1 Where to Buy HDPE Sheets, Rods, and Blocks
HDPE is widely available, which is part of its appeal. You can find it at:
- Industrial Plastics Distributors
Companies like Curbell Plastics or Interstate Plastics offer a range of plastic materials, including HDPE in various sizes and thicknesses. - Online Retailers
If you’re a hobbyist, Amazon and other e-commerce sites often have smaller HDPE sheets. For larger volumes, specialized websites like ePlastics can be more cost-effective. - Local Plastic Suppliers
Many cities have local shops that cater to sign makers or fabricators. These shops often carry HDPE and can sometimes do basic cuts for you.
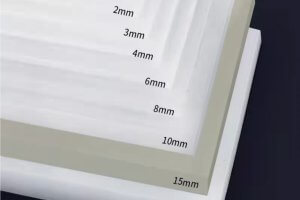
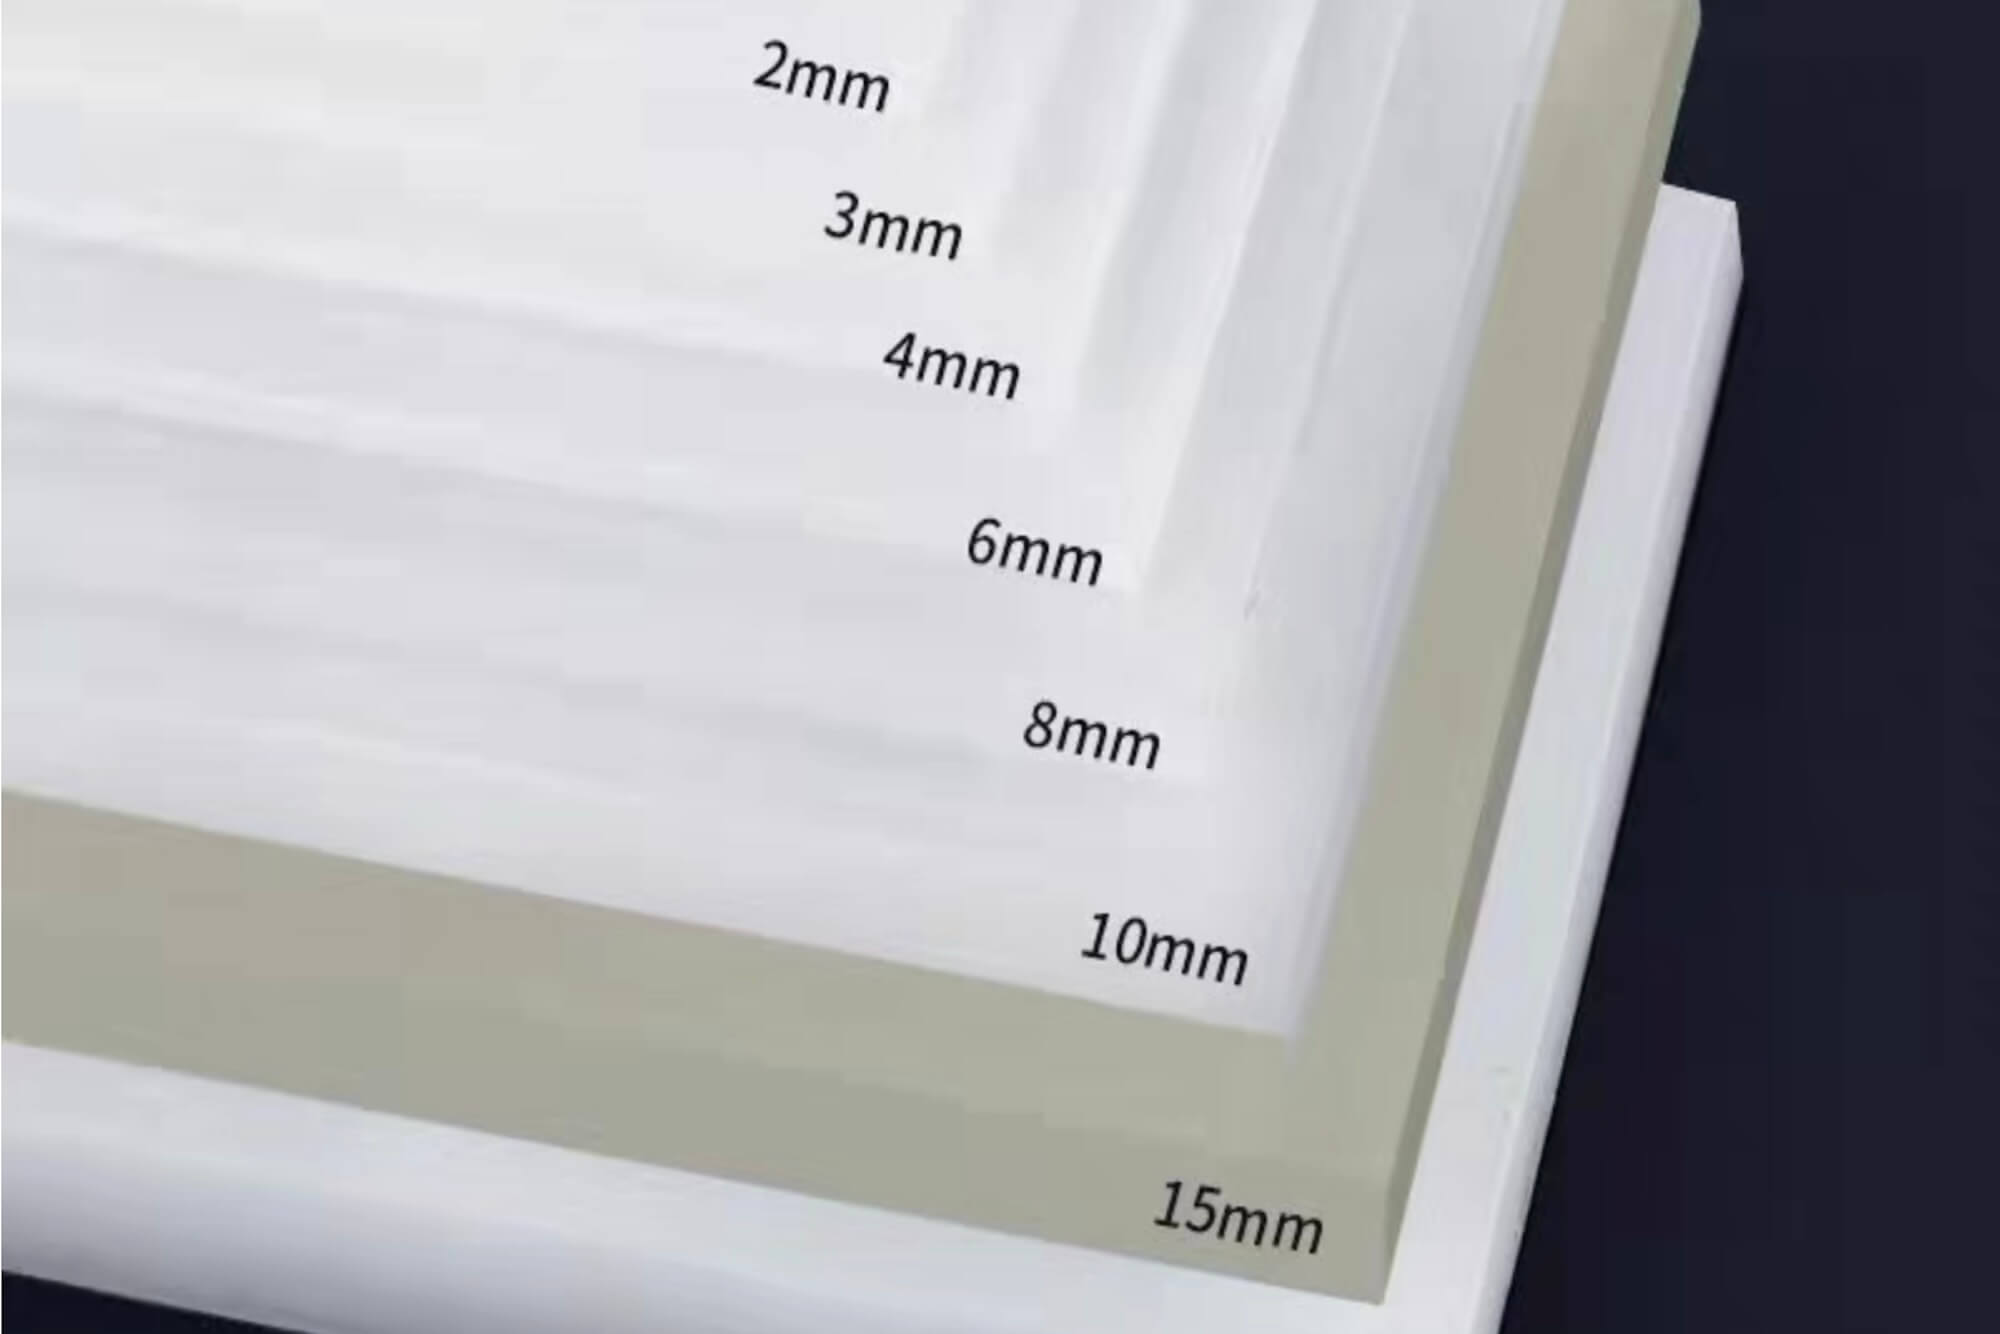
When you’re selecting HDPE, pay attention to:
- Thickness Tolerance: For CNC milling, you want a uniform thickness.
- Surface Finish: Some HDPE comes with a protective film that helps prevent scratches.
- Color Options: HDPE is typically natural (milky white), but you can also find black, red, blue, green, and other colors.
10.2 Choosing the Right Grade of HDPE
Not all HDPE is the same. Certain manufacturers offer premium grades with improved UV stability, better slip properties, or enhanced rigidity. Also, “Marine Board” or “StarBoard” is a type of HDPE formulated specifically for marine environments. If your project is outdoors or in contact with water, consider these specialized grades.
Some HDPE is also labeled “Food Grade,” meaning it meets FDA or NSF standards for food contact. If you’re making cutting boards or containers, that’s the safest bet.
10.3 Buying in Bulk vs. Small Orders
- Bulk Orders: If you’re running a commercial operation, bulk orders can reduce your per-unit cost. However, you’ll need storage space for large HDPE sheets or rods.
- Small Orders: Hobbyists or small businesses might prefer to buy only what they need for each job. In my early days, I often purchased HDPE offcuts or remnants from a local supplier at a discount.
10.4 Finding CNC Services for HDPE Machining
If you don’t have your own CNC machine or you need higher-volume production, hiring a CNC service is the way to go. You can find these services through:
- Local Machine Shops
Traditional machine shops sometimes work with HDPE, though they often specialize in metals. It’s worth asking if they have experience with plastics. - Dedicated Plastic Fabricators
Some fabricators focus almost entirely on plastics. These shops tend to have tooling and fixtures optimized for HDPE. - Online Platforms
Websites like Xometry, Protolabs, or Fictiv let you upload a CAD file and get quotes from multiple service providers. Many can handle HDPE effectively.
10.5 Evaluating a CNC Service
I usually look for:
- Experience with Plastics
Ask for samples or references. If a shop primarily machines steel, they might not be as familiar with HDPEquirks. - Capabilities and Equipment
Check that they have the right machines (router, mill, or lathe) for your part’s geometry. - Lead Times
Some shops can turn around HDPE parts in a few days. Others might take weeks. - Cost and MOQs
Smaller shops might accommodate low-volume orders. Large facilities could have higher minimum order quantities. - File Formats
Typically, .STL, .STEP, or .IGES are standard. Confirm in advance.
10.6 Navigating Quotes and Pricing
When you request a quote, the shop or platform will consider:
- Material Cost: They’ll either purchase HDPE themselves or ask you to supply it.
- Machine Time: The complexity of your part and how long it occupies the CNC machine.
- Setup Fees: If your job requires custom fixtures or numerous tool changes, that might increase costs.
- Shipping and Handling: Large HDPE sheets can be expensive to ship. Local options might save money.
Pro Tip: Provide a clear, detailed CAD model with as few ambiguities as possible. This helps the CNC shop accurately estimate time and cost. Overly tight tolerances or complex geometries will likely increase your quote.
10.7 File Preparation and Design Tips
To get accurate, cost-effective quotes, I’ve learned to:
- Add Tolerances
Specify essential tolerances clearly. Overly tight tolerances can drive up machining time. - Check for Undercuts
If your design includes undercuts or complex 3D features, you may need 4- or 5-axis machining, which is pricier. - Simplify Where Possible
Fillets, chamfers, and standard hole sizes reduce tool changes. - Use Reasonable Wall Thicknesses
Extremely thin walls in HDPE can warp during machining or in use.
10.8 Communication with the Service Provider
A big part of success is open communication. I’ve had times where I specified certain feed rates or tools, only for the shop to suggest an alternative that better suits HDPE. Often, they have specialized knowledge about how best to handle plastics. Being open to their feedback can improve your final product.
10.9 Owning vs. Outsourcing a CNC Machine
You might be weighing the pros and cons of buying your own CNC machine versus outsourcing:
- Owning a CNC
- Pros: Total control, quick iteration, no middleman.
- Cons: High upfront cost, maintenance, and learning curve.
- Outsourcing
- Pros: Access to professional equipment, no capital expenditure.
- Cons: Longer lead times, potential communication hurdles, cost for small runs can be high.
If HDPE machining becomes a core part of your business, investing in your own router or mill might pay off. If it’s an occasional need, outsourcing is likely more cost-effective.
10.10 Working with Online Manufacturing Platforms
I’ve tried a few online platforms to machine HDPE parts. You typically upload your CAD model, select “HDPE” from a materials list, and the system calculates an instant quote. You can specify surface finish, tolerances, and lead time preferences. It’s convenient for small to medium runs. The per-unit cost might be higher than a local shop, but the convenience factor is hard to beat.
10.11 Quality Assurance and Receiving Parts
Once the parts arrive, I always do an incoming inspection:
- Check Dimensions
Use calipers, micrometers, or a CMM to ensure they match your CAD specs. - Surface Finish and Burrs
If the shop did a finishing pass, the edges should be fairly clean. - Flatness or Warping
For large, flat parts, make sure they haven’t warped in transit.
If something’s off, reputable shops usually have policies for rework or refunds, but confirm that before placing your order.
10.12 Personal Experiences with Sourcing
I’ve gone both routes: sometimes I buy a sheet of HDPE and cut it on my own small CNC router, other times I outsource larger or more complex projects to local shops. One key lesson: local shops often appreciate it when you bring your own HDPE, especially if they don’t stock it frequently. That can simplify quoting and ensure you get the exact grade you want.
I once needed a batch of 50 identical HDPE parts in a hurry. My home setup wasn’t fast enough for that volume, so I sent the files to a CNC shop. They turned the job around in under a week. The cost was reasonable because HDPE is easy on tools, so the shop factored in minimal tool wear.
10.13 Assessing Lead Times and Future Scalability
If you’re prototyping, a quick-turn CNC service can help you iterate swiftly. For production volumes, you might negotiate a blanket order or a scheduled run to save costs. HDPE typically machines faster than metals, which is a plus, but don’t overlook setup and fixturing times, especially for complex designs.
10.14 Conclusion: Finding the Right Material and Service
Whether you buy HDPE yourself or rely on a CNC provider, availability is one of HDPE’s greatest strengths. You can find it in multiple grades, colors, and thicknesses to fit almost any project. By researching suppliers, clarifying your design, and verifying the shop’s experience with HDPE, you’ll likely get high-quality parts that meet your specs.
Summary and Takeaways
We’ve covered a lot of ground in this HDPE Machining Guide, from material properties and machining strategies to advanced tips, common challenges, and even how to source the material or a CNC service. Let’s pull it all together in this summary chapter, highlighting the most critical insights and best practices. I’ll also share final reflections on why HDPE remains one of my go-to plastics in many CNC projects.
11.1 Recap of Key HDPE Attributes
- High Strength-to-Density Ratio
HDPE is robust yet lightweight, which is a huge plus in many applications. - Chemical Resistance
It stands up to many acids, bases, and solvents, making it suitable for industrial, food-grade, and outdoor uses. - Ease of Machining
HDPE cuts, drills, and routs with relative ease compared to harder plastics or metals. - Cost-Effectiveness
It’s generally cheaper than many engineering polymers, making it attractive for prototyping or short-to-medium production runs.
11.2 Major Challenges and Their Solutions
Despite HDPE’s benefits, we uncovered some common pitfalls:
- Melting/Gumming
Solution: Lower spindle speed, increase feed, ensure good chip evacuation. - Burrs and Ragged Edges
Solution: Use compression bits, finishing passes, and keep tooling sharp. - Warping
Solution: Even fixturing, multiple passes, and limit heat buildup. - Tool Wear
Solution: HDPE is less abrasive than metals, but dull tools still generate heat and friction. Inspect regularly. - Workholding Slippage
Solution: Vacuum tables, custom clamps, or specialized fixtures to keep the part from shifting.
11.3 Overview of Machining Techniques
Feeds and Speeds:
- Moderate spindle RPM (8,000–14,000) with a sufficiently high feed rate to avoid melting.
Tooling:
- 2-flute or 3-flute end mills for general cutting.
- Specialized plastic cutters for higher production runs.
- Compression bits for sheet work to minimize burrs.
Cut Depth and Stepovers:
- Can be more aggressive than metals, but watch heat buildup.
- Multi-pass strategies—rough, semi-finish, finish—yield the best surface.
Chip Evacuation and Cooling:
- Air blast or light mist. Flood coolant can sometimes cause issues with part shifting.
11.4 Finishing and Quality Control
Achieving a great finish often comes down to that final pass. I’ve seen HDPE parts come off a CNC with edges so clean that hardly any post-processing was needed. Still, if burrs appear, a simple deburring tool or light sanding can handle them.
Quality Control Tips:
- Measure critical dimensions after the part cools.
- Check for warp on large, flat parts.
- Document each successful run so you can replicate settings.
11.5 Advanced Strategies Recap
For those looking to optimize cycle times and surface finishes further:
- Trochoidal or Adaptive Toolpaths: Maintain consistent chip load.
- Dedicated Plastic Tooling: Polished flutes, specialized geometries.
- Data Logging: Keep records of each project’s feeds, speeds, and outcomes.
- Repeatability in Production: Use custom fixtures, vacuum hold-down, or probing routines.
11.6 Applications and Case Studies
We looked at real-world uses of HDPE in:
- Industrial Settings (e.g., conveyor rails, gears)
- Food-Grade Components (e.g., cutting boards, containers)
- Medical Prototyping (instrument trays, lab tools)
- Marine Environments (boat parts, dock accessories)
- Custom Enclosures and Outdoor Furniture
- DIY and Hobby Projects
Case studies revealed how industrial plants cut maintenance costs by swapping metal rails for HDPE, while a medical startup used HDPE to quickly iterate on tray designs without busting their budget.
11.7 Sourcing HDPE and CNC Services
HDPE is widely available in different grades and colors. Key points:
- Material Suppliers:
- Industrial distributors
- Online retailers
- Local plastic shops
- Selecting a CNC Service:
- Ensure they have plastic-machining experience
- Ask about lead times, MOQs, and file formats
- Provide clear CAD files and realistic tolerances
Balancing the option of owning a CNC vs. outsourcing comes down to your budget, volume, and how central HDPEmachining is to your business.
11.8 My Personal Reflection on HDPE
After years of working with metals, I initially underestimated HDPE. I saw it as “just plastic,” something for cutting boards and playground slides. But once I started prototyping and producing parts, I realized how versatile it is. HDPEhits a sweet spot: it’s user-friendly, easy on tools, and cost-effective. I’ve made everything from complex machine guards to simple shop jigs and found that HDPE can handle both.
I also like that HDPE is a perfect stepping stone for people new to CNC. If you’re transitioning from woodworking or 3D printing, HDPE is a forgiving material to learn on, yet it’s robust enough for real-world applications.
11.9 Where HDPE Fits in the Plastic Ecosystem
HDPE isn’t the only plastic out there. For instance, POM (Delrin) offers higher rigidity and a better bearing surface, while PVC provides great chemical resistance but can release harmful fumes if cut incorrectly. Acrylic is prized for clarity but can crack if machined aggressively. Meanwhile, HDPE stands in the comfortable middle: decent strength, lower cost, wide availability, and consistent CNC results.
11.10 Final Words of Advice
- Experiment on Scraps: If you’re not sure about feeds/speeds, buy some extra HDPE and do quick test cuts.
- Respect the Heat Factor: This can’t be overstated—heat is your enemy when machining HDPE. Manage it well, and you’ll avoid most problems.
- Keep an Open Mind: You might discover that HDPE can replace wood, metal, or pricier plastics in many applications.
- Document Your Process: Write down what works. Over time, you’ll build a personal database of perfect speeds, depths, and finishing steps.
FAQ
Below are frequently asked questions regarding HDPE machining, compiled from my own experience and those of colleagues. This should serve as a handy reference if you’re short on time or need quick clarifications.
- Can HDPE be CNC machined easily?
Yes. HDPE is one of the most approachable plastics for CNC. Just watch out for heat buildup and use sharp tools. - What type of CNC machine is best for HDPE?
A standard CNC router or mill works well. For round parts, a CNC lathe is great. The key is controlling feeds, speeds, and chip evacuation. - What spindle speed is recommended for cutting HDPE?
It varies by tool diameter. A common starting point is 8,000–12,000 RPM for a 1/4″ end mill. Adjust as needed to avoid melting or chatter. - What kind of tools work best with HDPE?
Sharp end mills (2 or 3 flutes) designed for plastics are ideal. Compression bits reduce burrs in sheet cutting. - How do I prevent melting during HDPE machining?
Lower the spindle speed, increase feed, and ensure good chip evacuation (air blast or light coolant). Let the chips carry away the heat. - How can I reduce burrs on machined HDPE edges?
Use a finishing pass, keep your tool sharp, and consider compression or downcut bits for sheet edges. - Is HDPE better than acrylic or POM for CNC?
It depends on your application. HDPE is softer and less rigid than POM, and easier to machine than acrylic. Each has its pros and cons. - Does HDPE need coolant during machining?
Not always. Many machinists just use an air blast to remove chips. Light mist coolant can help if you’re experiencing heat issues. - What tolerance can I expect when machining HDPE?
Generally ±0.005″ to ±0.010″ for standard parts, though tighter tolerances are possible with careful heat management and tool setup. - How do I fixture soft plastic like HDPE?
Vacuum tables, custom soft jaws, or moderate clamp pressure. Avoid overtightening to prevent deformation. - Is HDPE safe for food-contact parts after CNC machining?
Food-grade HDPE (FDA-approved) is common in cutting boards and containers. Just ensure you deburr and clean it thoroughly. - What is the best way to polish or finish HDPE parts?
Typically a fine finishing pass on the CNC is enough. If needed, light sanding or buffing can smooth edges. Don’t expect a mirror finish like acrylic. - Can I engrave or etch HDPE using CNC?
Yes. A V-bit or small end mill at moderate speeds works well for logos or part numbers. - What are common machining issues with HDPE and how to solve them?
Melting, warping, and burrs are the big three. Solutions: optimize feeds/speeds, ensure proper fixturing, and keep tools sharp. - Can HDPE be laser cut as an alternative to CNC?
Technically yes, but it can melt or discolor. Laser cutting often isn’t recommended unless you have a specialized setup. CNC routing or milling is more common. - How does temperature affect HDPE machining?
Higher temperatures can cause dimensional instability or melting. Keep the workspace cool, and manage friction heat with proper feeds/speeds. - Where can I find reliable HDPE CNC machining services?
Look for local plastic fabricators or online CNC platforms like Xometry, Protolabs, or job shops that specifically mention plastic machining.
Authority References and Further Reading
If you want to delve deeper into HDPE (High-Density Polyethylene) or verify specific points mentioned throughout this guide, you may find these non-commercial, knowledge-based references helpful. Below are some direct links to recognized, educational, or governmental sources. (Note: These links are provided for informational purposes, and their content may be updated over time.)
- Wikipedia: “High-Density Polyethylene”
https://en.wikipedia.org/wiki/High-density_polyethylene
(Covers the general background, properties, and typical uses of HDPE.) - Wikipedia: “Polyethylene”
https://en.wikipedia.org/wiki/Polyethylene
(Explores broader polyethylene family details, with sections on HDPE, LDPE, and related variants.) - British Plastics Federation: “HDPE (High Density Polyethylene)”
https://www.bpf.co.uk/plastipedia/polymers/hdpe.aspx
(Provides an overview of HDPE’s technical specs, applications, and manufacturing considerations.) - National Institute of Standards and Technology (NIST): “Materials/Polymers”
https://www.nist.gov/topics/materials
(NIST provides insights into polymer research and testing methodologies, which can be relevant to HDPE properties.) - European Commission – “Food Contact Materials”
https://ec.europa.eu/food/safety/chemical_safety/food_contact_materials_en
(Offers regulatory context and safety guidelines for plastics in contact with food within the EU, which can include HDPE.)
Note: Always check the publication date or revision notes on these sites to ensure you are accessing the most current data. These references are not affiliated with this guide; they are provided strictly as a starting point for further research.
By consulting these reputable sources, you can reinforce or update your knowledge of HDPE properties, best practices for machining, and safety/regulatory standards.
Other Articles You Might Enjoy
- Hard Plastic Sheets Explained For Makers And Machinists: Which One Is Right for Your Project?
Chapter 1: Introduction I've worked in manufacturing and DIY fabrication for years, frequently handling all types of materials. Among these, hard plastic sheets consistently proved versatile and reliable for various…
- Step-by-Step Guide to CNC Machining Pulleys in China for Cost-Effectiveness
Introduction: Understanding the Value of CNC Machining in China CNC (Computer Numerical Control) machining stands as a cornerstone in China's manufacturing sector, driving efficiency and precision in the production of…
- 10 plastic materials frequently used in CNC machining
Introduction to CNC Machining and Plastics CNC machining stands for Computer Numerical Control machining, a manufacturing process where pre-programmed computer software dictates the movement of factory tools and machinery. This…
- The use of plastics in food processing machinery
Introduction to Plastics in Food Processing Machinery The incorporation of plastics into food processing machinery plays a pivotal role in the modern food industry. These synthetic materials are employed for…
- Master CNC Machining with ABS Plastic Sheet: Tools, Tips, and Techniques
Introduction: Mastering CNC Machining with ABS Plastic Sheet When it comes to CNC machining, the choice of material can make or break a project. ABS plastic sheet is one of the most…
- Nylon Material Properties and Applications in CNC and Other Machining Methods
I chose this title because I believe it captures the essence of what we’ll explore: the fundamental properties of nylon material, its applications, and especially its role in CNC and…
- Acetal Material Overview: Why It Excels in CNC Machining Applications
I. Introduction I’ve been fascinated by engineering plastics for quite some time. In my early days as a mechanical enthusiast, I spent hours experimenting with different polymers to see how…
- Plastic CNC Machining Services with PEEK for Complex Components
Introduction to Plastic CNC Machining Services with PEEK The field of manufacturing has embraced the revolutionizing technology of Computer Numerical Control (CNC) machining, taking plastic component production to advanced levels.…