Chapter 1: Why Machinists Need to Learn Powder Coating
Powder coating is a robust, eco-friendly finishing method that I’ve seen more and more machinists adopt.
When people look up “how to powder coat,” they usually want to know the basic steps, equipment, and best practices.I’ve noticed it’s especially popular among those perfecting surface finishes, since powder coating delivers durable and uniform results on machined parts.
But for machinists specifically, “how to powder coat” brings unique advantages.
We machine precise metal parts.
Sometimes those parts need an extra layer of corrosion protection, or maybe they need a custom color or texture.
In my shop, we used to outsource all finishing work.
Eventually, I realized we were spending time and money shipping items back and forth.
Clients wanted a single-stop solution: CNC machining plus final finishing.
That’s what prompted me to learn how to powder coat in-house.
Powder coating merges well with machining because the process can handle sharp edges and complex geometries. Unlike liquid paint, powder coating doesn’t run or drip. With the right prep and techniques, you can achieve a tough and aesthetic finish. I’ve seen this firsthand in Custom Machining projects, where powder coating enhances CNC machined parts
When I first started, I thought “how to powder coat” was straightforward: clean the part, spray powder, bake it, and you’re done.
But over time, I learned there’s more nuance to it—especially if you want consistent, professional results.
You have to handle surface prep carefully.
You have to choose the right powder type.
You have to dial in the correct oven temperature.
Otherwise, you end up with orange peel, incomplete cure, or poor adhesion.
In this guide, I share the entire “how to powder coat” journey from a machinist’s viewpoint.
We’ll discuss gear, preparation, step-by-step application, troubleshooting, real-world case studies, and more.
My goal is to help you integrate powder coating seamlessly into your metalworking process.
By the end, you’ll be able to produce professional, durable finishes for the parts you machine.
I keep paragraphs short to simplify reading.Next, we dive right into the necessary equipment and materials.If you’re like me, you probably want to know exactly what gear is essential to get started or to enhance your existing setup.
Let’s begin with the building blocks of success: tools, materials, and shop setup.
Chapter 2: Essential Equipment & Materials for How to Powder Coat
2.1 Why the Right Gear Matters
In my early days, I tried using a bargain-bin powder coating gun.
I quickly learned that cheap tools can hamper your ability to produce a consistent, professional finish.
When you learn “how to powder coat” at a machinist level, you need equipment that can deliver reliable, repeatable results.
Let’s explore the core items every machinist should consider.
2.2 Powder Coating Gun: The Heart of the Operation
A proper powder coating gun uses electrostatic charging to adhere powder particles to the metal surface.
It’s different from a typical HVLP paint gun.
Powder clings electrically, which is why you need a grounding clip for your workpiece.
Basic Powder Coating Gun vs. Professional Setup
- Entry-Level Gun: Sometimes called a hobby gun, suitable for small parts or occasional usage.
- Professional Electrostatic Gun: Offers adjustable voltage, more uniform charge, and better flow control.
As a machinist, I eventually upgraded to a mid-level professional gun with adjustable kV (kilovolts).
This allowed me to fine-tune the charge for different metals and shapes.
It also helped with corners and recesses, so powder coverage was more uniform.
2.3 Air Compressor & Filtration
You need a consistent air supply to fluidize the powder and move it through the gun.
Look for an air compressor that can deliver 5–7 SCFM (standard cubic feet per minute) at around 30–40 PSI.
I learned that using an inadequate compressor leads to pulsating airflow, uneven powder distribution, and frustration.
A moisture filter is also crucial, because even minor humidity can clump powder.
2.4 Powder Types: Choosing the Right Chemistry
Powder selection is a big topic in “how to powder coat.”
Different chemistries excel in different scenarios:
- Epoxy Powders: Great for chemical resistance, commonly used on industrial parts.
- Downsides: Less UV stable, so color can fade if exposed to sunlight.
- Polyester Powders: Popular for outdoor applications, more UV-resistant than epoxy.
- Downsides: Slightly less chemical resistance than epoxy.
- Epoxy-Polyester Hybrids: Offer a balance between chemical resistance and UV durability.
- Fluoropolymer Powders: High-end architectural uses, robust weather resistance.
- Downsides: Expensive and sometimes trickier to apply.
As a machinist, I pick the powder based on final usage.
If it’s an outdoor piece—like a bracket on a construction site—I lean toward polyester.
If it’s an indoor industrial machine part that might contact chemicals, epoxy or an epoxy-polyester hybrid might be better.
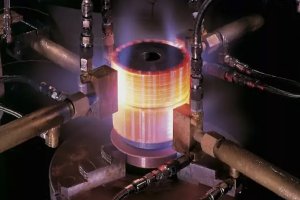
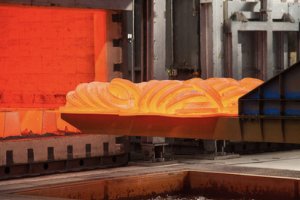
2.5 Ovens & Curing Methods
After spraying, you must bake the powder at the recommended temperature (usually 350–450°F).
This fuses the powder into a continuous film.
Industrial Ovens are the gold standard.
They allow you to handle large volumes or big parts.
But if your shop space is limited, a smaller dedicated powder coating oven can still work well.
Some machinists experiment with old household ovens for small parts.
I tried that once for prototypes, but controlling temperature precisely was challenging.
Infrared Curing Systems can be beneficial for large, flat objects or production lines.
They rapidly heat the powder, reducing cure times.
However, they require precise distance and angle.
For small-to-medium machine shops, a convection oven is typically more straightforward.
2.6 Prep Supplies: Degreasers, Cleaners, & Abrasives
Surface prep is crucial.
Powder won’t stick reliably if the metal is dirty or oily.
I keep a stock of industrial degreasers, lint-free cloths, and proper gloves.
For mechanical abrasion, a sandblaster or blast cabinet helps remove scale or old finishes.
Using an 80–120 grit media is common, though this depends on the metal’s hardness.
Phosphate Wash or Chromate Treatment can also improve adhesion and corrosion resistance.
If you machine steel or aluminum that will face harsh environments, a phosphate or chromate pretreatment can extend the finish’s lifespan.
2.7 Grounding & Racking Equipment
Remember that electrostatic principle?
You need good grounding for the powder to cling effectively.
I’ve used special racks and hooks designed for powder coating.
They let the electrical charge flow from the part to the ground, ensuring even coverage.
Plus, good racking strategies help keep each part separated and reduce blemishes from contact points.
2.8 Masking Tapes & Plugs
As a machinist, you might have parts with threaded holes or tight tolerances.
You don’t want powder to build up in those areas.
That’s where high-temperature masking tapes and silicone plugs come in handy.
They block powder from entering threads or surfaces that must remain bare metal.
2.9 Data Table: Key Equipment for How to Powder Coat
Below is a reference table listing essential equipment, recommended specs, and typical cost ranges.
| Equipment | Recommended Specs | Approx. Cost Range | Key Notes |
|---|---|---|---|
| Powder Coating Gun | Adjustable voltage (10–100 kV) | $300–$3,000 | Pro-level guns allow better coverage in tight spots |
| Air Compressor | 5–7 SCFM @ 30–40 PSI | $200–$1,500 | Ensure moisture filter to avoid powder clumping |
| Filtration System | In-line moisture + oil separator | $50–$300 | Keep air supply dry; crucial for consistent powder |
| Powder Coating Oven | 350–450°F capability, stable temp | $500–$5,000+ | Size depends on part dimensions; consistent heat |
| Sandblaster/Blast Cab. | 80–120 grit media (aluminum oxide) | $200–$2,000 | Helps create anchor profile for powder adhesion |
| Masking Supplies | High-temp tape, silicone plugs | $20–$100 | Protect threads, holes, or critical surfaces |
| Grounding & Racks | Conductive metal racks, grounding rod | $50–$500 | Ensures uniform electrostatic coverage |
| Powder Materials | Epoxy, polyester, hybrids | $10–$50/lb | Choose chemistry based on environment |
| Safety Gear | Respirator, gloves, eye protection | $30–$200 | Protect from powder inhalation and chemicals |
(Prices and specs are approximate, subject to region and brand.)
2.10 Putting It All Together
When I set up my powder coating corner, I tried to balance cost with reliability.
I invested in a mid-tier electrostatic gun, a decent compressor, and a dedicated oven.
That combination allowed me to coat small-to-medium parts without constant frustration.
If you skip on certain items—like a moisture filter or good masking supplies—you’ll pay for it with reworks and inconsistent results.
I learned that the hard way after a few runs with random blemishes and rough spots.
Takeaway: A professional machinist approach to “how to powder coat” demands the right gear.
It might seem expensive initially, but in the long run, it can save time, money, and deliver superior results.
Now that we’ve covered the basics of equipment and materials, let’s move on to the next crucial chapter: surface preparation.
I firmly believe that surface prep is the foundation for any successful powder coating job—especially in a machine shop environment.
Chapter 3: Surface Preparation – The Key to Reliable Powder Coating
3.1 The Importance of Surface Prep
Surface prep might sound tedious, but it’s everything in “how to powder coat.”
No matter how fancy your gun or how perfect your powder chemistry, if the surface is dirty or rough in the wrong way, your finish will suffer.
In my experience, about 80% of powder coating failures trace back to inadequate prep.
Machined parts often have residual cutting fluids, oils, or even polishing compounds.
These contaminants form a barrier that powder can’t properly adhere to.
If you neglect cleaning them off, you’ll see poor adhesion, flaking, or bubbles after curing.
3.2 Cleaning & Degreasing
Degreasing is step one.
Some machinists rinse parts in soapy water or a mild solvent, but serious shops use industrial degreasers or an alkaline wash.
I’ve used a heated ultrasonic cleaner for smaller components, which quickly breaks down oils and grime.
Whatever method you choose, ensure the entire surface is degreased.
For complex parts with pockets or blind holes, it helps to rotate or agitate them in the cleaning solution.
If you still see droplets beading up, that’s a sign oil or contamination remains.
3.3 Removing Oxides & Old Finishes
If parts are raw from the CNC, you might have minimal oxides.
But if they’ve been sitting around or come from a supplier with mill scale, you need to remove that layer.
Sandblasting or “abrasive blasting” is popular.
It creates an anchor profile, a slightly rough texture that helps the powder cling.
Choosing an Abrasive:
- Aluminum oxide grit is standard for mild steel, stainless, or aluminum.
- Glass beads can be used if you want a smoother finish.
- Steel shot is more aggressive, but might embed in softer metals.
Sometimes, if a part has a prior finish like old paint, you may need a coarser media or a paint-stripping chemical.
During one job, I tried to powder coat over an old paint layer.
It peeled right off after curing, revealing the importance of removing everything down to bare metal.
3.4 Mechanical vs. Chemical Etching
For aluminum, chemical etching processes like chromate or phosphate conversion can improve corrosion resistance.
I remember a project where we had to powder coat thousands of aluminum brackets for marine applications.
We used a chromate conversion coating before powder, resulting in a finish that withstood salt spray testing far better than non-treated parts.
Phosphating is popular for steel.
It’s a mild acid treatment that leaves a crystalline surface, improving both adhesion and corrosion resistance.
In some shops, they combine phosphating with a rinse that leaves a protective layer, preventing flash rust if the part sits a few days before coating.
3.5 Drying & Handling
After cleaning or chemical treatment, ensure the part is thoroughly dried.
Moisture left on the surface can cause pinholes or a “spitting” effect during powder application.
I typically blow parts off with compressed air (filtered and dry), then let them air-dry or run them through a warm drying oven.
Handling is another overlooked factor.
If you handle parts with bare, oily hands, you can recontaminate them.
Use clean gloves or hold them in areas that won’t be coated if possible.
In my shop, we have a rule: once a part is prepped, nobody touches it without gloves.
3.6 Dealing with Machined Edges & Burrs
Machined edges might have tiny burrs.
Sharp edges can cause thin coverage because powder flows off the corner.
I take a moment to break or chamfer edges.
At the very least, I remove burrs so the powder can wrap around corners better.
This also gives the part a more professional look.
3.7 Masking & Plugging
Masking is particularly important for machinists who must maintain tolerances on certain features or keep threads uncoated.
High-temp tapes can withstand 400°F without peeling.
Silicone or rubber plugs are great for threaded holes.
I once tried normal painter’s tape for a quick job.
It shriveled in the oven, leaving adhesive residue.
Lesson learned: always use heat-resistant tapes.
Mark your job travelers so everyone knows which areas to mask, preventing confusion on the shop floor.
3.8 Data Table: Common Surface Prep Methods
Below is another data table, summarizing popular surface prep methods:
| Prep Method | Ideal Use | Recommended Equipment | Pros | Cons |
|---|---|---|---|---|
| Alkaline Wash | Oily parts, cutting fluid residue | Alkaline cleaning solution, soak tank | Efficient for moderate contamination | May not remove rust or scale |
| Solvent Cleaning | Small or delicate machined parts | Acetone, alcohol, ultrasonic cleaner | Quick, easy to implement | Flammable, limited scale removal |
| Sandblasting | Removing rust, scale, prior finishes | Blast cabinet, aluminum oxide media | Creates anchor profile, thorough | Dust generation, higher cost |
| Glass Bead Blasting | Light finishing or decorative surfaces | Glass bead media, blast cabinet | Smooth satin finish, less surface damage | Not aggressive for heavy rust |
| Phosphate Coating | Steel parts, added corrosion resistance | Phosphate bath, rinse systems | Improves powder adhesion, longevity | Additional cost, must handle chemicals |
| Chromate Conversion | Aluminum & zinc alloys, marine environment | Chromate solution, rinse | Excellent corrosion protection | Hazardous chemicals, environmental regs |
| Wire Brushing | Light oxidation or burr removal | Power brush or drill attachment | Cheap, easy for small areas | Inconsistent finish, labor-intensive |
| Vibratory Finishing | Deburring complex shapes | Vibratory tumbler, abrasive media | Automated, uniform deburring | Equipment can be costly, lengthy cycle |
3.9 Personal Reflections on Prep
When I was new to “how to powder coat,” I sometimes skipped thorough cleaning if the part “looked okay.”
That led to issues like flaking powder or random spots after curing.
Once I established a standardized prep sequence (clean, rinse, abrade, rinse again, dry, mask), rejects dropped significantly.
Tip: Keep detailed logs of your prep steps for different materials.
If a certain pre-treatment or blast media combination yields great results, note it.
This data helps you standardize processes and train new technicians.
3.10 The Machinist’s Edge on Prep
As machinists, we often know the metal better than a general finisher.
We know if the part is 6061 aluminum or 1018 steel.
We also know the dimensional tolerances.
This knowledge guides how aggressive we can be with blasting or chemical treatments without distorting or pitting the part.
In short, we have an advantage because we understand the metal from the inside out.
Key Takeaways for Chapter 3:
- Thorough cleaning and degreasing are essential for “how to powder coat” success.
- Abrasive blasting or chemical etching can significantly boost adhesion.
- Proper masking ensures you don’t ruin threads or critical surfaces.
- Good handling and dryness prevent re-contamination and moisture-related defects.
Next, we’ll tackle the actual step-by-step application.
That includes gun settings, spraying technique, and oven curing, which is arguably the most exciting part of “how to powder coat.”
Chapter 4: How to Powder Coat Step-by-Step
4.1 Overview of the Process
In this chapter, we combine everything learned so far—equipment, powder selection, surface prep—into the actual “how to powder coat” procedure.
I’ll share the approach I’ve refined over time, focusing on machinist-friendly tips.
The steps basically are:
- Equipment Setup
- Part Racking & Grounding
- Powder Application
- Curing
- Cooling & Inspection
Let’s break these down in detail.
4.2 Step 1: Equipment Setup
Before you spray any powder, ensure your environment is ready.
I set up a designated powder coating corner in my shop to avoid contaminating other machining areas.
Powder overspray can float around if your ventilation isn’t adequate.
Gun Settings:
- Voltage (kV) typically between 40–100 kV, depending on the powder and part geometry.
- Powder flow rate: adjust so the powder cloud is consistent, not sputtering or heavy.
- Air pressure: around 10–20 PSI at the gun tip (some guns specify higher).
- Ensure the gun’s ground clamp is attached to the part or rack.
Compressor & Filtration:
- Double-check your moisture trap.
- Set the regulator to feed the correct PSI to the gun’s venturi.
4.3 Step 2: Part Racking & Grounding
Racking means suspending or placing your part so every surface is accessible.
Good racking also ensures an electrical path from the part to the ground.
I use steel hooks or racks that are stripped of any old powder buildup.
If powder accumulates on your hangers, it can impede grounding.
Try to position parts so you can walk around them or adjust the gun angle easily.
Grounding is crucial.
If the part isn’t grounded, the powder won’t adhere well.
Sometimes I also attach a ground clamp directly to a hidden spot on the part.
That ensures minimal contact points while maximizing conduction.
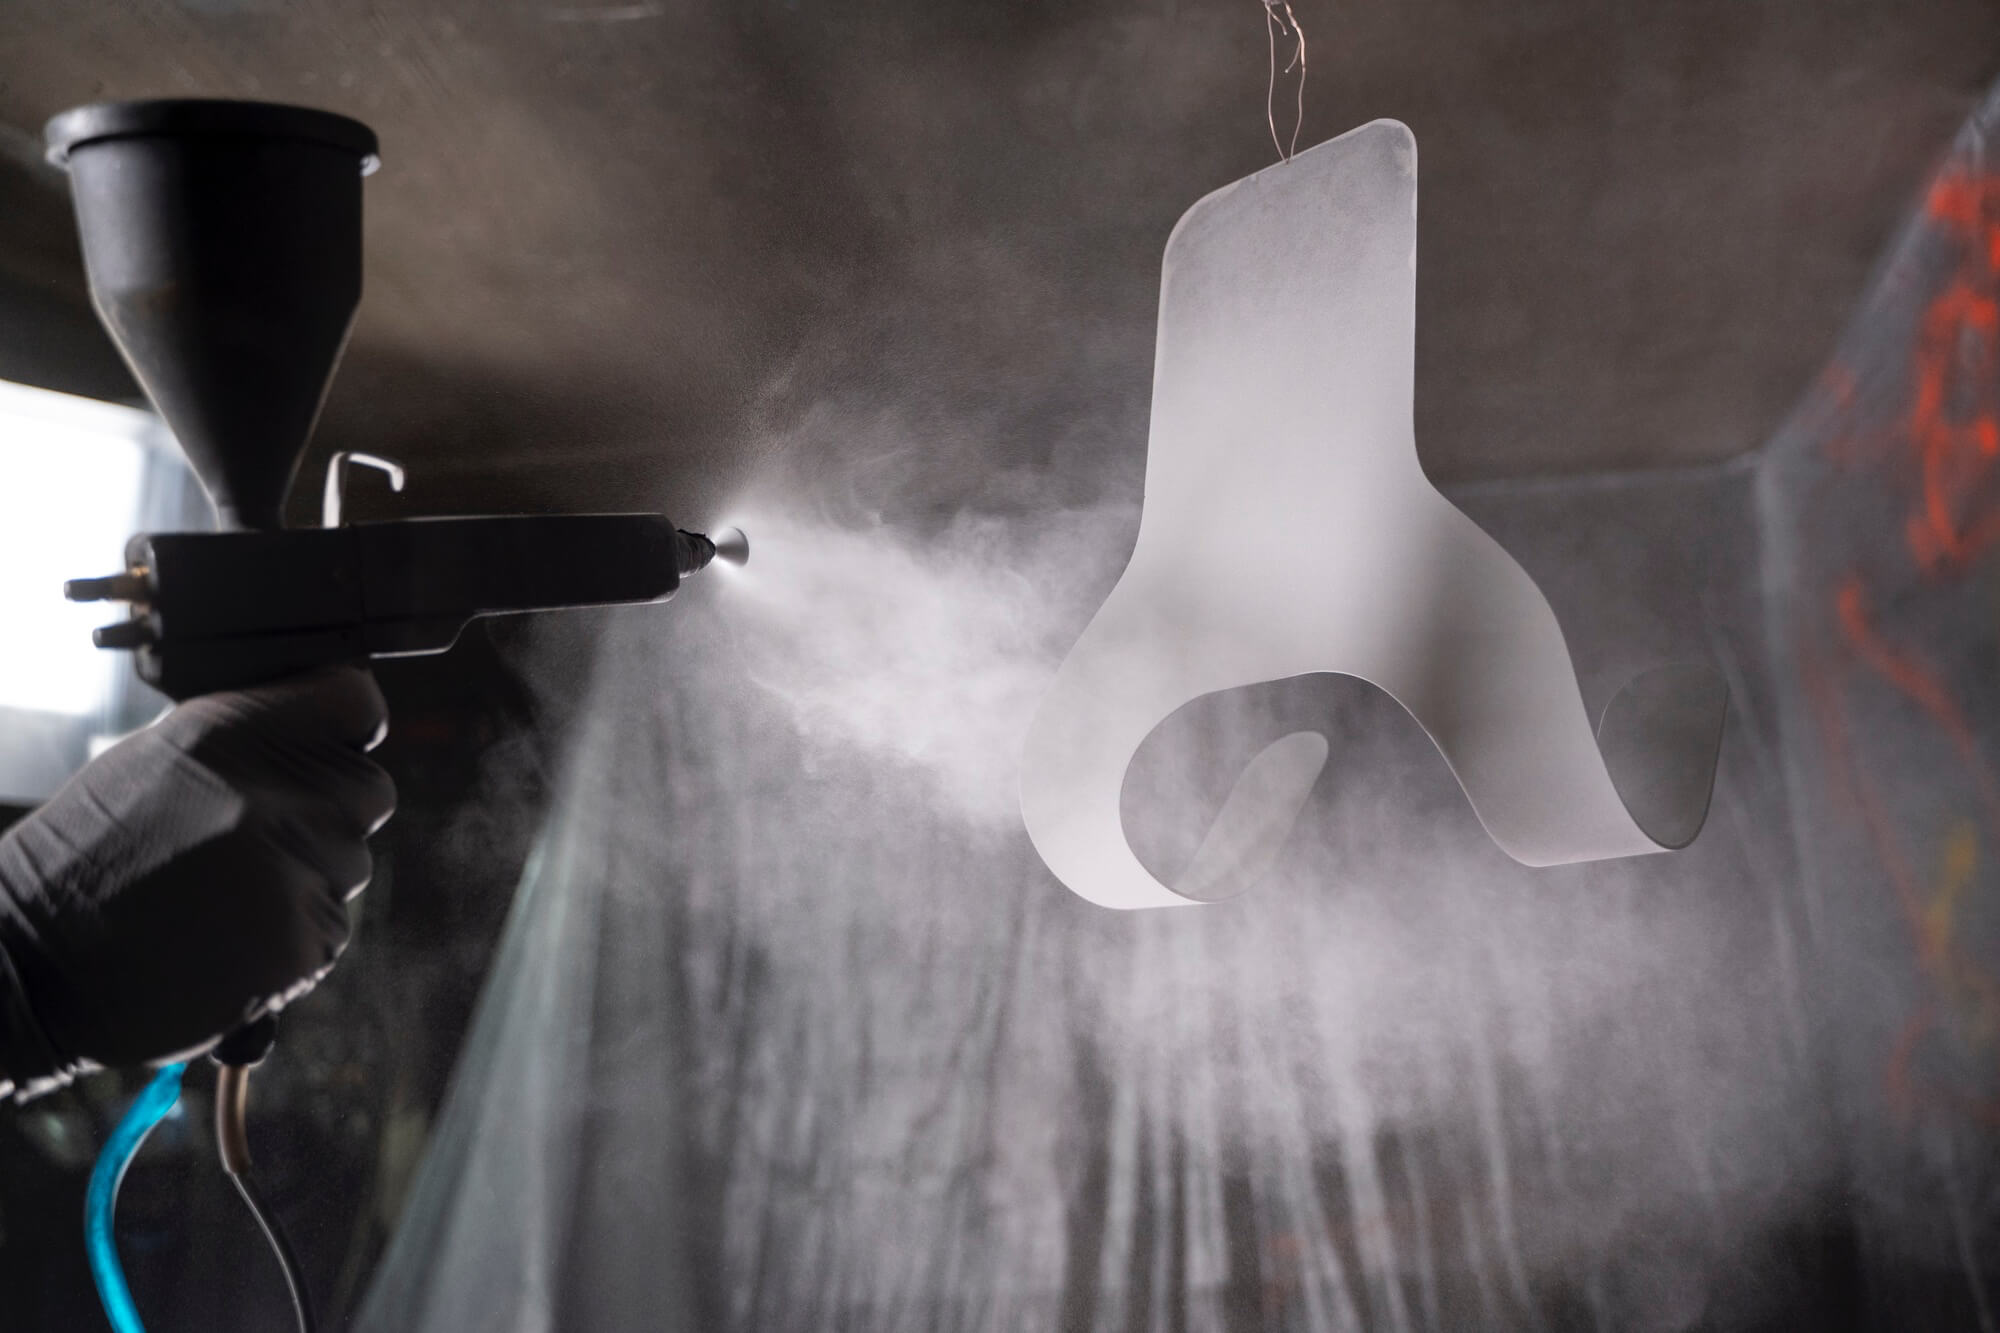
4.4 Step 3: Powder Application
This is the core of “how to powder coat.”
I hold the gun about 6–8 inches away from the surface in most cases.
For recesses or corners, you might need to get closer or adjust the gun angle.
Smooth, Steady Passes:
- Sweep the gun in an even motion, overlapping by ~50%.
- Avoid dwelling in one spot too long, which can create thick areas.
- Watch how the powder cloud behaves.
- If you see swirling or weak coverage, adjust your air pressure or voltage.
Tricky Areas:
- Faraday cage effect in corners or inside angles can repel powder.
- Lower the voltage or move in closer to deposit powder effectively.
- Sometimes I momentarily drop kV to about 25–30 in tight corners.
Coverage Check:
Parts should appear evenly dusted, not blotchy or patchy.
If you see an obvious thin spot, lightly re-spray.
But don’t overapply powder.
Excess powder leads to orange peel or runs after curing (though it’s not liquid paint, thick spots can still cause texture issues).
4.5 Step 4: Curing in the Oven
Once coated, carefully move the racked part into the curing oven.
Try not to bump or shake it—powder can still fall off.
I keep the oven preheated to the recommended temperature for that powder, typically 400°F (± 25°).
It’s wise to follow the powder manufacturer’s datasheet for exact time and temperature.
Typical Cure:
- 10–20 minutes at 375–425°F.
- Start timing once the part hits the target temperature, not when you first place it in the oven.
If you have thick or bulky parts, they take longer to heat up.
Use an IR thermometer or a temperature probe to verify the part’s actual surface temperature.
Some shops use digital timers that beep once the part’s metal surface hits the required threshold.
Curing Issues:
- If you under-cure, the powder remains partially molten or chalky, lacking full chemical crosslink.
- If you over-cure, color might shift or the coating can become brittle.
- Crisp corners or thin edges can sometimes cure faster than heavier sections.
- Try to maintain uniform heat distribution.
4.6 Step 5: Cooling & Inspection
After the set cure time, let the part cool slowly.
Sudden temperature changes can cause micro-cracking.
I usually let the part remain in the oven with the door slightly open or place it on a metal stand in a dust-free area.
Inspection:
- Visually check for uniform gloss or texture.
- Feel for any rough spots.
- A quick tape pull test can confirm adhesion.
- On critical jobs, I measure film thickness with a dry film thickness gauge, typically aiming for 2–4 mils.
- Check all masked regions to ensure no powder seeped in.
If something’s off, you can sometimes recoat or strip and start over.
Stripping powder can be time-consuming, but it’s better than shipping flawed parts.
4.7 Handling Painted Parts
Powder-coated parts can be used almost immediately once they’re cool.
But for full mechanical strength, some powders require an additional 24-hour rest.
I keep them on padded racks, so the fresh coating doesn’t get chipped by contact with a hard surface.
If your customer or your own assembly line needs them quickly, at least ensure they’ve cooled to room temperature.
4.8 Special Considerations for Large or Irregular Parts
For big parts, you might have to spray in sections or reposition them mid-process.
If possible, rotate the part so the corners that were in a Faraday cage can be coated from a different angle.
Make sure your oven can handle the size—some machine shops build custom ovens or use modular designs.
For small, intricate parts with fine details or tiny holes, reduce the kV and the powder flow.
Otherwise, you risk bridging or caking in small cavities.
4.9 Inter-Coat Adherence for Multi-Layer Finishes
Sometimes you’ll do a two-coat system: a primer coat plus a topcoat, or a base color plus a clear coat.
Follow the manufacturer’s guidelines about partial curing the first layer.
Usually, you cure the base coat fully, let it cool, then apply the second.
Between coats, watch out for contaminants or fingerprints.
4.10 Recap of the Step-by-Step “How to Powder Coat” Process
- Set Up: Ensure the booth is clean, gun is calibrated, air supply is stable.
- Rack & Ground: Position part for 360° access; secure ground contact.
- Spray: Apply powder in smooth passes, adjusting gun settings for corners or recesses.
- Bake: Cure at recommended time and temperature. Monitor part temperature if needed.
- Cool & Inspect: Let it cool, then verify coverage, thickness, and adhesion.
Machinist Tip: Keep a small test coupon in the oven with your part.
It’s easier to pull out that test piece for quick checks than handle the entire part.
With the fundamental application process explained, we can move to common problems that might arise.
That’s the next chapter—troubleshooting.
Chapter 5: Troubleshooting – Common Powder Coating Issues & Fixes
5.1 Introduction to Troubleshooting
Even when you follow the correct steps on “how to powder coat,” issues happen.
Powder coating is part art, part science.
Sometimes a small environmental change or a different metal alloy can throw off your usual results.
In this chapter, I’ll share typical problems that I and fellow machinists encounter when powder coating.
More importantly, we’ll look at solutions.
5.2 Common Problems & Their Causes
1. Orange Peel Texture
- Cause: Excessive film thickness, overly high gun voltage, or incorrect oven temp.
- Fix: Lower powder flow, reduce kV by 5–10, verify consistent cure temperature.
2. Poor Adhesion
- Cause: Insufficient surface prep, contamination, or improper grounding.
- Fix: Recheck degreasing, possibly blast surfaces again, or ensure better ground contact.
3. Faraday Cage Effect
- Cause: Corners, tight recesses repel electrostatically charged powder.
- Fix: Lower the voltage for inside corners, aim from multiple angles, or apply a specialized “Faraday-friendly” powder.
4. Pinholes or Bubbles
- Cause: Outgassing from porous metals, residual moisture, or contaminants.
- Fix: Preheat the part slightly to bake out trapped gases; ensure dryness.
5. Color Variation
- Cause: Different powder batches, uneven cure times, or inconsistent thickness.
- Fix: Use the same lot of powder for each batch, carefully time the oven cycle, measure film thickness.
5.3 Detailed Problem-Solution Table
Below is a longer table for quick reference:
| Issue | Symptom | Likely Causes | Solutions |
|---|---|---|---|
| Orange Peel | Dimpled or pebbly texture | High film build, excessive gun voltage, uneven heat distribution | Lower powder flow, reduce kV, confirm uniform oven temp |
| Gassing / Pinholes | Tiny craters or bubbles on surface | Porous cast metal, moisture in powder or part, insufficient outgassing | Pre-bake part, store powder in dry environment, cool part thoroughly |
| Incomplete Cure | Powder appears chalky or smears if touched | Oven temp too low, short cure time, thick sections not reaching temperature | Use a reliable oven thermometer, adjust cure time for heavier parts |
| Weak Adhesion / Flaking | Powder easily chips or flakes off | Dirty or oily substrate, poor grounding, friction from jigs or racks | Improve cleaning, ensure strong ground path, avoid part contact after spraying |
| Color Mismatch | Final color differs from swatch | Mixed powder batches, oven fluctuation, part geometry affecting thickness | Use same powder lot for entire run, calibrate oven, measure film thickness |
| Contamination Specks | Tiny foreign particles embedded in coating | Dust in spraying environment, cross-contamination from other powders | Clean spray booth thoroughly, dedicate separate lines for distinct powder colors |
| Edge Pulling | Thinner coverage on corners/edges | Excess electrostatic repulsion, part not oriented well, high voltage | Lower voltage on edges, tilt or reposition part, reduce coating thickness settings |
| Drips/ Thick Runs | Powder lumps or thick ridges after cure | Over-application in certain areas, possibly bumped part before oven | Use consistent gun movement, handle racked part carefully, reduce feed rate |
| Poor Recoat Adhesion | Second coat peels or has texture issues | Partially cured first coat, contamination, too high film build | Fully cure or partially cure per instructions, keep layers within recommended thickness |
| Metal Fume Fever (Safety) | Operator shows flu-like symptoms after exposure | Inadequate ventilation or protective gear, especially with heated metals | Improve shop ventilation, wear an approved respirator, handle hot parts with caution |
(This table addresses many issues that machinists commonly face when mastering how to powder coat.)
5.4 Environmental Factors
Humidity and temperature in your shop can affect how to powder coat effectively.
If your workshop is too humid, powder can clump in the hopper.
Static electricity also behaves differently with changes in humidity.
Aim for a stable environment, or consider a climate-controlled room for consistent results.
5.5 Fixing Mistakes: Can You Re-Coat or Strip?
Sometimes you’ll see an imperfection mid-spray or after curing.
If it’s just a small area, you can try a light re-spray and re-bake, but that might yield a slight texture difference.
For major defects, stripping the entire coat is more reliable.
Chemical strippers exist, though they can be messy and require careful handling.
Sandblasting is another option, but it can be slow and may alter dimensions if the part is delicate.
5.6 Learning from Each Batch
I keep a troubleshooting log, noting the color, brand, part geometry, gun settings, oven temperature, and any issues that appeared.
Over time, patterns emerge: maybe brand X’s black powder is more prone to orange peel, or brand Y’s red powder needs a slightly longer cure.
By collecting data, you can standardize solutions and reduce trial and error.
5.7 Personal Experience Anecdote
I recall a job for an automotive client wanting a bright candy blue finish on CNC aluminum valve covers.
No matter what I tried, I kept getting small pinholes near the spark plug wells.
Eventually, I realized the part was outgassing from subtle casting pores.
Pre-baking each cover at 400°F for 20 minutes before applying the powder drastically reduced pinholes.
That small step saved me from multiple reworks.
5.8 Machinist Mindset for Troubleshooting
Approach powder coating issues like you’d approach a machining defect.
Systematically isolate variables:
- Check your gun parameters.
- Check your substrate condition.
- Check your oven temperature.
- Confirm your powder’s shelf life and humidity exposure.
One step at a time, you’ll zero in on the cause.
With a good troubleshooting process in place, you’ll tackle most powder coating challenges effectively.
But how do these theories apply in real-world machinist scenarios?
That’s up next in the case studies chapter.
Chapter 6: Real-World Case Studies – Applying “How to Powder Coat” in Machinist Settings
6.1 Why Case Studies Matter
The best way to understand “how to powder coat” from a machinist’s angle is to see it in real-life applications.
In this chapter, I’ll share a few scenarios from my own experience, plus some from colleagues.
We’ll explore the synergy of CNC machining and powder coating, and how that synergy provides benefits in actual production environments.
6.2 Case Study 1: CNC Aluminum Car Parts
Context:
A local car enthusiast shop wanted custom valve covers and intake manifolds powder coated in bright colors.
They needed a machinist who could also finalize the surfaces and handle the finishing in-house.
Machinist Actions:
- Milled the raw cast aluminum to ensure flat gasket surfaces and add logo engravings.
- Performed a thorough cleaning, including ultrasonic degreasing.
- Lightly blasted critical areas to create an optimal anchor profile.
- Applied a “chrome-like” base coat powder plus a translucent candy color topcoat, each fully cured.
Challenges:
- Casting pores caused outgassing.
- Fine details in the engravings needed precise coverage.
Solutions:
- Pre-baked each part to release trapped gases.
- Used a lower kV setting for engraved areas, ensuring powder settled without bridging.
Outcome:
Vibrant, durable covers that impressed the client and gave my shop a reputation for both machining and finishing.
They returned with additional pieces like brake calipers and mounting brackets, all in custom finishes.
6.3 Case Study 2: Industrial Steel Brackets for Construction
Context:
A construction supplier needed thousands of steel brackets with high corrosion resistance.
The parts were CNC laser-cut, then formed, and typically just hot-dip galvanized.
However, the client wanted a color-coded system to simplify job site organization.
Machinist Actions:
- Machined bracket holes to precise tolerances.
- Switched from galvanizing to a powder coat finish (with a zinc-rich primer coat under a color topcoat).
- Added some identification engravings that had to remain visible beneath the powder.
Challenges:
- Large volume: needed an efficient workflow.
- Ensuring the identification marks were still readable.
Solutions:
- Used an automated blast line for surface prep.
- Applied a thin primer layer to maintain engraved text clarity.
- Batch-processed brackets in an industrial conveyor oven for consistent throughput.
Outcome:
Faster turnaround compared to external galvanizing.
Better color organization on job sites.
Though the powder coat cost was a bit higher per piece, the client valued the color-coded efficiency and paid a premium for it.
6.4 Case Study 3: Aerospace Aluminum Panels
Context:
An aerospace project demanded lightweight aluminum panels with a tough, chemical-resistant finish.
They were rethinking anodizing because the client wanted a specific brand color that was easier to match with powder.
Machinist Actions:
- CNC milled each panel with pockets and weight-reduction cutouts.
- Chamfered all edges to ensure even powder wrap-around.
- Used an epoxy-based primer powder plus a custom tinted polyester topcoat.
- Carefully monitored the oven’s temperature uniformity to avoid warping these thin panels.
Challenges:
- Panels were large but only 1.5 mm thick, prone to thermal distortion.
- The aerospace client required full documentation of cure cycles and adhesion testing.
Solutions:
- Lowered the cure temperature slightly and extended time to reduce thermal stress.
- Performed multiple test coupons to confirm adhesion and thickness.
- Implemented a fixture system that supported the panels while they heated, preventing sag.
Outcome:
The panels passed both mechanical and chemical resistance tests.
The powder coat color matched the client’s branding, and the weight penalty was minimal.
They continued with this approach for other interior and secondary structural components.
6.5 Case Study 4: Hobbyist to Professional – A Machinist’s Journey
Context:
An individual started with a small machine shop in their garage, making custom motorcycle parts.
Curiosity led them to learn “how to powder coat” for personal projects.
Success with personal items escalated into a side business.
Machinist Actions:
- Used a basic Harbor Freight powder coating gun at first, plus a household oven.
- Upgraded to a better electrostatic system once orders increased.
- Documented each job with photos and notes, learning from mistakes quickly.
- Specialized in custom engine covers, footpegs, and handlebar components for motorcyclists.
Challenges:
- Limited space, no formal spray booth.
- Temperature inconsistencies with a small oven.
Solutions:
- Built a DIY powder spray enclosure using PVC frame and plastic sheeting.
- Bought a used commercial oven from a closing auto shop.
- Gradually introduced consistent blasting, dedicated racking, and professional safety gear.
Outcome:
The hobby turned into a profitable niche.
The machinist’s knowledge of metal geometry gave them an advantage over typical finishing shops.
Clients appreciated how the machinist could tailor each part’s shape and surface specifically for powder coating.
6.6 Lessons Learned Across These Cases
1. Pre-Baking:
When working with cast metals, especially aluminum or iron with pores, preheat them to drive out moisture or gas pockets.
2. Multi-Coat Systems:
Primer plus topcoat can significantly enhance durability and color depth.
But partial cures or excessive film thickness can cause problems.
3. Batch Process:
For high-volume or large parts, a conveyorized system or consistent racking strategy is crucial.
Manual approaches can be too slow or yield variable results.
4. Thorough Documentation:
Case studies highlight the value of tracking cure times, temperatures, brand of powder, and final outcomes.
This helps replicate success or fix recurring issues.
6.7 Machinist’s Perspective: Benefits of In-House Powder Coating
- Faster Turnaround: No waiting on external coaters.
- One-Stop Service: Clients prefer dealing with a single vendor from raw material to finished product.
- Quality Control: You control every step, ensuring consistency in dimension and finish.
- Customization: Quick color changes or special finishes are easier to handle in-house.
6.8 Potential Pitfalls
- Initial Investment: Ovens, guns, ventilation, and prep stations can be pricey.
- Learning Curve: “How to powder coat” might seem simple, but real mastery takes practice.
- Space Constraints: You need a dedicated area for spraying and curing.
- Environmental/Safety Considerations: Proper filtration and disposal of powder overspray are essential.
6.9 Final Thoughts on Case Studies
By applying “how to powder coat” knowledge in real manufacturing contexts, these machinists overcame many challenges.
They built better relationships with clients and expanded their capabilities.
If you’re considering adopting powder coating in your own machine shop, these examples show it’s doable and often profitable.
Now let’s address some frequently asked questions.
We’ll cover at least 15 questions that I hear most often about “how to powder coat” from a machinist’s perspective.
FAQs
- How to powder coat at home without expensive equipment?
You can start with a basic hobby gun and a used kitchen oven for small parts.
The biggest challenge is consistent temperature control.
Upgrade once you confirm interest and volume. - Which metals can I powder coat successfully?
Steel, aluminum, stainless, and cast iron are common.
Non-metallic materials typically can’t handle the heat needed to cure powder. - Does powder coating affect dimensional tolerances?
Typically 2–4 mils thick, so it can matter on precision fits.
Mask areas like bearing seats or threads if tight tolerances are required. - How does powder coating compare to anodizing for aluminum?
Anodizing penetrates the metal surface, while powder coating forms a film on top.
Powder coating offers more color variety.
Anodizing is thinner and might show machining lines more. - Why is my powder peeling off easily?
Likely poor surface prep or contamination.
Check degreasing steps, ensure mechanical or chemical etch, and confirm good grounding. - Can I powder coat parts that will be welded later?
It’s not ideal.
Welding burns the powder coating, creating fumes.
Coat after welding, or grind away the coating in the weld area first. - How to powder coat multiple colors on one part?
Mask off sections for different colors, cure each color separately.
It can be time-consuming but yields striking designs. - Is powder coating safe for food-contact parts?
Some powders are FDA-compliant.
Check the manufacturer’s certifications.
Typically used on things like metal racks, bowls, or drink tumblers. - What about large parts that won’t fit in my oven?
You may need a custom-built oven or an IR curing system.
Alternatively, outsource if the part is too big to handle internally. - Can I strip and recoat if I mess up?
Yes, but it’s labor-intensive.
Use chemical strippers or blast off the old coat.
Thoroughly re-prepare the surface. - What PPE do I need while spraying powder?
Wear a respirator or mask rated for fine particulates, nitrile gloves, and eye protection.
Ensure adequate ventilation or a spray booth. - How do I measure powder thickness?
A dry film thickness gauge with magnetic or eddy current sensors works well on metal.
Aim for 2–4 mils unless your powder specifies otherwise. - How to handle outgassing from cast metals?
Pre-bake at or above cure temperature to release trapped gas.
Some powders are formulated as “low outgassing” for porous substrates. - Does humidity affect how to powder coat?
Yes.
High humidity can cause clumping and inconsistent electrostatic charge.
Keep your powder storage area around 50% or less humidity. - Why does my color differ from the sample?
Variation in cure time or temperature can shift color.
Always follow the powder manufacturer’s recommended parameters.
Use the same batch of powder for consistent results. - Can I powder coat over chrome or galvanized surfaces?
Technically yes, but you need to scuff or blast to promote adhesion.
A strong mechanical key is essential, or the coating may peel. - How do I reduce the orange peel effect further?
Fine-tune your gun voltage, reduce powder feed, and keep the oven temperature stable.
Some powders are “low orange peel” by design.
Other Articles You Might Enjoy
- Ceramic Coating and Machining: Unlocking Advanced Manufacturing Applications
Introduction I’ve been fascinated by the way ceramic coating can radically transform the performance of machined parts. Ceramic coating, as a concept, goes well beyond the automotive finishes many of…
- Glass Bead Blasting Material and Its Impact on CNC Machining Performance
In the world of CNC machining, precision, quality, and surface finish are critical factors, especially for industries that demand high-performance components. Among the various surface finishing techniques used to improve…
- Surface Treatment After CNC Machining Applications of the Anodized Aluminum Colors Chart
In the world of manufacturing, CNC machining is a cornerstone of precision and efficiency, especially when it comes to working with aluminum. However, the journey of a part doesn’t end…
- Powder Metallurgy Materials: Stainless Steel vs. Cobalt Chrome
Powder Metallurgy Materials: Stainless Steel vs. Cobalt Chrome Powder metallurgy, a manufacturing process that combines fine powdered materials and heat-treatment to create solid metal parts, is renowned for its efficient…
- The Role of Surface Finish in CNC Machining: Comparing Anodized vs. Powder Coated Finishes
The Importance of CNC Machining and the Significance of Surface Finish Process CNC (Computer Numerical Control) machining plays a pivotal role in today's manufacturing industry, providing undoubtedly high speed, precision,…
- Machining Techniques for Parts: Unlocking CNC and Cutting-Edge Tech
I. Introduction I remember the first time I realized how critical machining is to modern manufacturing. I was interning at a small shop, watching a CNC machine carve intricate features…
- Waterjet Cutting: A Comprehensive Guide
Waterjet cutting is a fascinating and versatile technology that's widely used across various industries due to its precision, efficiency, and environmental benefits. This article will dive deep into the world…
- Comprehensive Guide to Metal Cutting Tools
In modern mechanical manufacturing, metal cutting processes are the most widely used methods, accounting for over 50% of the total workload in mechanical manufacturing. Whether it's a conventional lathe, an…
- Enhancing Optical Components with CNC Machining: Glass vs. Polycarbonate
Introduction to CNC Machining CNC (Computer Numerical Control) machining stands as a pivotal technology in the manufacturing of optical components, enabling the precise shaping of materials with minimal human intervention.…