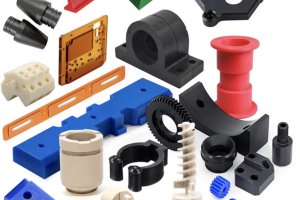
Cavity milling is a common operation in CNC machining centers. It involves removing material from a closed area defined by its boundary lines, which can include sidewalls and a bottom surface. These boundaries can be of various shapes such as tapered, convex, spherical, or others. The cavity can be square, rectangular, cylindrical, or any other shape, and it might be completely hollow or contain unmachined areas called islands.
General Rules
When programming cavity milling, there are two important considerations:
- The method of tool entry
- The roughing method
Before starting cavity milling, you should use a center-cutting end mill to enter the workpiece along the Z-axis. If this isn’t possible, you can opt for an inclined entry method, which combines movements along the Z-axis with movements along the X, Y, or XY axes. This method is supported by all modern CNC machining centers.
Types of Cavities
The simplest and easiest cavities to program have regular shapes and no internal islands:
- Square Cavities
- Rectangular Cavities
- Cylindrical Cavities
Square and rectangular cavities are essentially the same in programming, differing only in the length of their sides.
Rectangular Cavities
Programming a rectangular or square cavity is straightforward, especially when the sides are parallel to the X or Y axis. Let’s look at an example of a rectangular cavity.
- Tool Selection: The choice of tool is critical. Although the drawing shows sharp corners, the actual corners will have radii equal to or larger than the tool’s radius. For roughing, a center-cutting end mill works well. For finishing, choose an end mill with a slightly smaller radius than the corner radius to ensure cutting rather than just rubbing the corners.
- Starting Point: You can start milling from the center of the cavity or a corner. Starting from the center allows single-direction feed but requires more calculations. Starting from a corner is common and allows for a zigzag motion, alternating climb and conventional milling, which simplifies calculations. We’ll start from a corner for this example.
General Milling Rules
- Tool Diameter Selection: For single-pass face milling, the ideal tool width should be 1.3 to 1.6 times the width of the material. For multi-pass face milling, choose the largest diameter tool suitable for the machine’s power, tool geometry, and cutting conditions.
- Tool Geometry: End mills come in various geometries, including positive, negative, and combination rake angles. Positive rake angles require less power and are good for small machines and softer materials. Negative rake angles are stronger and can handle harder materials but require more power.
Programming Example
Let’s consider a rectangular cavity with dimensions provided in a drawing (not shown here). The cavity has fillets at the corners with a radius of 5/32 inches. We’ll use a 5/16 inch center-cutting end mill for roughing and a 1/4 inch end mill for finishing.
- Roughing: The roughing tool must be capable of center cutting. Start from the lower-left corner and use a zigzag path to cover the entire area.
- Semi-Finishing: Before finishing, use the same tool to perform semi-finishing passes to remove uneven material left from roughing.
- Finishing: Finally, use the finishing tool to achieve the desired dimensions and surface quality. Use tool radius compensation to ensure accurate cutting along the profile.
Calculation Examples

- Step-Over Calculation: Determine the step-over distance based on the number of passes. For example, if the cavity width is 1.5 inches and you want 5 passes, the step-over (Q) is calculated as:

Where ( W ) is the cavity width, TLR is the tool radius, S is the finishing allowance, C is the semi- finishing allowance, and N is the number of passes.
- Cutting Length Calculation: The cutting length for each pass is calculated as:

Where ( L ) is the cavity length.
In this example, let’s assume the cavity width ( W = 1.5 ) inches, tool diameter ( \text{TLR} = 0.125 ) inches, finishing allowance ( S = 0.025 ) inches, and semi-finishing allowance ( C = 0.01 ) inches. For 5 passes, the step-over (Q) would be:

For 7 passes, the step-over (Q) would be:

Conclusion
Mastering cavity milling in CNC machining involves understanding the nuances of tool selection, entry methods, and step-over calculations. By following these principles, you can achieve precise and efficient cavity milling operations.